Easy To Improve, Hard To Master
Many people ask me How To Photograph Dress Shoes or how to improve their shots.
In this helpful guide, I am going to tell you all about how I do it.
I will be giving you feedback, tips and hopefully things to avoid and have a faster learning curve.
Because as the title says, photography is easy to improve but hard to master.
Let’s begin.
Equipment For Shoe Photography
Let’s be honest, in 2023 you do not need a high end DSLR camera to do photography.
Phones these days are so good at taking great pictures but there still are some things to consider.
I recommend having a phone that has a high quality lens and is capable of low aperture (f number) with a portrait mode.
More on that later, but oftentimes I consider it important as it blurs the background and focuses on the subject.
However, if you are more serious about photography you should invest in a good camera and lens.

With around $1000 you can get a great camera such as the Sony A6400 and a Sigma 30 mm f/1.4 lens.
Good cameras are more flexible in a variety of scenarios while also being much more editing friendly using software.
I find that the 30 mm (or similar) lens with a low aperture is perfect for capturing shoes.
It goes without saying that you should be using software like Photoshop but I prefer Lightroom for basic editing.
If shots include movement or you are doing reels, a gimbal is a no-brainer.
Lastly, for shots in lower light conditions with a slower shutter speed you should invest in a tripod.
Quick Terminology
There are tons of guides out there talking about photography, cameras and technical terms.
I will not go into great detail, however I will briefly mention the three key aspects of a camera.
1. Aperture
Also known as f, aperture refers to how much light enters through the lens.
A lower aperture allows more light to go through the lens and be captured while also creating a depth of field.
When shooting small subjects or portraits and you want to blur the background, you want a lower f.
I recommend getting a lens that is f/1.4 or similar.
2. Shutter Speed
Shutter speed dictates how quickly the shutter closes after you press it.
It’s in numbers such as 1/60 or 1/100 and the lower the number, the more light the camera captures.
Higher shutter speed allows you to capture crisp moving motions and subjects at the expense of a darker image.
For shoe photography, to eliminate any possibility of unfocused or blurry imagery I stay around 1/100 shutter speed.
It is up to you to find a good balance between aperture and shutter speed.
For lower light conditions or if you need to use a slower shutter speed, I recommend using a tripod.
Otherwise, pictures can be shaky and fully of noise and artifacts.
3. ISO
The ISO shows how sensitive the camera is to light.
A lower number is less sensitive and a higher number the opposite.
ISO numbers go from 100 to over 128000 for professional cameras but you should always strive to be at the lowest.
The higher the ISO, the higher the noise and artifacts that appear in your images.
Of course, this allows more light and a brighter image so you have to take all 3 components in mind.
I always start from 100 and never go over 400 ISO.
Composition
Before I do the actual shooting, I ask myself the following question.
What am I trying to do and what is my theme?
Am I photoshooting a casual rugged boot, or a fancy formal dress shoe?
Does the shoe have texture or a smooth surface?
The shoe will speak to you and show you what needs to be done so listen to it!
Generally, I go around the city looking for interesting textures, reflections, patinas, foliage and rustic backgrounds or color to add to the image.
Cobblestones for example, benches in parks or old tables with graffiti can be a good start.
Take inspiration from Pinterest, Google or established companies in your field.
I am a big fan of Velasca for lifestyle imagery and the recent Crockett & Jones adventure photoshoots are masterful.

Avoid too much foliage and bright colors as they can take away the focus.
If it’s unavoidable, you can desaturate those colors via lightroom.
Weather For Shoe Photography
Afterwards, I take into consideration the light conditions.
Unless you are doing specific artistic photography, a cloudy bright day is perfect for shoe photography.
The clouds diffuse the light and most of the harsh direct sun rays giving crisp reflections and focus.
For dramatic effect or accentuation of color you can experiment with the golden hours or direct sunlight and shadows.
Angles In Shoe Photography
While not an expert, I do know a thing or two about angles in shoe photography now.
It took me a while but you can see the improvement was drastic from 2018 to 2020 and onwards.
A good (or bad) angle can make or break the photoshoot.
Here are some positions I like to use.
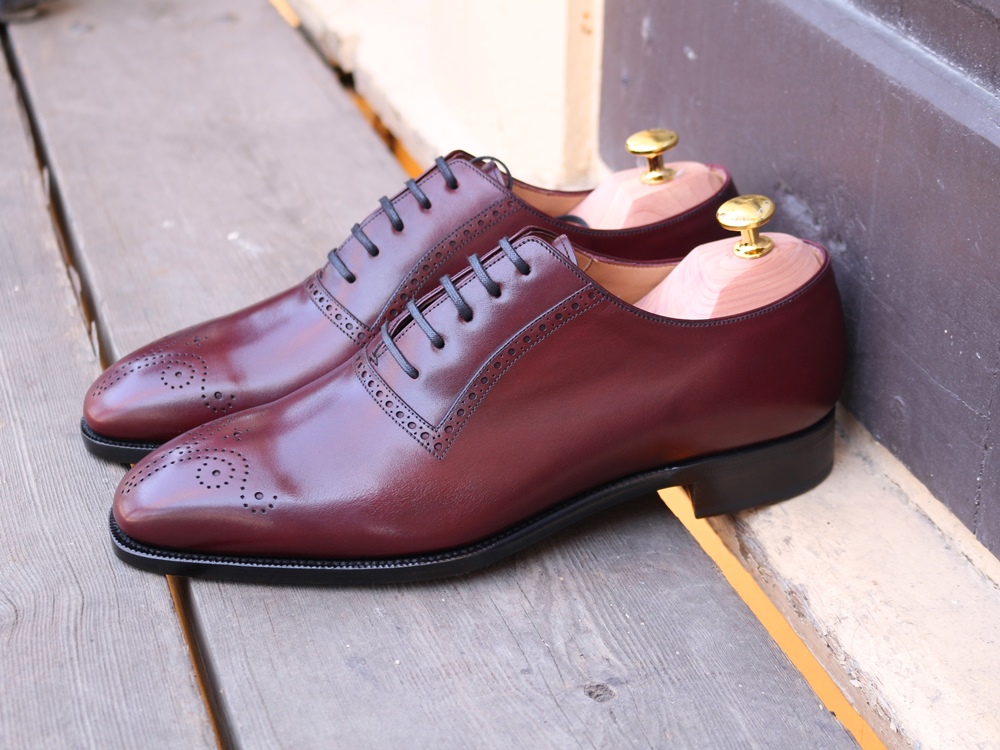
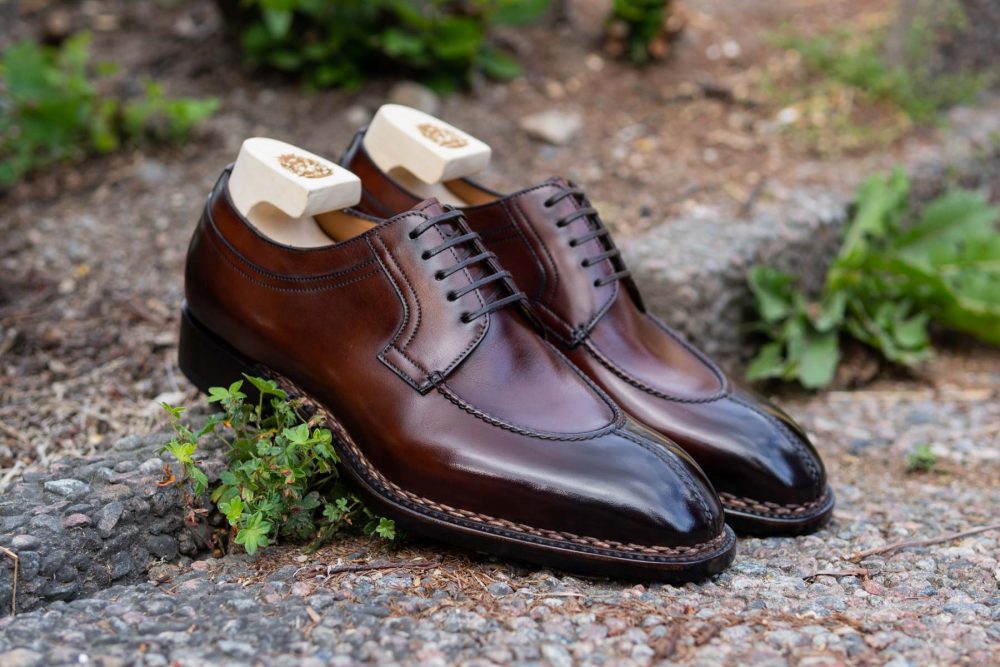
1. Diagonal From The Side
I recommend starting by placing the shoes in a diagonal position and shooting them from a 45 degree angle.

The goal is to find the angle that makes the shoes look 3dimensional and not flat or warped.
If you shoot from a low angle, usually the top of the shoes appears too elongated and the proportions look weird.
 For example, look at the photo that my friend took and compare it to the one I made above.
Tip: if you are going for an imposing effect or the shoe is extremely slick, it’s worth trying this kind of shot.
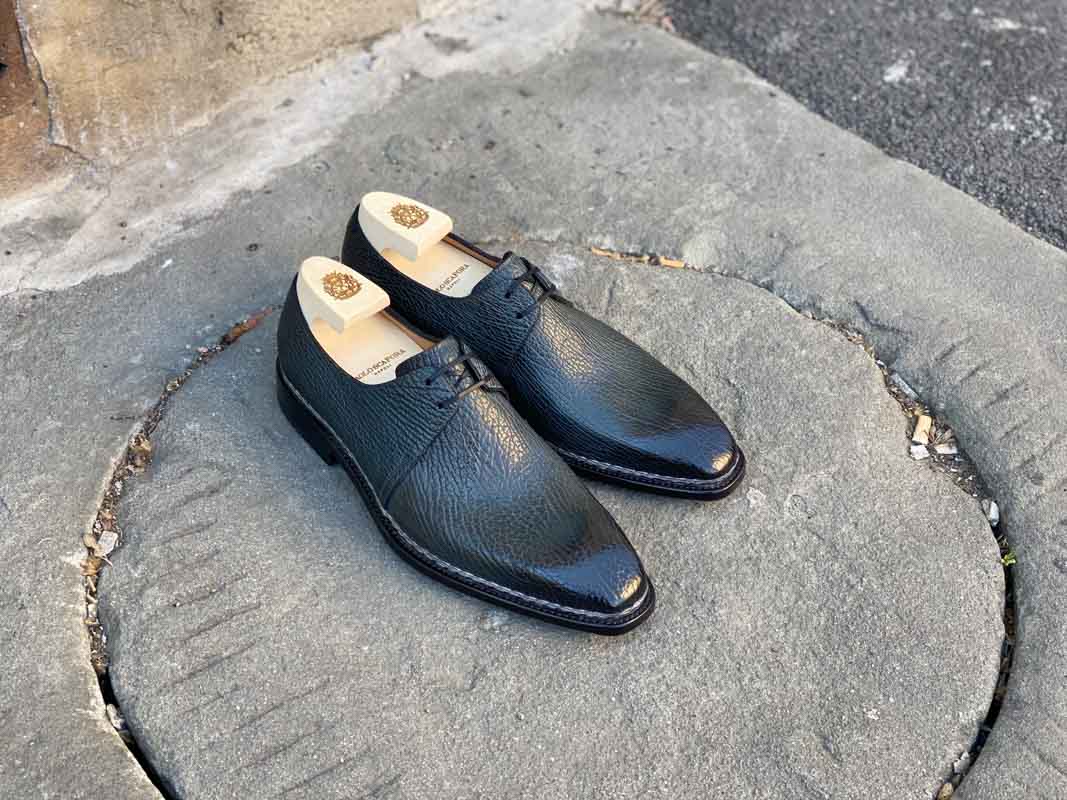
2. Bird’s Eye
Bird’s eye is a classic shot that can be trickier than you think.
You essentially shoot the shoes from the top and capture their top profile and shape.
It shows the curves, sharpness and can look great.
I do recommend trying a few things however to spice things up.

For example, try to pull in the heel of the shoes slightly to great an angle between them.
This makes them look less flat and more lively.
I also recommend trying a slightly lower, diagonal angle instead of a straight top down shot.
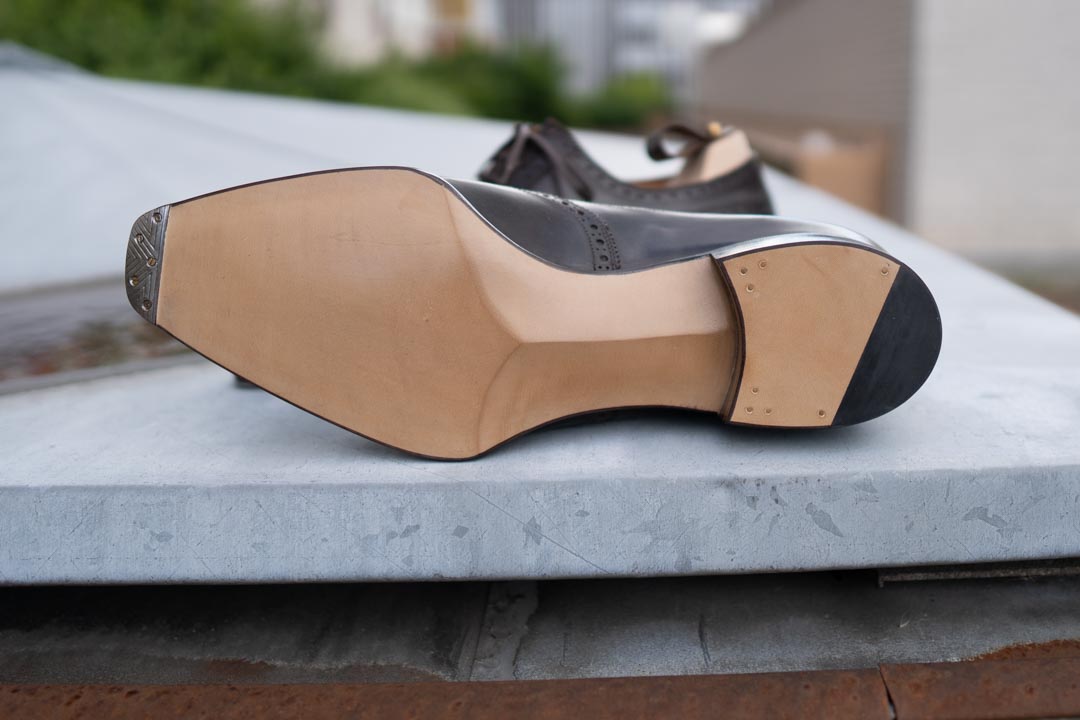
3. Side Profile
If you find a good soft light spot, a good side shot is always going to be a success.
Simply place your shoes next to each other with the heel resting on a short step and shoot from the side.
Experiment with angles and positioning and it will become second nature to you.
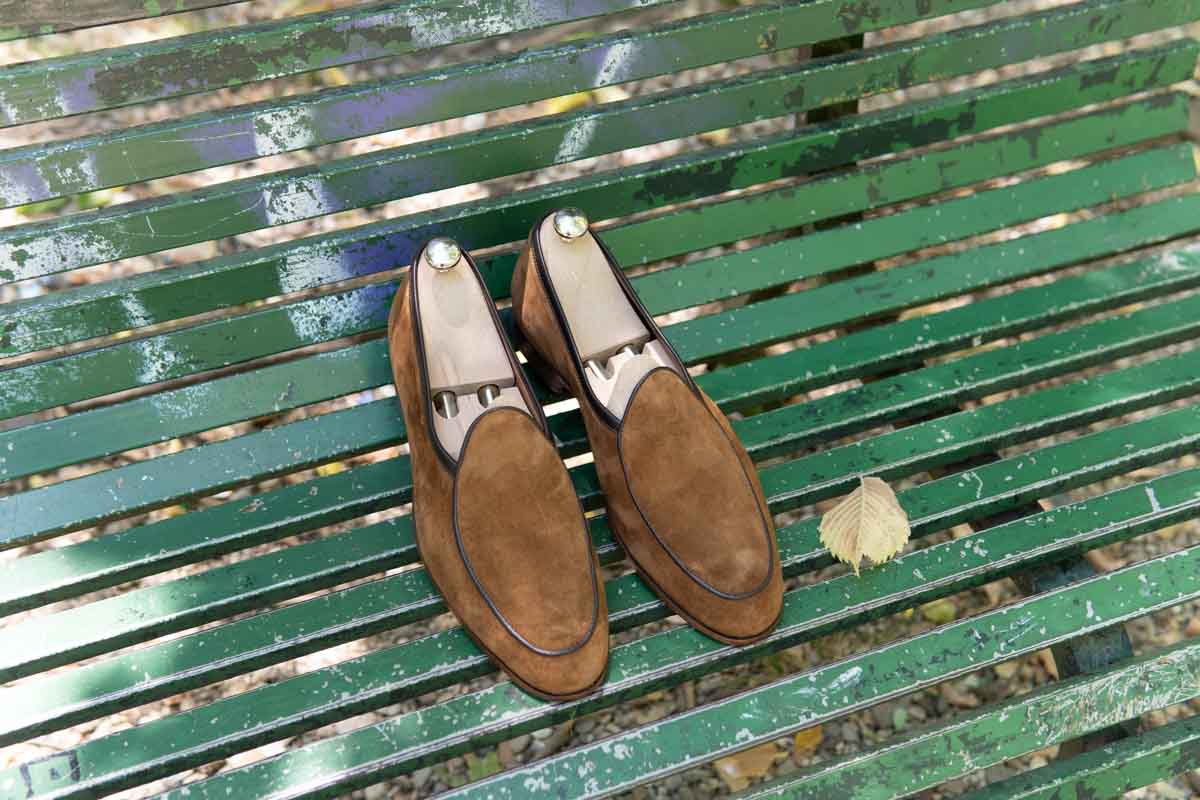
4. The Criss-Cross
One of my favorites is what I call the Criss Cross but it’s something I do only with shoes and not boots.

Place the shoes in a similar fashion as in my picture and work the angles from the front and slightly the sides.
The effect is great and really shows the shape of the toe box and curves of the shoes.
It looks particularly good with an elegant soft square last.
5. The “Burzan Hands”
An homage given to a classic position of an older shoe and Instagram blogger by the name of Burzan.
The “Burzan Hands” refers to holding out the shoes from the back with your fingers and letting them rest in a downwards position.

You then proceed to shoot them from the side, preferably with a white or cream background.
All the attention goes to the shoes and it always creates a better emotional connection due to the human presence.
You will need a tripod for this one or the help of a friend.
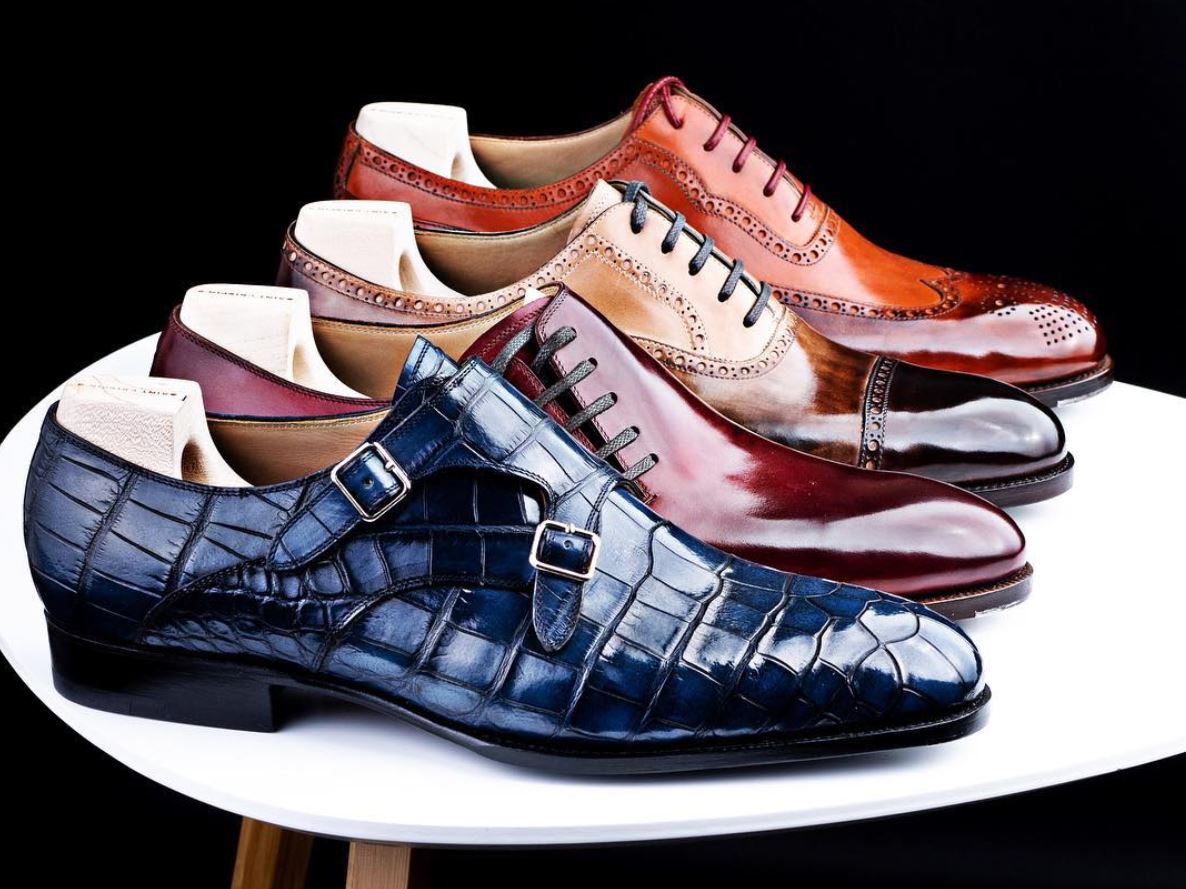
Product Photography
Product photography is a whole different animal, even though it follows similar principals.
You will be needing advanced equipment to create the correct artificial light for example.
A good tripod, flash trigger, software and background for example are key as you try to capture the natural colors in an artificial environment.

You can see the evolution at the recent images at The Noble Shoe where we are creating high quality product imagery.
It allows you to focus on the product and not have any distractions.
Keep it simple, without too many shots but with enough key details to pick someone’s interest.
I recommend looking at a product page at The Noble Shoe as an example.
Things To Avoid in Shoe Photography
Everybody has their own style, however there are some glaring errors (in my opinion) by amateurs and established brands alike.
For example, I would avoid overediting pictures in the first place.
I also recommend skipping ridiculous oversaturated filters like Saint Crispin’s does.
It looks plastic and fake and I would be really unhappy if the product didn’t look like that.
Never, ever remove the shadows from a shoe or other product.
Shadows give form, substance and a sense of reality.
I would like to know what in god’s name did my friends at Altan Bottier to remove the shadows from their images and a digital background.
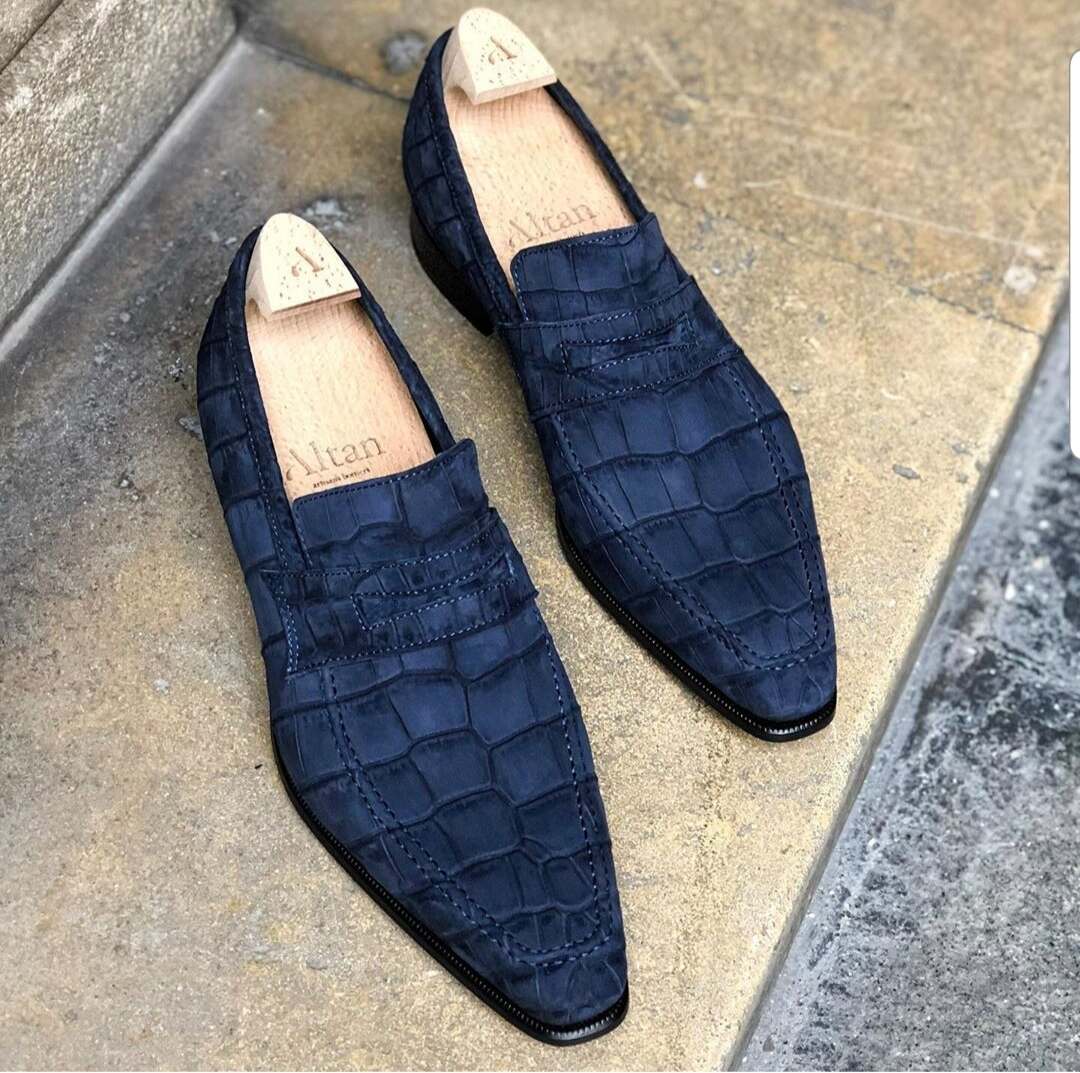
Which one do you prefer?

I already mentioned before that you should preferably avoid too much foliage and bright colors.
Look for more muted instead with good earth tones such as leaves and dirt for a more adventurous photoshoot.
This doesn’t mean that you can’t play with colors as you can see from one of our examples.
Tip: Consider Different Devices
One last tip that I can give you is to check your exported photos in different devices and screens.
Some screens appear brighter, some darker so you need to find a good balance of light that comes with experience.
Also, study a bit the correct ratios, crops and sizes of your images and keep it down as much as possible without sacrificing image quality.
A big size picture will compress on Instagram and ruin the quality or put a heavy loading time on your webpage.
I tend to stay around 100-150kb for website images and 300-500kb for Instagram Photos.
Conclusions
This brings us to the end of the “How To Photoshoot Dress Shoes” Guide.
It is an article I wanted to write for a long time, but was unsure how to approach the topic.
It takes time and practice to learn it, but if you spend some time you can become fast and efficient.
You will know how to set up, what to look for and how to edit.
It will also up your status, profile and credibility a lot especially if you are building a brand.
Let me know what you think or if you have any further tips and tricks!
Thank you for reading,
Kostas Mandilaris,
Misiu Academy