Tremendous progress for 2 weeks!
Not even in my wildest dream would I think I would make a Handmade Leather Bag for women in 2022.
Yet, here we are in the continuation of my Bespoke Leatherworking journey doing exactly that.
In only two weeks I improved massively as you will see in today’s pictures!
Hopefully this short (picture heavy) article will show you the effort it takes to make even the simplest leather goods.
Let’s go!
Week 2 Recap
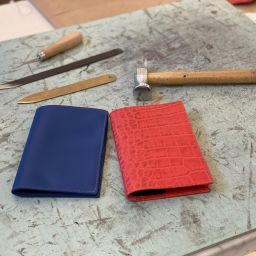
After the very adventurous first week, where we made wallets and passport holders we slowly moved to bigger things.
The idea was to learn how to make bags and purses with varying and more complicated constructions.
While nobody is here for the “women’s content”, the principals of why and how are more important.
A leatherworker artisan can apply those principals to any leather goods regardless of gender.
When I make bags for men, I will use those rules and way of thinking as well.
This week there was a very strong focus on creating zippers, stitching multiple pieces together and creating more advanced accessories.
We ended up making two types of bags, a smaller purse with piping and a bigger bag with a detachable lining.
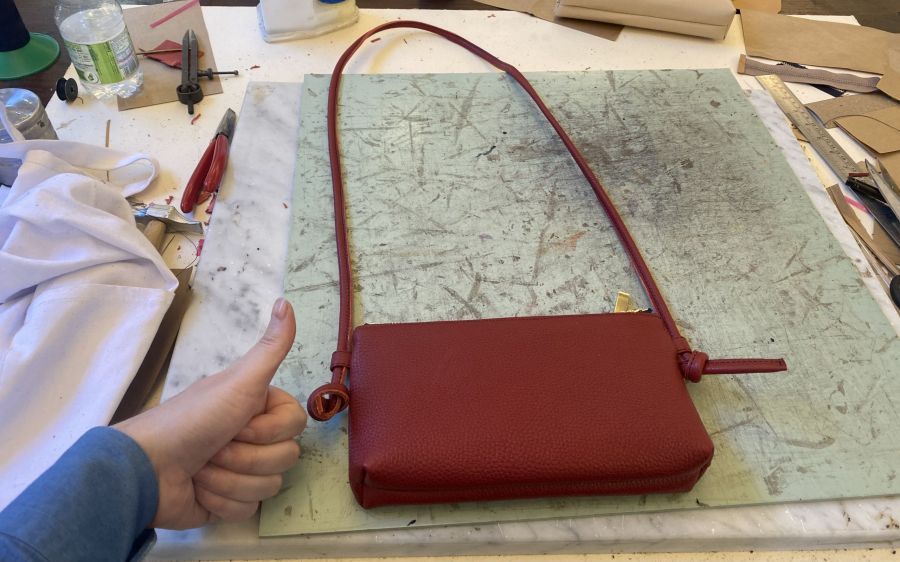
#1 Handmade leather bag…or purse?
Honestly probably something in between.
You could use such a small piece in many ways such as storing tools and pens or your toiletries.
Or it could be a small handheld purse for your other half.
This project showed us how to stitch more things together, how to glue and reinforce certain parts and of course how to make the piping.
There was also heavy emphasis in using the sewing machine and the different types of “feet” they have for each occasion.
All things considered, I am very happy with the result but I needed to clearly improve my pattern cutting and sewing skills.
choosing leathers & Lining
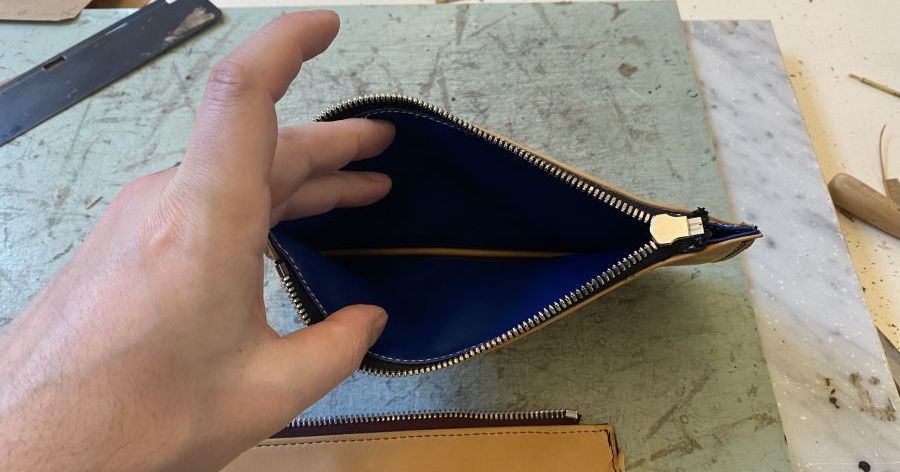
A thing to consider when making a bag of this sort is the leather.
Stiffer, more rigid leather will make it much harder for you to turn the finished product inside out.

This is because you finish it from the inside before giving it its final shape.
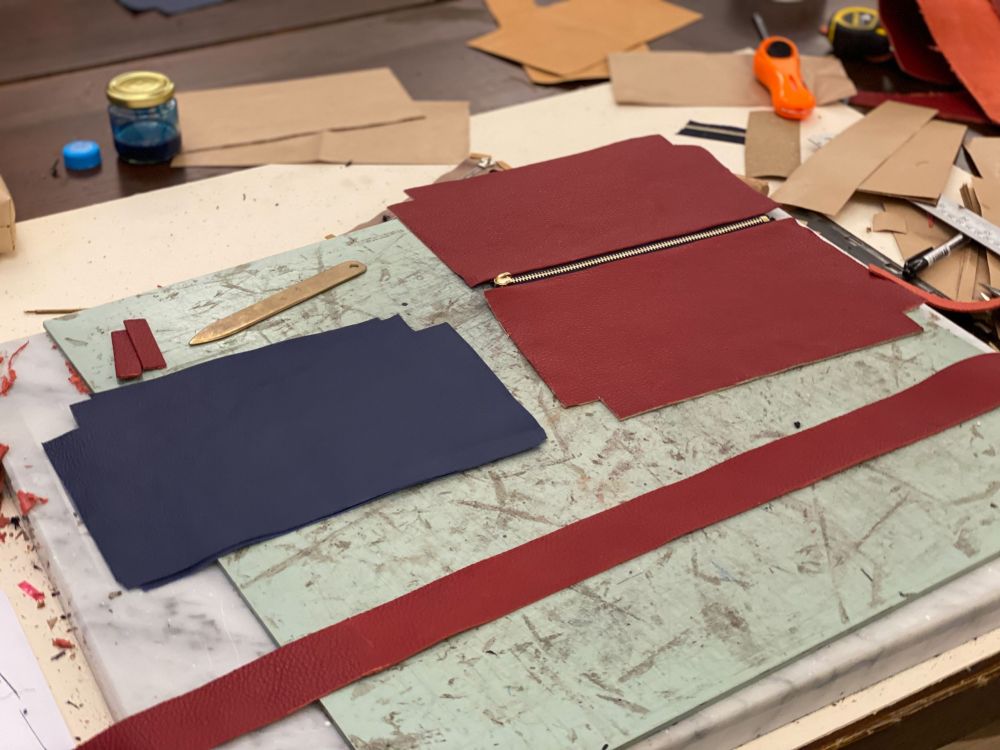
In this occasion I chose a softer blue leather and a stiffer embossed dark brown one.
For the lining and piping in both occasions I chose this lovely natural and smooth leather I found in the workshop.
pattern making
A good thing is that I am becoming very good at cutting the pattern.
What I do need to improve however is transferring those patterns into a clean cut on the leather.
I bought a lot of tools that are arriving this week so my life should be easier.
It is valuable to label all your patterns and write notes on them so you know exactly what you need.
For example, I needed two sets of outer lining, two sets of inner lining, two zippers, two pieces for the piping and the binding strips.
Zippers are not fun
There are a few ways to make a zipper but both include labor.
You have to really wrestle with pulling the unnecessary teeth out with a pincer tool.
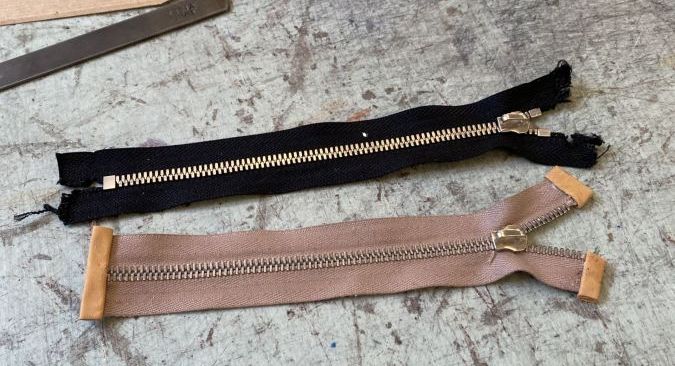
Then there’s the added stress of putting the zipper correctly, closing the ends and not ruining the exterior.
As soon as you finish, you have to attach the outer leather on top in the correct way and stitch it properly.

To do that, you need a special foot on your sewing machine and precision is important.
My first attempt was rubbish, but I did even worse sewing the lining on top of those.
If your patterns aren’t precise and you miss some stitches, you will practically ruin it.

Be extremely careful when stitching, it can make or break your final product.
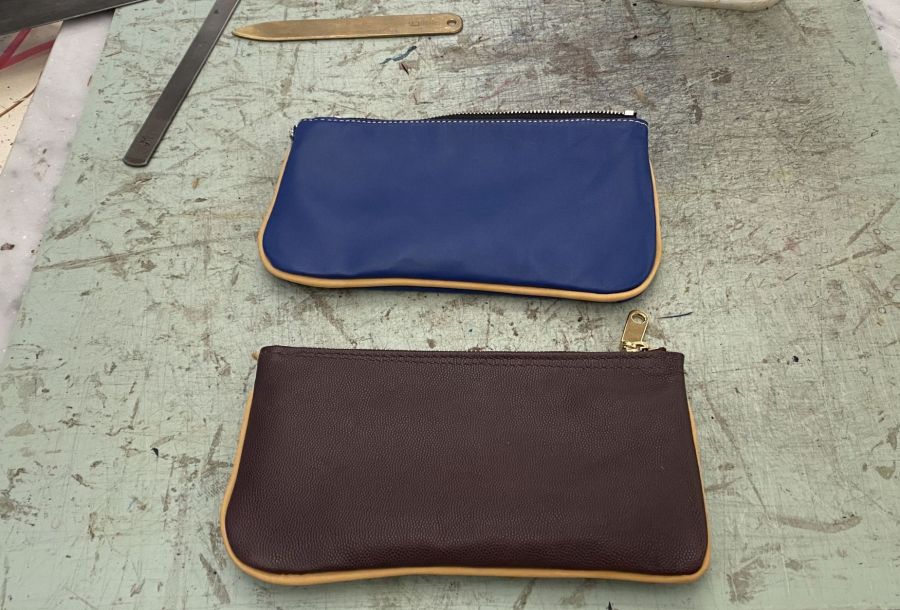
final results
As you can see the two bags I made were pretty decent.
The brown/reddish one had terrible stitching on one part of the exterior.
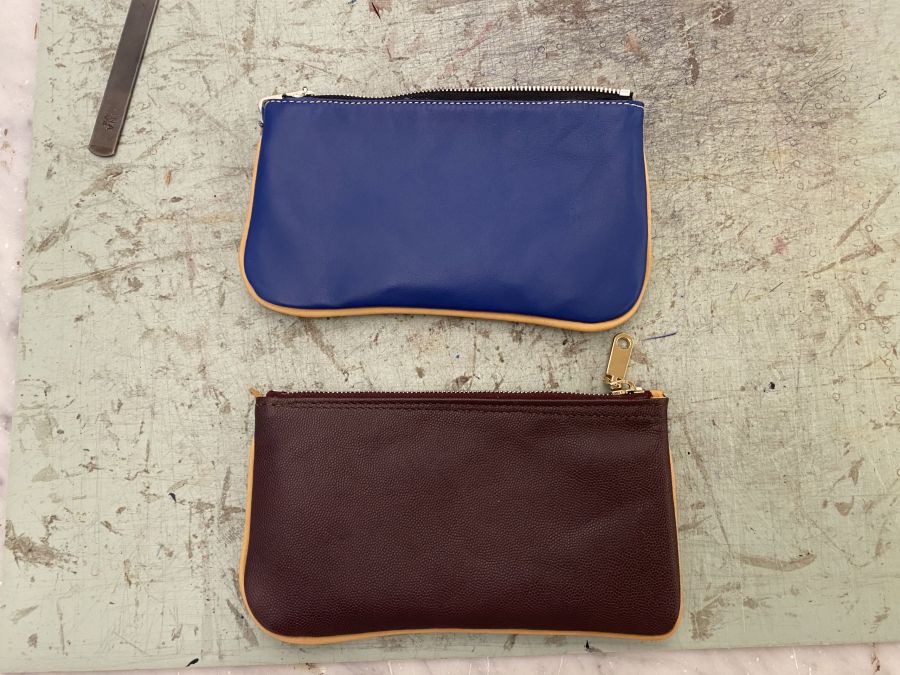
Both pipings were pretty alright, though sewing them on was a pain in the ass.
However it was very informative to learn how to do the piping, stitching and of course the zipper.

As you will see in the next project, I did much better everywhere.
#2 The handmade leather shoulder bag
At first it looked like this would be a repeat of the previous project.

However, it turns out this was much more complicated and included more advanced thinking and mathematics.
Additionally, the lining was detachable (not sewn on the exterior) and I had to make a shoulder strap.
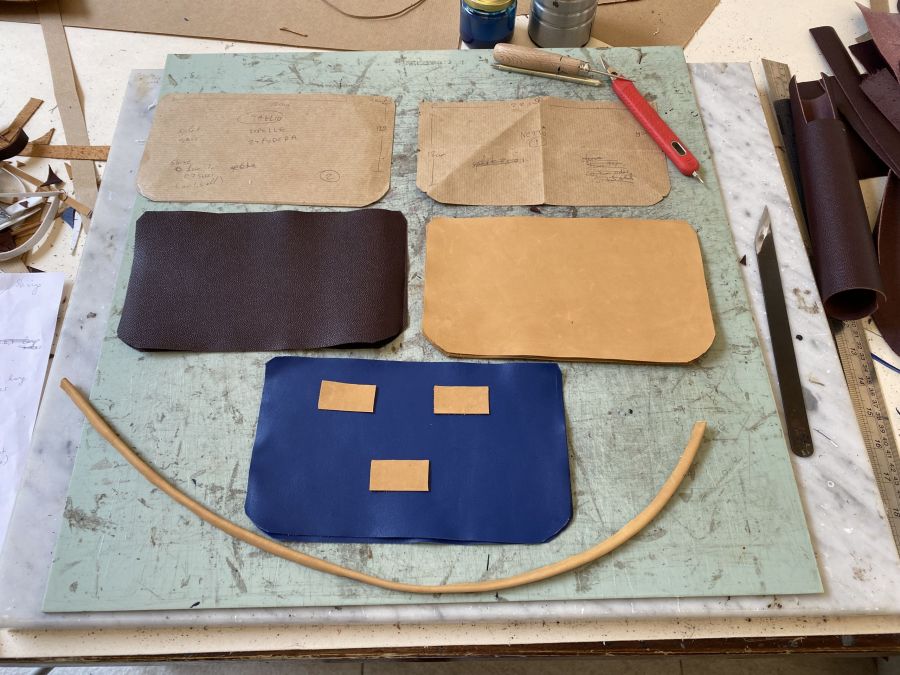
Complicated patterns
The patterns this time were essentially only 4.
I had to cut only 2 pieces of exterior and 2 pieces of interior leather.

In addition, I cut directly 2 long pieces that I would attach together to form the shoulder strap.
Making the pattern was harder this time, as the angles required science, math and diligence.
After making them I used some cheap fake leather to quickly assemble them and see that it works.

It also gives you a good idea of how the final project would look.
There was the added challenge of me increasing the proportions.
Initially the bag was too small so I added almost double the height.

In retrospective, I might have added even more.
zippers & Shoulder straps
My zipper game was much, much better this time and it shows.
Attaching the leather was also a much cleaner job, let alone the actual stitching.

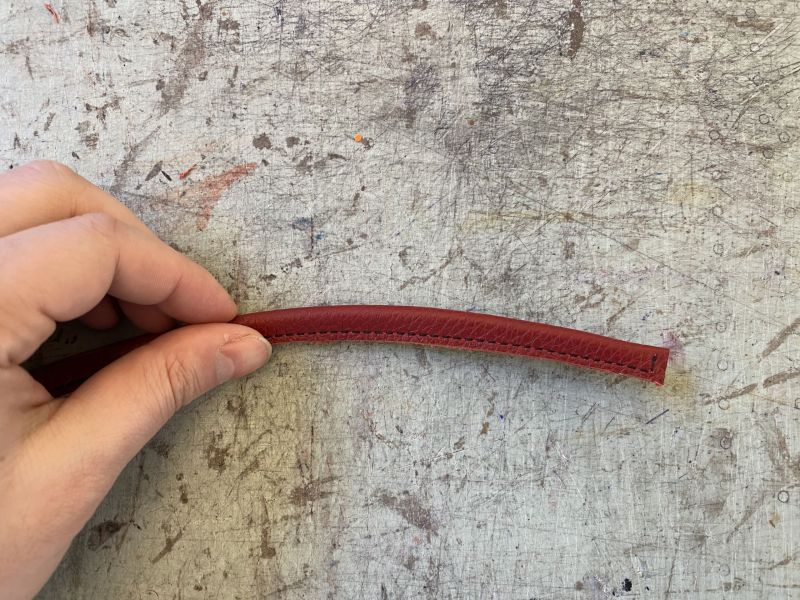
I also spent time to make the shoulder strap which was a wide piece of leather with rope in the middle.
It was surprisingly easy and my stitching was pretty good.
Since the hide I used wasn’t so long, I cut two pieces and joined them together.
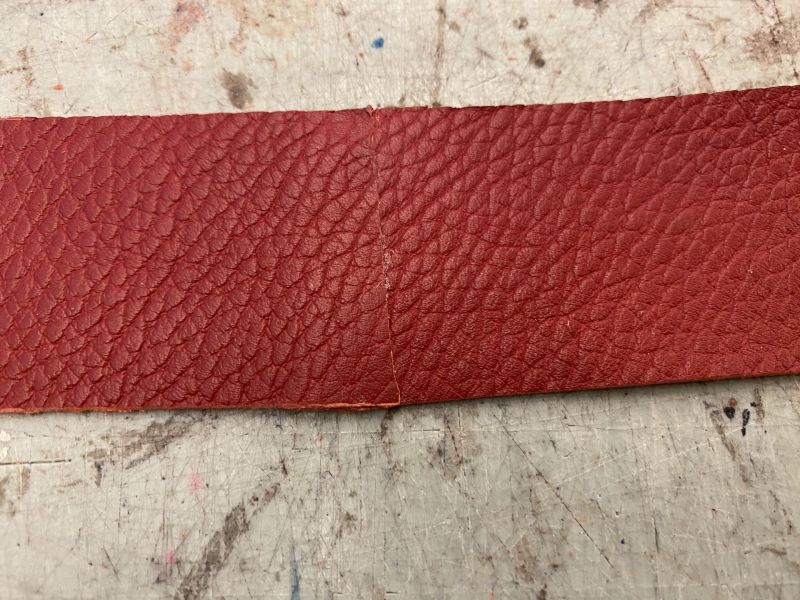
In order to do that you need to skive thin the edges that join and glue them together.
Afterwards you stitch the whole thing and trim the excess.
Stitching and reinforcements
This type of construction required much more stitching.
Attaching the loops for the shoulder strap was easy, but the rest brought my weakest point out again.

Cutting clean, matching patterns.
The smallest difference or mishap can cause issues on the outside or make you miss a stitch line.
For example you can see on the side top that the leather is not level.

However, seeing the improvements was encouraging and I am sure I will be better with practice.
final outcome
Overall, this was a very successful project in my book.
I was very happy to give it to someone special and see their reactions.
The words of my friends and family were also encouraging.
I even decided to wear the bag just to see where it would sit on a human.
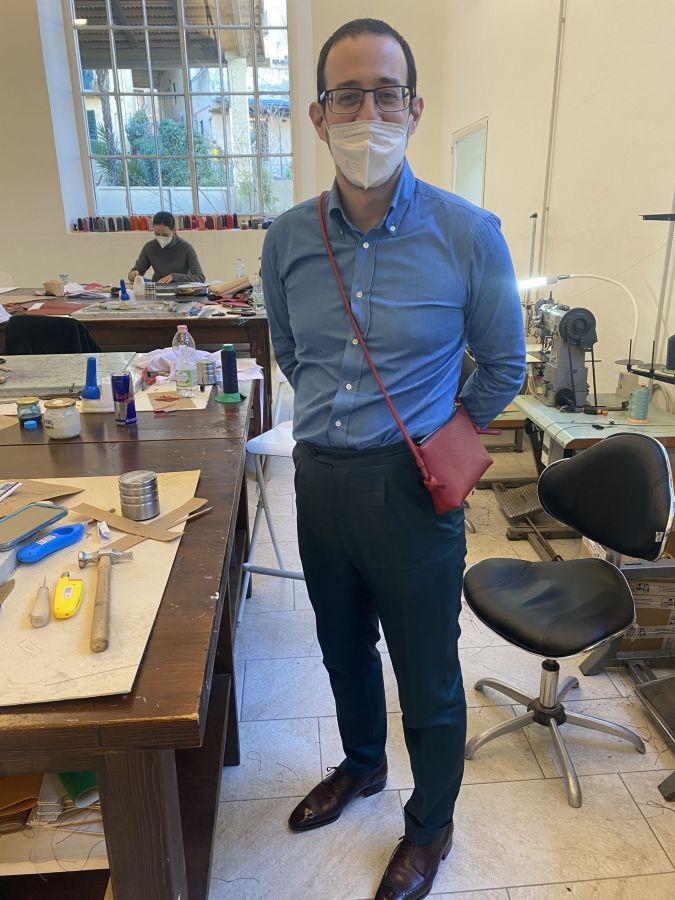
For anyone wondering, I am wearing my Norman Vilalta shoes in the picture.
By the way, there is a big change you will find Norman’s Shoes soon at The Noble Shoe!
summing it all up
This concludes my second week of leatherworking and making a handmade leather bag.
A difficult, rewarding experience that raises questions, solves questions and generates excitement and anticipation.
It stimulates your mind, promotes critical thinking and overcoming problems or challenges.
For just 2 weeks of being a student I would say that my progress is huge.
But I would like to see what you think about my adventure and if you enjoy this miniseries.
I really encourage you to pick up leatherworking as a hobby and to respect leather artisans even more!
See you next week with a review, guide or another exciting project.
Thank you for reading,
Kostas Mandilaris,
Misiu Academy


Great work Kostas! I’m also starting a leathercraft journey, so this is really inspiring.
All the best in your journey!
More power to you!
Do make structured bags (small to medium). Unbranded but stamped with fine crafmanship, that would be a doozy!
Thanks dear, my passions is shoes however. When I master that skill I will probably go back to bags and accessories!