Want To Learn How To Mirror Shine?
Well if you do I am certainly not the one to tell you how! I can achieve a decent shine but some of my friends on Instagram are unreal! Since I always wanted to write a Guide about How To Polish Your Shoes To A Mirror Shine it sort of presented a problem. Luckily for me, one of my good friends and Andy Vaughn – owner of Pure Polish Products – kindly offered to write a super explanatory step-by-step guide so you can become an expert too.
This marks the first every Guest Post on Misiu Academy if I remember correctly and there is no better person than Andy to show you how to do it with a very comprehensive yet easy guide. Pure Polish is a 100% American Brand producing ecological, handmade shoe care products that smell fantastic. Literally, they smell like oranges. Please consider visiting their website and supporting them!
Now, let’s move on to the good stuff!
Terminology & Why Would You Want To Achieve Mirror Shine
To begin with it is important to understand the terms since there is often a lot of confusion. In reality it is rather simple however.
“Mirror Shine”, “Spit Shine”, “Bull Shine”, or “Glaçage” – ways to describe the level of shine that can be achieved on a pair of leather shoes or boots, whereupon you can see your reflection (like a mirror).”
You don’t have to overcomplicate things as your goal is to simply produce a shine that is as reflective as a mirror.
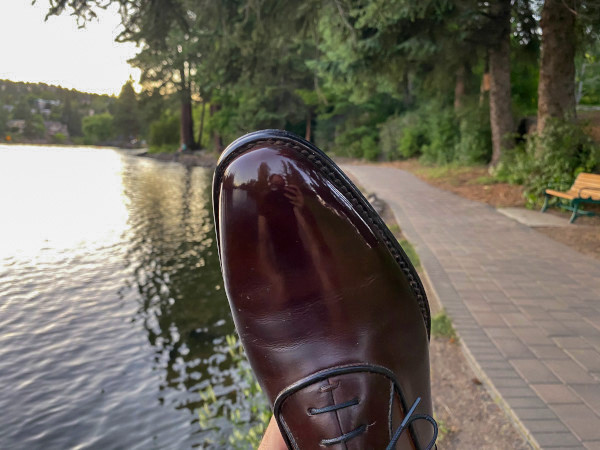


There are many reasons why someone would want to mirror shine their shoes or boots. It’s impressive to co-workers and shows attention to detail. It is also required for some military formal wear and in many ways it’s meditative and helps clear the mind. Of course, it also adds a protective layer to valuable leather footwear.
All of these are valid reasons and in fact many more exist. But your reason for mirror shining aside, we are going to show you how to do it!
Tools Required
You cannot achieve a Mirror Shine without the proper tools! Here’s a list of what you need:
- Pair of full-grain leather shoes or boots
- Cream Polish, Paste/Wax Polish, High Shine or Mirror Gloss Wax Polish
- Thin Cotton Cloth
- Buffing Brush
- Water Spritzer or Dispenser


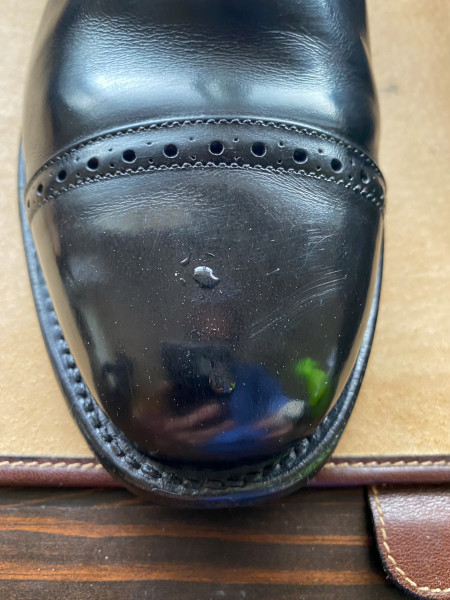
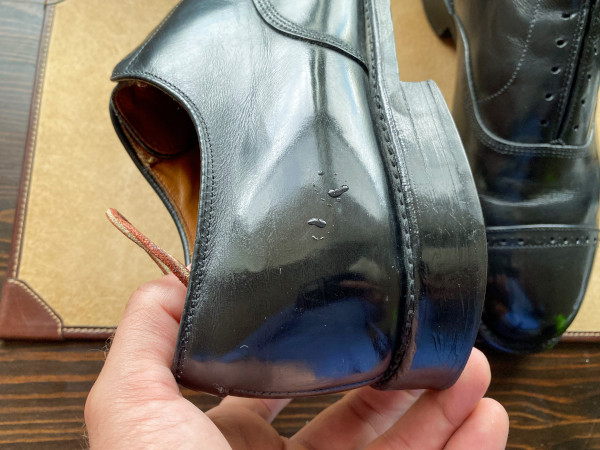
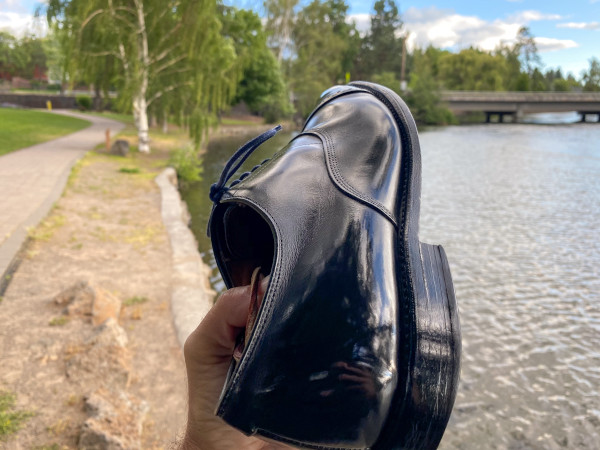
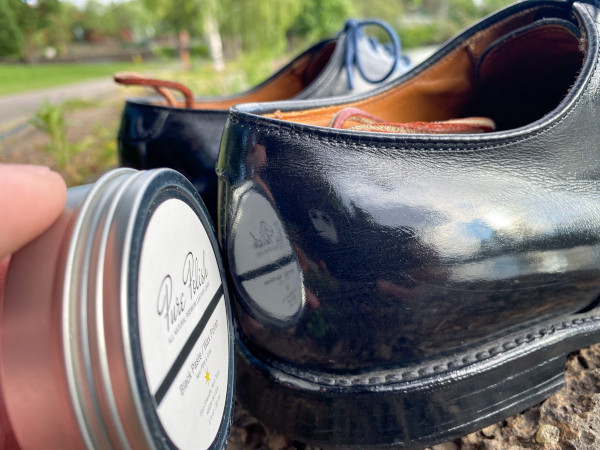
For this example, we are going to use a pair of Black Allen Edmonds Dalton Cap Toe Oxfords that have been heavily used and pulled out of the closet. The reason for that is to show that this can be done on used shoes, and not only new shoes. This particular pair had previously only had standard routine care (cream polish and brushing), and needed to build from that base level stepping-stone.
Note: You want to only mirror shine the stiff leather sections (typically the toes and heels of your shoes or boots). If you put the stiff waxes used for mirror shining across the flexing parts of your shoes, it will crack and crumble when you walk. This causes a very displeasing look, as opposed to an attractive shine.


Step 1: Wipe-down & Brush Warm-up
Whenever you take a pair of shoes out of the closet it’s good to wipe them down with a slightly damp cloth and give a vigorous brushing to warm up the leather. This implies that they don’t have any kind of mirror shine already on them and were sitting in storage for quite some time (in dust bags or not).
For this example, we used a short horsehair brush to knock off any settled dust, warm up the grain, open up the leather pores, and get it ready to receive polish.
Step 2: Applying A Water Buff (AKA Dab & Swirl)
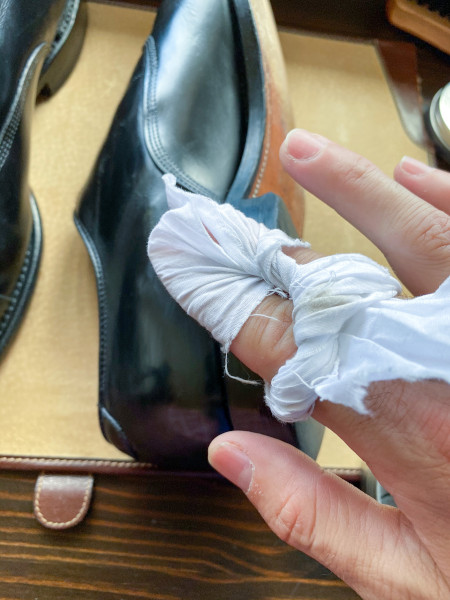
We first begin with a Water Buff. Wrap a thin cotton cloth around your fingertips and try to keep the surface tension taut and the fingertip area wrinkle-free. Using 1 or 2 water droplets (no polish), buff lightly in small circles (2-3 cm) across the surface, until the water absorbs into the leather.
You’re using this very small amount of water as a delicate solvent to help prepare the leather to absorb the stiff paste/wax products, and to ensure the leather has a smooth base surface. Remember to work only on the stiff areas that don’t bend!
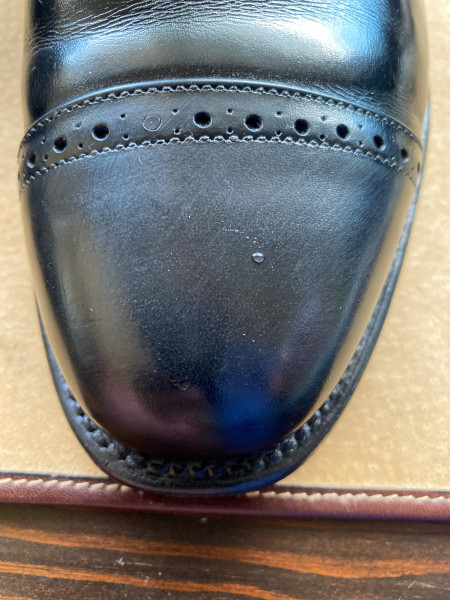


Step 3: Polish Swirl
Use your fingertips through the cotton cloth to dab lightly into the paste/wax polish. Then rub the polish into the leather grain in small circles. Afterwards apply a single droplet of water to the surface and buff until the grain absorbs the polish. The wax should cloud up when applied, but dissipate when buffed and fed a droplet of water.
Alternate back-and-forth between a single droplet of water and a dab of polish, until you thoroughly cover the toe with a single layer of polish. A good indicator is also when the cloudiness no longer dissipates after buffing.


Step 4: Switch Sides
It’s now time to switch and apply the same technique to the heel quarters. Repeat the same buffing and droplet process as above.
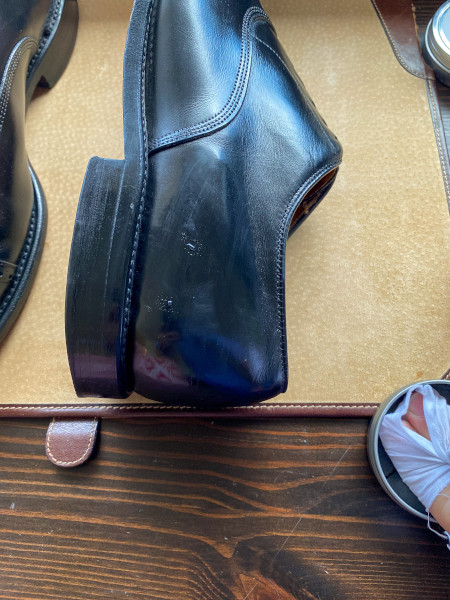


After you finish one shoe, rotate to the second one and repeat both steps.
Step 5: Building the Base
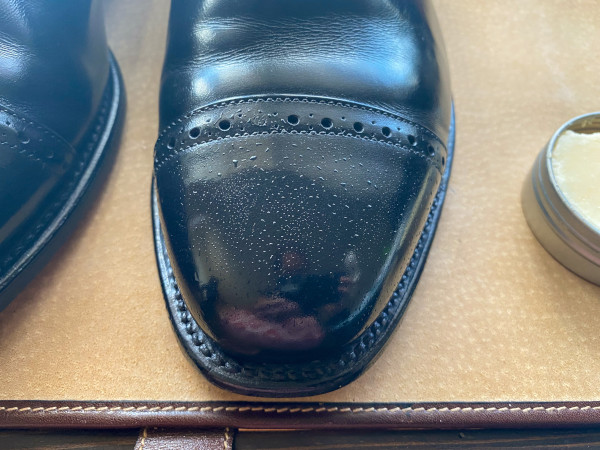
The goal of this first stage of wax dabs and droplets is to build up a smooth polish layer that no longer allows water to absorb directly through to the grain. A “smooth candy shell” is a good description of what you’re trying to build.
You will know you accomplished the first step when water droplets bead up on the surface of the wax, and it takes more than a few circles to buff away.
Considerations Before Mirroring – Grain & Temperature
The type of leather you use and the climate you live in can substantially affect your ability to mirror shine. For example, you have Grain Leathers and some people live in warm climates which makes it harder to harden the waxes.
1. Option for Grain Leathers
With grain leathers (such as Hatch Grain, Scotch Grain, or Pebble Grain) you may need to alternate a round of cream polish (for the softer waxes) in order to build up a thicker surface before buffing. This is because the embossed grain pattern won’t be smooth until the layers of wax are even with the surface of the grain.
2. Option for Warm Climates
If the waxes won’t harden and instead just spread around – this sometimes happens in warmer weather – it can be helpful to use ice to chill your water.
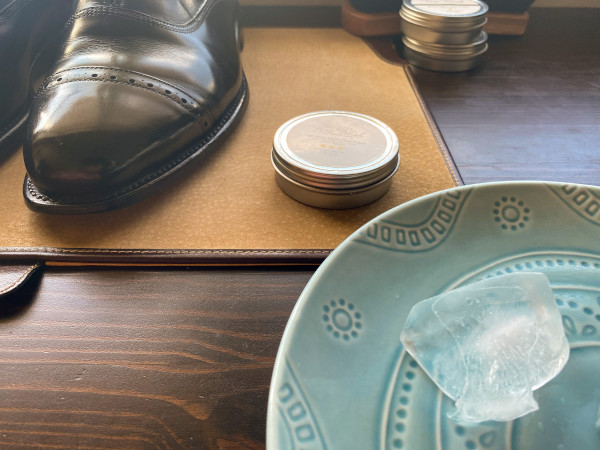


At this point, you should achieve a “high shine” and begin to see some reflection. But this isn’t a complete mirror, yet!
Step 6: Mirroring With High Shine/Mirror Gloss
After building the “smooth candy shell” on the toes and heels you can switch from the paste/wax polish to the High Shine or Mirror Gloss Product. High Shine & Mirror Gloss are stiffer waxes designed to augment the buffing process and smooth out any occlusions in the surface.
Rotate to a clean section of your buffing cloth which involves again wrapping it around your fingertips with the surface taut.


Step 7: Dab & Swirl
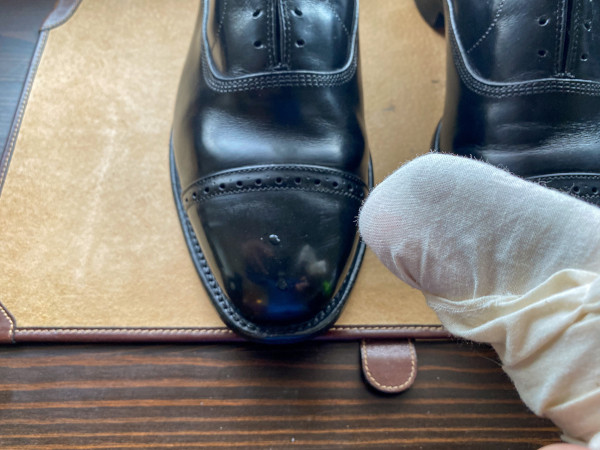
Back to the Dab & Swirl technique by putting 1-2 droplets of water on the toe surface. However, if you use an ice cube, dab your cloth-covered fingertip against the ice and rub the slightly damp cloth against the toe. In this example we press against the ice cube for moisture which shows how the water beads-up on the surface instead of passing directly through This is due to the fact that now there is a solid paste base layer.
Dab lightly into the High Shine and using circular swirling patterns across the water droplets buff the surface until it’s clear. Water and High Shine combined act as a buffing wax, fill-in any thin areas while also making the surface glassy smooth. Proceed by alternating between light droplets and “dab and swirls” with the High Shine. Each time, ensure you are buffing the wax until it is completely clear. This sometimes takes an additional droplet of water between dabs.
Step 8: Rotate & Repeat
Just like we did in the beginning rotate to the heel quarters, and repeat the process.
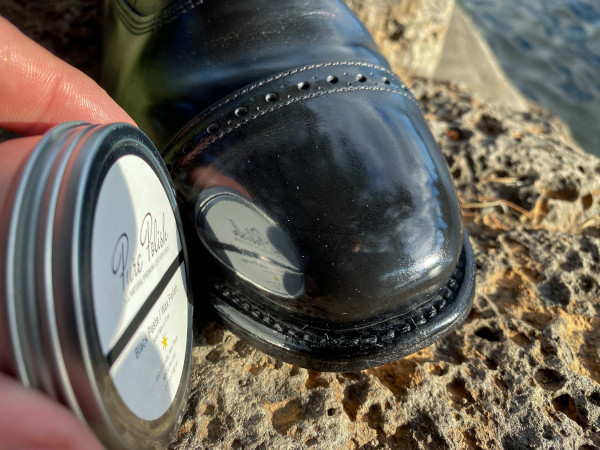
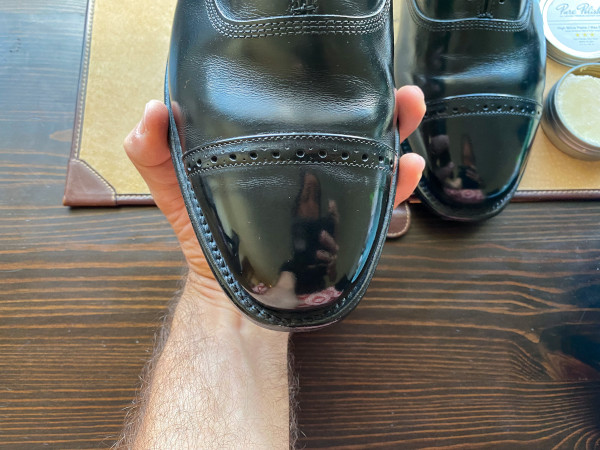
For this example, we only did two light layers of High Shine buffing on top of the paste/wax base. The reason for this is to show that you can achieve a reflective mirror shine rather quickly by using ice-cool water and a properly built-up, smooth base.
Step 9: Fog the Surface
Sometimes before a final buffing you can “fog up” the surface with your breath. It allows you to see if fog lays flat and if there are any dimples or areas that require filling.
Step 10: Brush & Prep
It goes without saying that you will handle and rotate your shoes quite a bit during this whole process. Sometimes the oils from your fingers, stray dust particles and/or droplets go astray. A good brisk brushing with a long horsehair brush across the non-mirrored sections will clean all of this up.


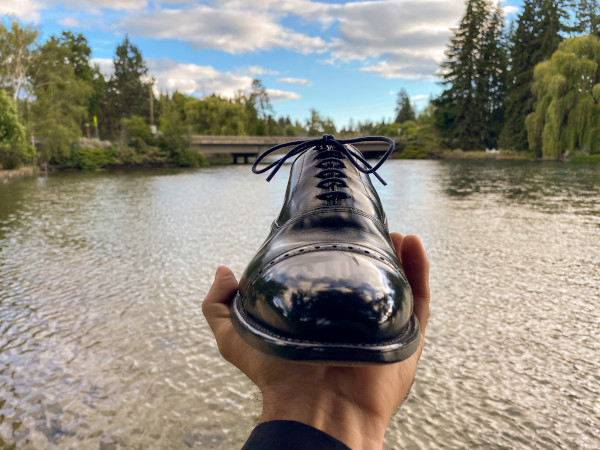
Now you’re ready to show off your mirror shined toes and heels! Take some good photos or wear them out and about proudly.
Over time you’ll get better and faster at this process. The first few times will feel like you could do better – and you will. So, keep at it!
Quick Summary Of Steps
This is a quick recap of the steps we discussed during this guide:
- Wipe-down
- Water Buff
- Polish Swirl
- Switch Sides
- Build the Base
- Option for Grain Leather – Cream layer
- Option for Warm Climates – Ice
- High Shine / Mirror Gloss
- Dab & Swirl
- Rotate & Repeat
- Fog the Surface
- Brush & Prep
- Wear, Photo, Show-off


Final Words
First of all I would like to thank Andy for his comprehensive written guide on How To Mirror Shine Polish Your Shoes. Not only it’s educational with great visual material, but also in words that everyone can understand and follow. I recommend checking out Pure Polish Products which is a small family business in the USA and giving him a follow on Instagram. He is also extremely friendly and a genuinely good guy and will always answer your questions!
What did you think about this one? Let me know in the comments if you found it helpful or suggest any improvements! Of course, this is not the only way to achieve a great shine but as you can see in the photos works great! In the meantime, take care and be safe and I will see you next week with an exciting interview of Vahtia Shoes from Indonesia! Oh and don’t forget to Subscribe to not miss a thing!
Thank you for reading,
Kostas Mandilaris,
Misiu Academy



















Thank you so much for this guest post opportunity Kostas! I’m happy to share techniques and pass-on the knowledge with the community. Shine on!
And thank you for taking the time to share this with me Andy!
Love this and looking forward to experiment this with Pure Polish! I’m good with Saphir but practicing with Pure Polish now.
Great to hear Kyle! Keep practicing it gets better with time!
I tried this and am rocking it right now thank u so much ?
Glad you found it helpful!
Very good content as always. Love to learn.
Chris
Hello, Kostas, and thank you for this excellent tutorial. When I was in the Navy, we were taught to “spit shine” our dress shoes using tampons and candle wax. Your way is much more sensible and easy. Well done!
Hi John, I was in the Special Forces in the Airborne Division in Greece and they didn’t teach us anything 😀 Thank you for sharing!
Military boot polishing steps. Step 1: Clean the boots. Step 2: To clean, use warm water. Step 3: Allow the boots to air dry completely. Step 3: Shine up the boots. Step 4: Allow the polish to dry.
Hi Stephen, I was in the army. This is a basic explanation but I would not use water.