![Handwelting]()
 Ready To Hand-Welt
Welcome to Part 3 of my “Becoming a Bespoke Shoemaker” Series.
In this article we will take our first foray into hand-welting dress shoes.
An essential part of good shoemaking and a skill you need to master to become a good shoemaker.
Let’s begin!
Recap From Part 2
If you want to follow the journey from the beginning here are the other articles:
In the previous parts we talked about the building block of shoemaking.
Lasting pieces of leather on a last (a 3D rendition of a foot) on a carved insole.

We begin by learning how to do this on a toe partition before moving to the entire shoe.
I also taught you how to create “The Wall” whose official name is Holdfast and is the connecting tissue between leather and the welt.
Now, we will learn how to sew the welt by hand and start preparing for the outsole stitching.
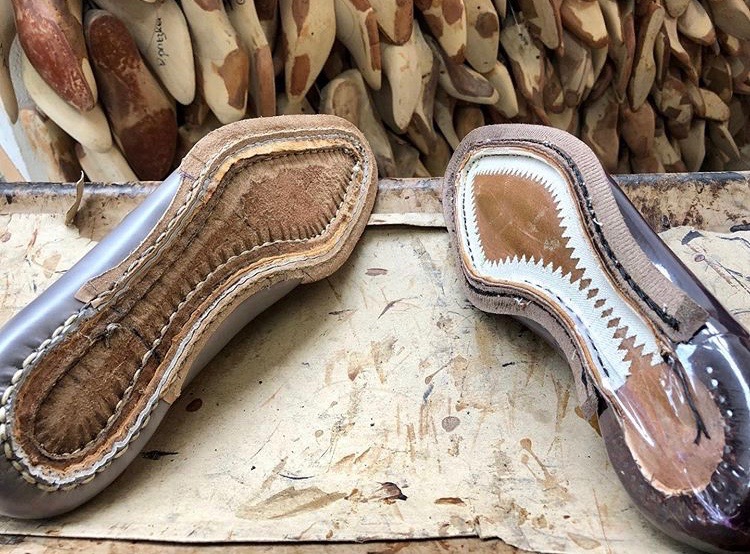
A Welt?
We hear a lot about a welt, or the Goodyear Welt process.
But what is really a welt?
It is a piece of leather that acts as a bridge and connects two key components of the shoe.

The first piece connects the welt to the uppers and the insole.
Afterwards you attach the sole on the bottom and sew it to the welt.
This makes it easy to resole the shoe as you simply remove the outsole and re-stitch it (in most cases).
You can have a pre-made welt from veg tan leather or make your own if you have hours to kill.
“Welting” Without A Welt
Before we practiced on the real thing, we did it without a welt.
However the procedure was the same and the purpose was to familiarize with the movement, the awl and the thread.
This happens right after lasting the uppers.
So right now you have 3 layers on your last and lasted to the insole.

The lining, the toe puff and the uppers.
It is crucial at this point that you push your awl through correctly and make a few holes on the leather.
Then you use those as a guide to connect them in a consistent line.
Its purpose is to know where your awl will come out and subsequently your stitches.
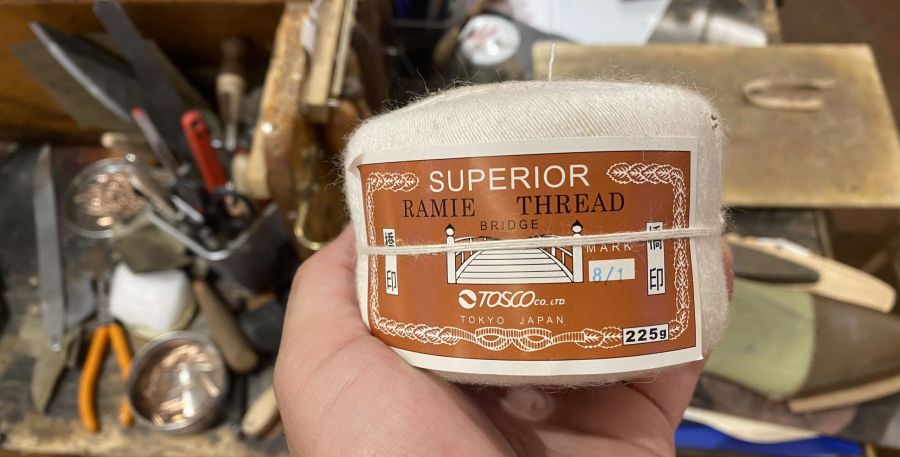
Making The Thread
There are a few different kinds of thread to use for welting.
You can use a waxed synthetic one which is also stronger or a natural linen one.
There are of course a few key differences on how to prepare them but also the technique of welting.
The waxed synthetic thread is pre-twisted so you have to untwist the ends first.
You then have to rasp them to thin the edges and remove excess material while giving it a fluffier look.
Then you proceed to use resin (shoemaker’s wax) to get them to stick together.
Pass the tip through the bristle’s eyes on each edge, fold at the point where the thickness will be even and twist to secure it.
Don’t forget to apply some paraffin at the end.
On the other hand, a natural linen thread is untwisted and you need 5 of them.
You not only have to soften the edges for each one of them, but they also have to be the same length.
Linen thread has no wax so you need to apply the resin to the whole thread very fast.
You do that by securing the thread on a knob or a handle or a hook of some point.
By holding it securely and using tension, you apply the resin in fast long movements.
Do this for the whole thread and then buff it using a simple cloth with the same movements.
The end is quite similar as you attach them to the bristle with the same way.
As far as the actual welting technique the only difference is that the synthetic thread needs a double twist.
More on that later maybe.
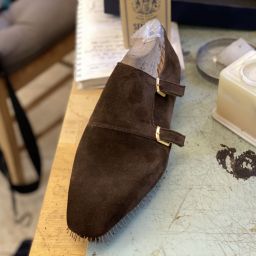
Welting By Hand
I am only going to show you a picture of how it looks without an actual welt.
But when you get to the real thing, make sure to leave the welt to soak for at least 15-20 minutes.
Dry the excess water and you are ready to begin.
Well, almost since you are going to need a belt that you put around your legs and under your feet.
It serves as a counterweight to keep the last steady so you can focus on the movement.

Remember to always last towards you on a backwards motion.
Begin by attaching the welt with a single nail through the ridge at the welting line you drew.
From that point you make your first real hole with the awl.
I suggest practicing holding the awl and the thread at the same time.
Also make sure that your workspace and floor is clean.
Your awl needs to come out at the same place each time otherwise the effects will show later.
The stitching will be crooked, uneven and a mess when attaching the sole.
Make the first hole and pass your thread through with the bristles and make sure their length is even.
You proceed to make the next hole with your awl, passing your bristles through and making specific loops and movements to ensure the thread locks correctly.
On the exterior side, you need to loop the bristle over and under the thread (once for linen, twice for synthetic).
On the inside however you keep the bristle at the bottom and twist and loop the thread over it.

Very hard to explain in words but you pull hard and fast so the wax seals the holes.
Pull hard at the end to tighten up the stitches.
Next Step: Outsole
As you see the concept behind welting by hand is not rocket science.
However the precision you need, the experience, the consistency and practice makes it hard.
Let alone the demanding energy it requires as you need to use more force and power.
The next step is to prepare the cork and cork-bed to fill in the gaps.
After it will be time to make the outsole stitching and finish the edge dressing.
But this will be the topic of Part 4 & 5!
Wrapping Things Up
This marks the end of Part 3 of the “Becoming a Bespoke Shoemaker” Series at Stefano Bemer.
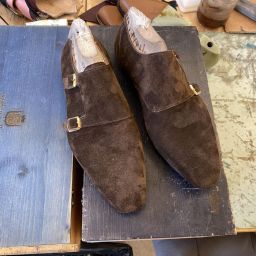
Hand-welting is a very frustrating experience in the beginning especially as you move on to the whole shoe.
Today it took me 2 hours and 15 minutes to welt my first 3/4th of a shoe.
It is imperative to find the right positions, be patient and keep your tools sharp.
As you will see in the next few sections however the results are rewarding and encouraging.
I hope you are enjoying this journey and I will see you next week!
Thank you for reading,
Kostas Mandilaris,
Misiu Academy


Hi, I am glad that you had published the articles and I am enjoying the information that I read and hopefully I will be able to produce my own bespoke one day as I am new to cobbling arena and setting up a small business of mine.
I hope that the guide will not end and it would be useful in future.
You are welcome!