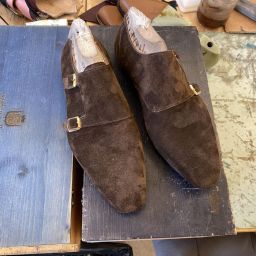
![Lasting leather on last]()
 The Journey Continues
Welcome to Part 6 of my “Becoming a Bespoke Shoemaker” Series!
In this article we will take a quick look into the creation of a blind waist.
We will also discuss the additional support we provide to the shoe with a shank.
Let’s get going!
Previous Weeks Recap
If you want to follow the journey from the beginning here are the other articles:
- Learning How To Last (Part 1)
- Preparing & Lasting The Toe Puff (Part 2)
- Learning To Hand-Welt (Part 3)
- Cork Filling & Hand-Sewing A Leather Sole (Part 4)
- Edge Coloring Leather Soles (Part 5)
And today we will move on to a bigger part of the shoe!
Moving On To 3/4th Of A Shoe!
As you might have noticed, we gradually progress to more complicated constructions.
Initially we begun with a simple toe lasting just the inner lining.
Then it became progressively more advanced to the point where the toe really resembled the actual shoe.
When you are comfortable with this construction it is time to move to a bigger part.
Since the heel block is a different beast on its own, it’s sensible to do 3/4th of a shoe.
Essentially you build the entire shoe all the way to the heel just the way you would normally.
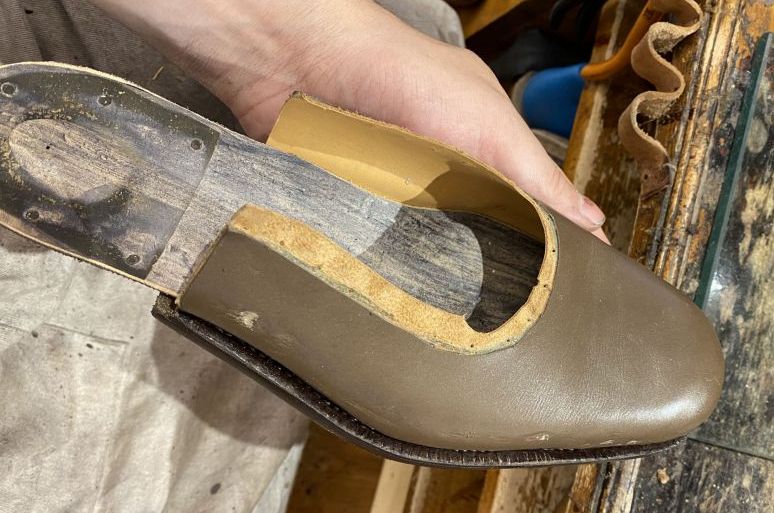
A difference here is that the provided uppers were quite simplistic and resembled more of a slip on.
Full Insole
A key difference is that you finally will attach a full length insole to the last.
It actually includes the heel point, even though we might not use it yet.
Whether you use it or not, it still is great practice for you to learn how to trim and cut to shape.
However, the heel does come with a vital measurement and shape that allows you to shape the waist.
You see, you can simply follow the waist line of the last for a normal shape.

However, if you want to do a blind waist you need to calculate more things.
A blind waist is what you usually see on high end shoes where it folds inside and you cannot see the stitching.
The way this works is that you trim the outsole so thin at the top that it folds over the welt inside the waist and hides it.
Attaching the insole is pretty simple with just a few more nails and wetting it first.
Of course you have to use the rubber band to give it shape until it’s dry too.
Shaping The Waist
To shape the waist you need to have a nice heel shape first.
The width of the heel gives you a few important measurements.
To begin with, by using the width measurement of the heel and adding 0.5 cm to it you can calculate the vertical point where the heel block will rest.
Then, by using the same width you kind of follow the last and find the points where the blind waist will curve.
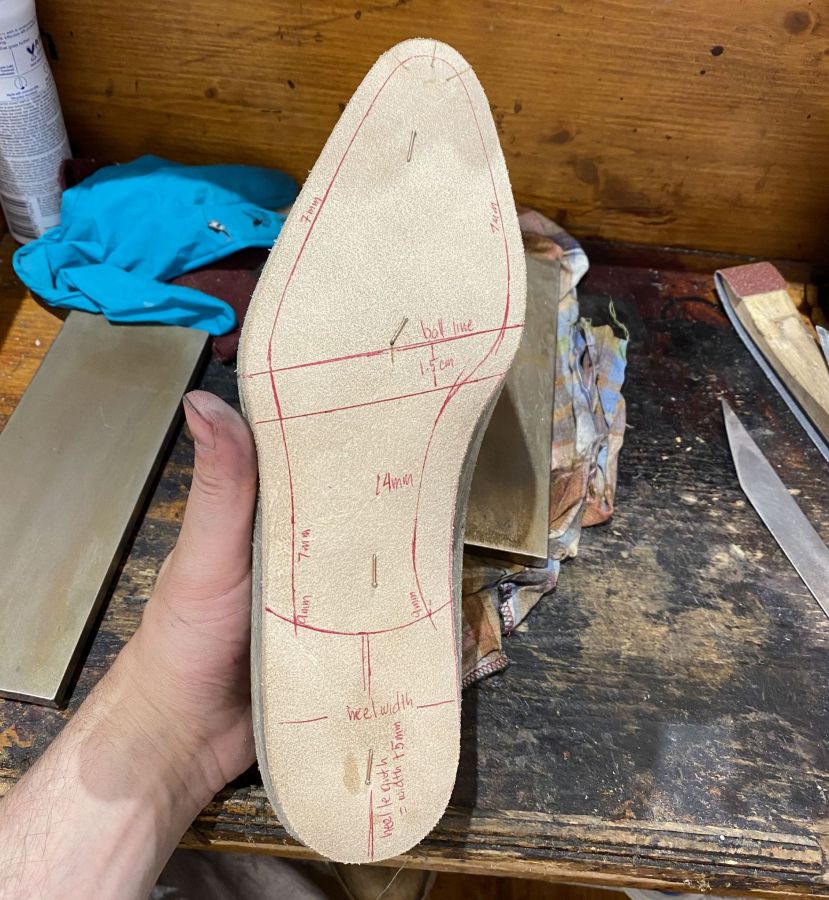
Eventually you create and trim the shape which gives this beautiful lovely curve to high end shoes.
Of course, these are just indicators and you are the one that gets to decide the shape of the shoe or the sharpness of the waist.
Holdfast Differences
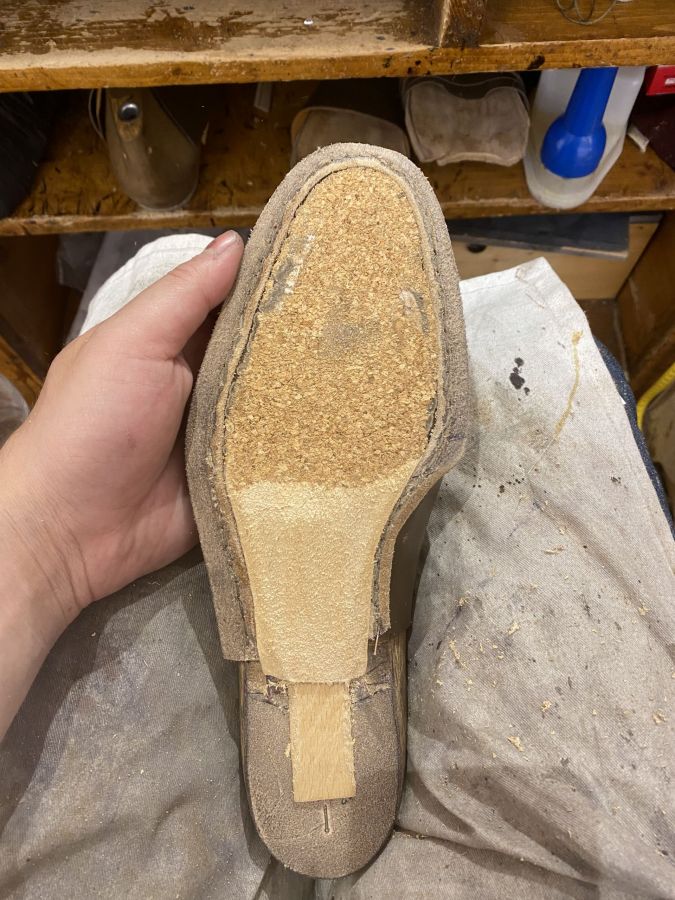
In the picture above you can also see a few numbers and key differences to the previous iterations.
For example, the holdfast (wall) that we created before was a standard 7 mm from the edge.
If you choose to make a normal waist then you do the same distance.
However when you do a blind waist you generally need to double that.
Usually for the inside part it’s 14mm and if you do the outside part around 13mm.
Remember these are just indicators and a lot depends on your shape and tools.

Another difference is towards the heel where you see the 9 mm mark.
It just becomes slightly wider than the standard at that point and a nice connection to the heel.
You can even see a few more lines that indicate the ball line (widest point).
This gives you reference for things we do later such as the cork, shank etc.
The lower ball line is simply a parallel line 1.5 cm lower than the ball line.
Lasting Process
Other than the difference of having to last and hold the waist first together the rest is quite similar.
At this stage you still fold the upper upwards and do the lining first.
Then you last the toe puff in the usual way and shape it as you should.

There will eventually be key differences here in the future, such as side stiffeners and reinforcement.
Or the fact that you will do a proper pre-lasting of the uppers before the actual thing.
But this is for a future article since I am not yet so comfortable with the process!
Post Welting
After the lasting part you have to welt the shoes by hand.
The process is largely the same and you follow the same rules.
At the end after you flatten and shape everything you still skive the inside part as we are about to fill it.
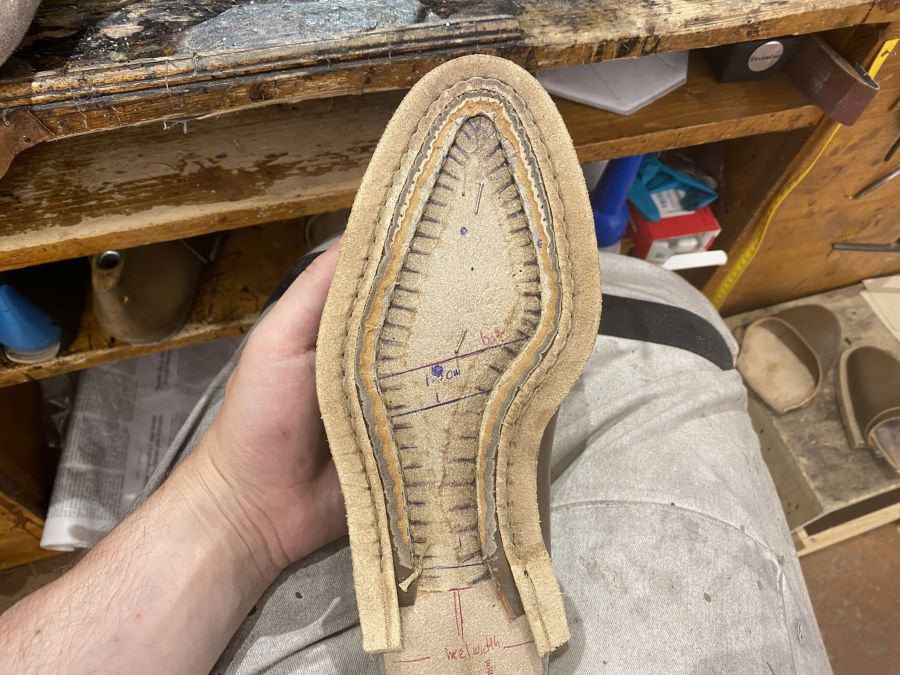 This is where the cork, shoulder leather and shank as well as the ball measurements come into play.
You first put the shank (a wooden, plastic or metallic) piece that strengthens and supports the shoe just under the lower ball line.
It sits straight and is quite an important component for a proper shoe.
You will then cover it all the way to the top ball line with shoulder leather.
Shoulder leather is strong, compressed and better than cork for those areas.

It has to be skived at the sides and about 1.5 cm on the top since it needs to fit seamlessly in the sides and connect to the cork.
Lastly, you apply the cork which just overlaps the shoulder leather and skive the edges and rasp it flat.
 Later, when we make a fiddleback we will make further adjustments but for now this will suffice.
This should be enough information for this time!
Conclusions
This brings us to the end of Part 6 of my “Becoming a Bespoke Shoemaker” Series!
It was a quick overview on how to prepare and learn what a blind waist is.
Of course there is much more to that and we will pick up next time when we finally learn how to close it!
Until then however I have more shoe reviews coming your way next week!
Stay tuned!
Thank you for reading,
Kostas Mandilaris,
Misiu Academy