![Stefano Bemer Bespoke Shoes by Kostas Mandilaris]()
 My First Bespoke Shoes
Welcome to Part 9 of my “Becoming a Bespoke Shoemaker” Series.
In this article I finally get to finish and show you my first pair of Bespoke shoes.
Specifically, we will talk about finishing the edges, adding the heel and wearing them!
Let’s go!
Previous Weeks Recap
If you want to follow the journey from the beginning here are the other articles:
- Learning How To Last (Part 1)
- Preparing & Lasting The Toe Puff (Part 2)
- Learning To Hand-Welt (Part 3)
- Cork Filling & Hand-Sewing A Leather Sole (Part 4)
- Edge Coloring Leather Soles (Part 5)
- Making A Blind Waist (Part 6)
- Starting My First Bespoke Pair (Part 7)
- Cork, Fiddleback & Sole (Part 8)
Today we are picking up from Part 8 and finishing my first Bespoke Shoes!
Trimming The Heel
At this stage, we have a pretty nice looking sole already.
The actual outsole is level and flush with the welt and both follow the shape of the last and the shoe.
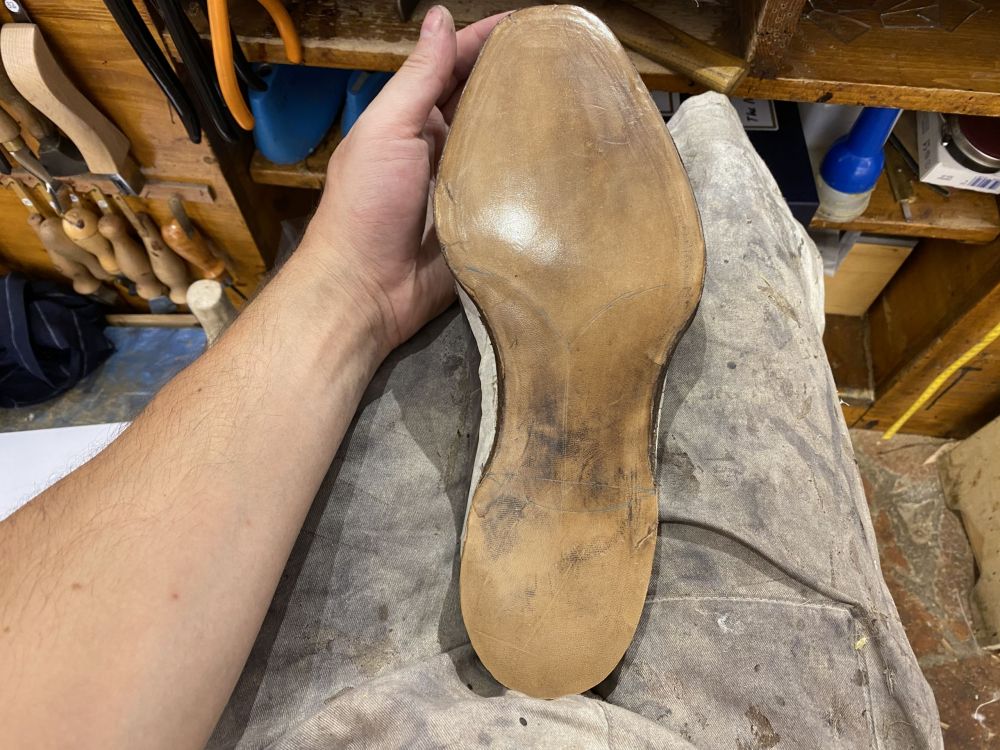
The difference with the previous pictures from Part 8 is that the heel received a much better shape.
It is not the final one of course, but it is a start.

Here is a closer look above, where I also redrew the markings for the heel placement.
Preparing The sole For THe Heel
However, before we actually start building the heel block there are a few key steps.
To begin with, I need to put some tacks on the heel to keep everything together.

Not only that, but also to skive, glass and flatten the waist and heel part.
For the waist, we do that as when you begin building the heel it becomes hard to accurately do it.
For the heel, I want it to be as flat as possible and saves a lot of trouble later.
Building The Heel Stack
Honestly building the heel stack by hand is among the hardest things in shoemaking for me.
Your first 1-2 layers have to be flat or it ruins the balance of the shoe.
If you choose to do this by hand and without the sanding machine it can take you a whole day.
As you can see in the image above the first heel stack is skived almost to nothing.
It took the most amount of time to perfect and involves tons of skiving and glassing.
However, this makes it so much easier for the next stacks.
As you build up, you need to make sure to scratch the stack and the next piece before you glue it.
Then you attach them, hammer hard and trim the excess.
Your goal is to give a nice overall shape to the heel but it doesn’t have to be perfect.
The reason for this is that you can use the sanding machine (or do it manually) to shape the end product.

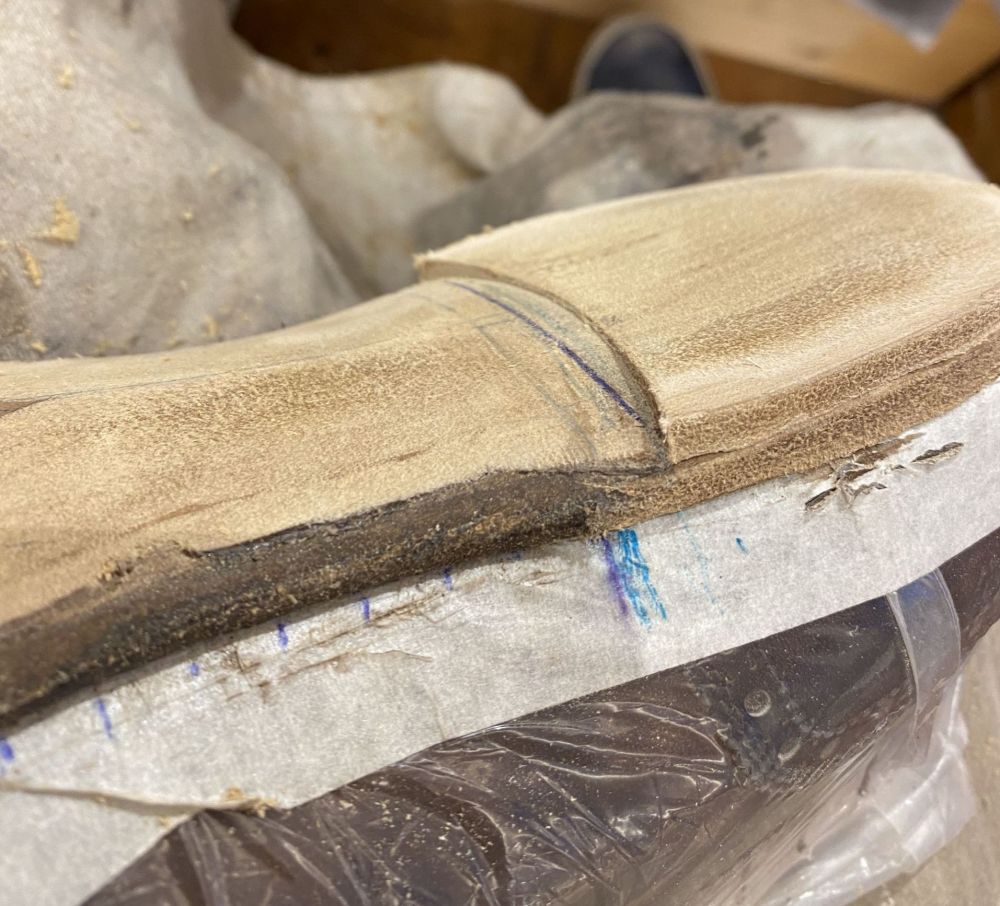
In the picture above you can see how I just finished the heel block.
The shape is rough with many jagged edges but I will fix it afterwards.

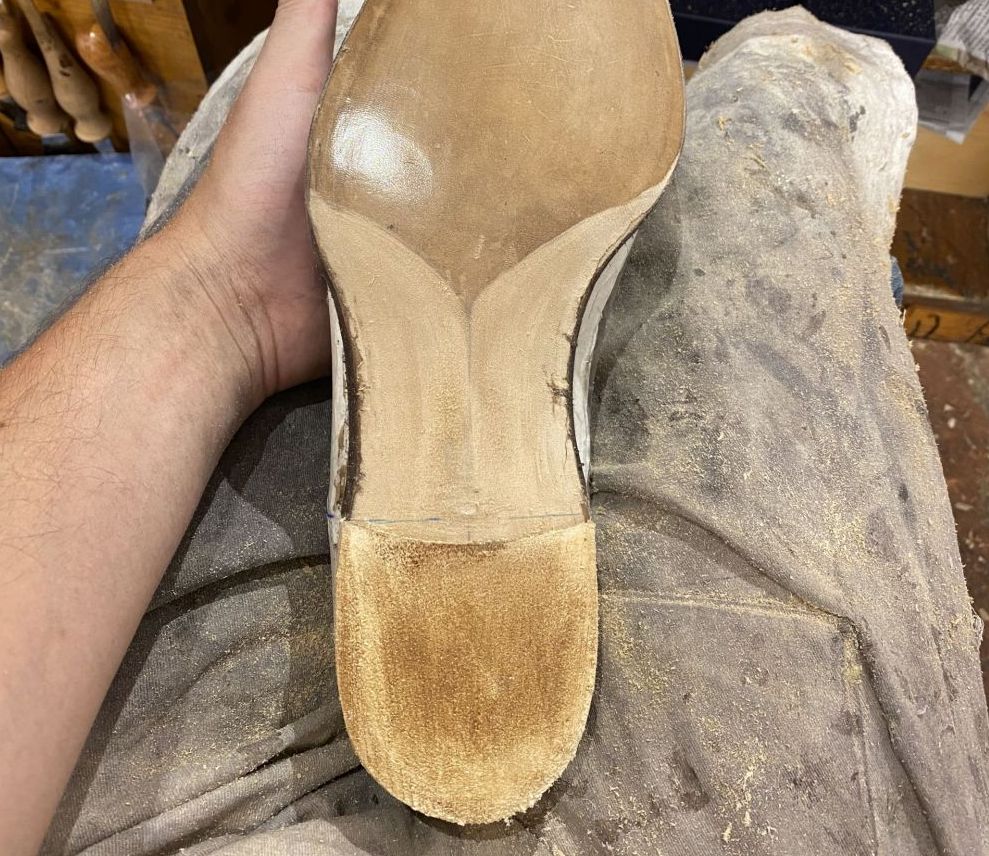
The top lift consists of a piece of shoulder leather and a rubber piece.
I cut them by hand, shape them and make them as level as possible before attaching them.
At the end I will sand them a little more to prepare for the finishing touches.
Dying The Sole & Heel
Dying the sole is a laborious process that I covered before.
It involves going through layers of sandpaper which become finer each time.
In between you also use water based dye and ammonia while ironing the sole.

When all of this is done (after the 1000 or 2000 grit) you can apply liquid wax and polish to get the final finish.
However, I still had to finish the heel block shape.
For practice, I used the sanding machine which you have to be extremely careful with.

One mistake in the movement and you damage the leather and ruin everything.
Final Touches
Before we take our shoe off the last there are a few more steps to do.
Once more, I have to glass and sand with the 220 grit the entire sole, heel and inside of the heel block.
It became a bit difficult as I had a few cuts while cutting and closing the sole channel.
So my bottom is not as clean as I wanted it but a massive improvement from the previous go.
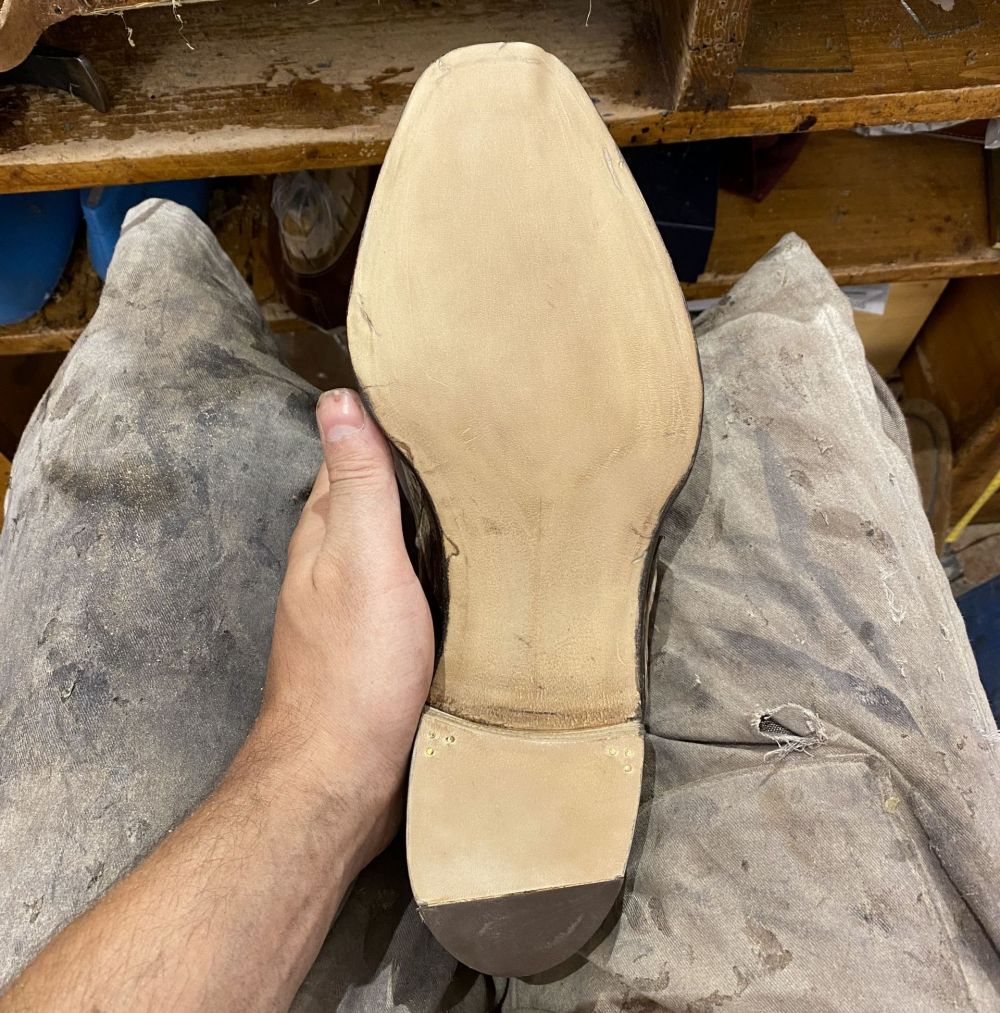
As everything becomes ready, the more decorative steps are in order.
Specifically, you pass that sole finishing mustard cream everywhere on the bottom and rub vigorously.
When it dries it leaves a nice glassy, natural finish to the outsole if done right.
Then you can add some decorative elements, brass tacks on the heel block or metal tips.
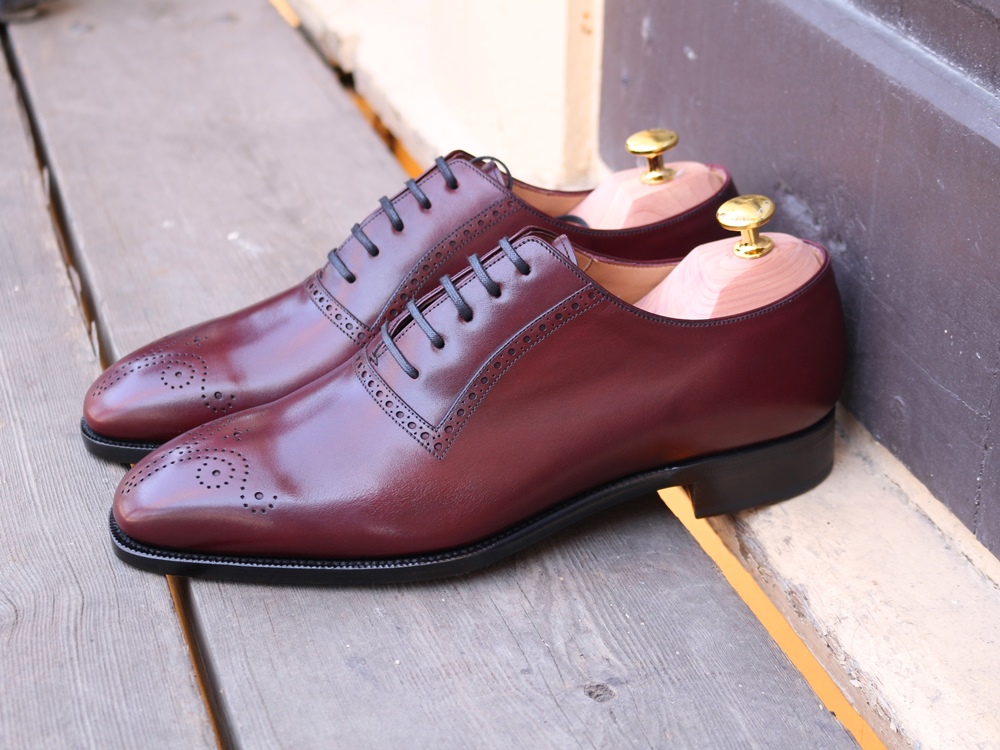
Final Reveals
This is the most important and heart-pounding moment.
Removing the masking tapes and carefully cutting the plastic cover and removing the last.
Any mistake you did, any cut or any color bleaching through will show now.
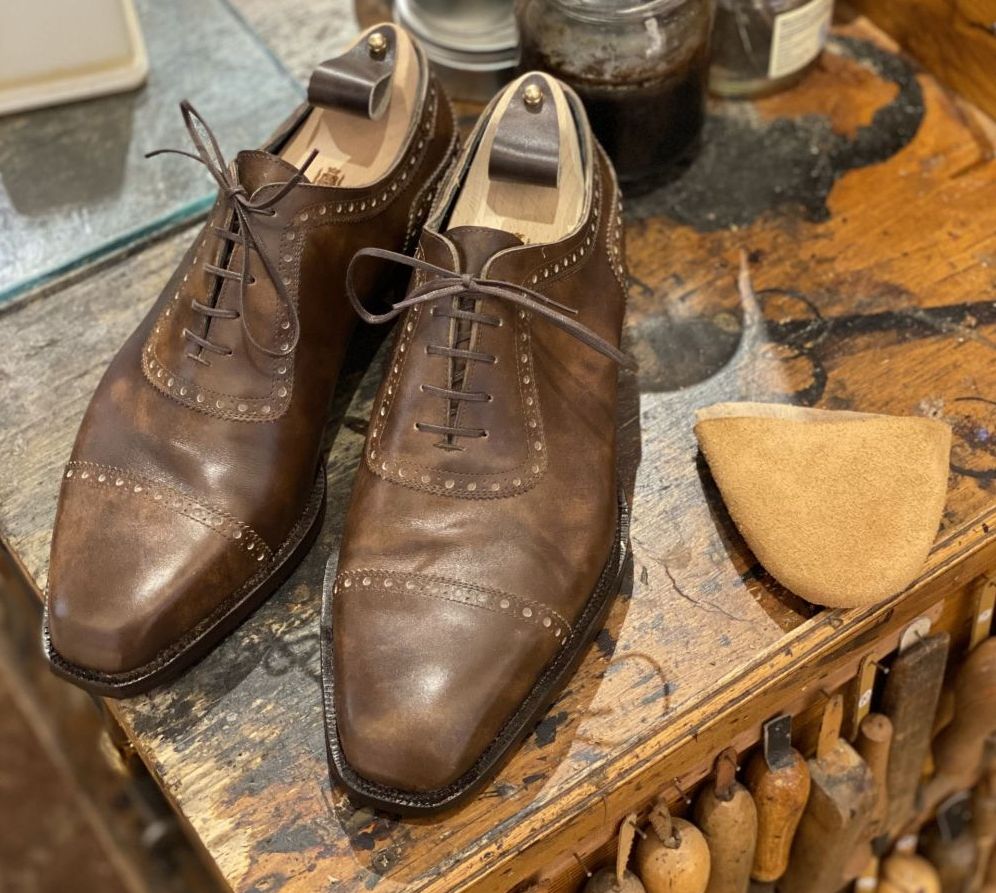
Removing the last was actually really hard work and in my case required two people.
However, after you can admire what you made and trim the top of the inner lining.
You also put some tacks on the insole before cutting the proper insole by hand.
I don’t have pictures of that as it’s nothing interesting, just making a mock up that fits before cutting the real leather.

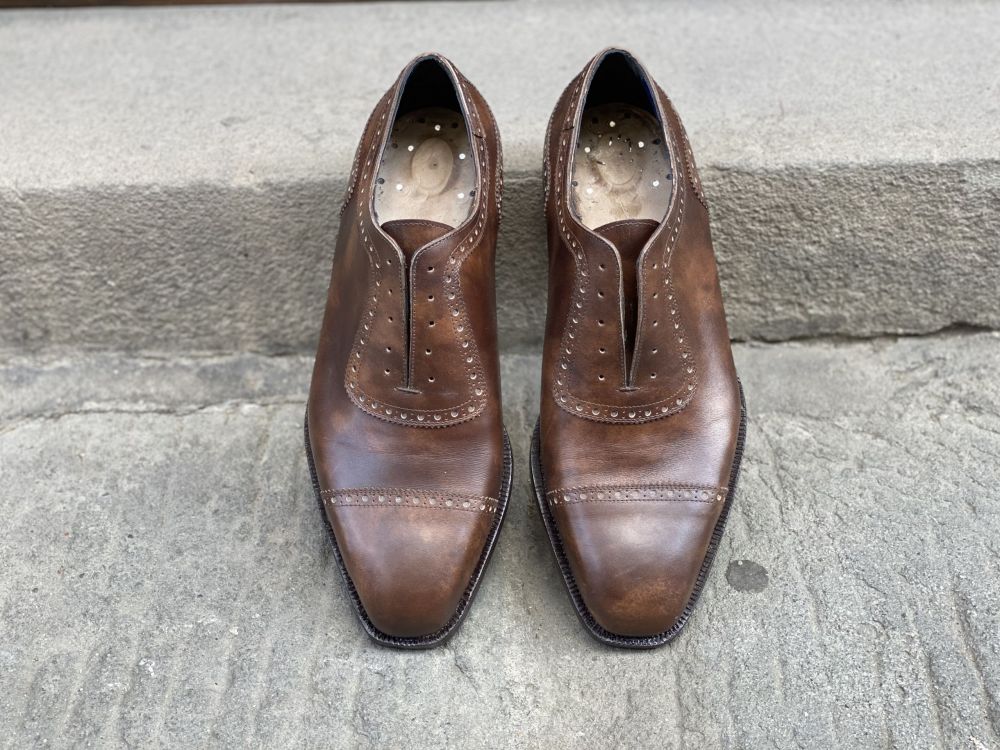
Trying On The Shoes
What’s a good pair of shoes if it doesn’t fit though right?
Luckily mine fit spot on and extremely comfortable.
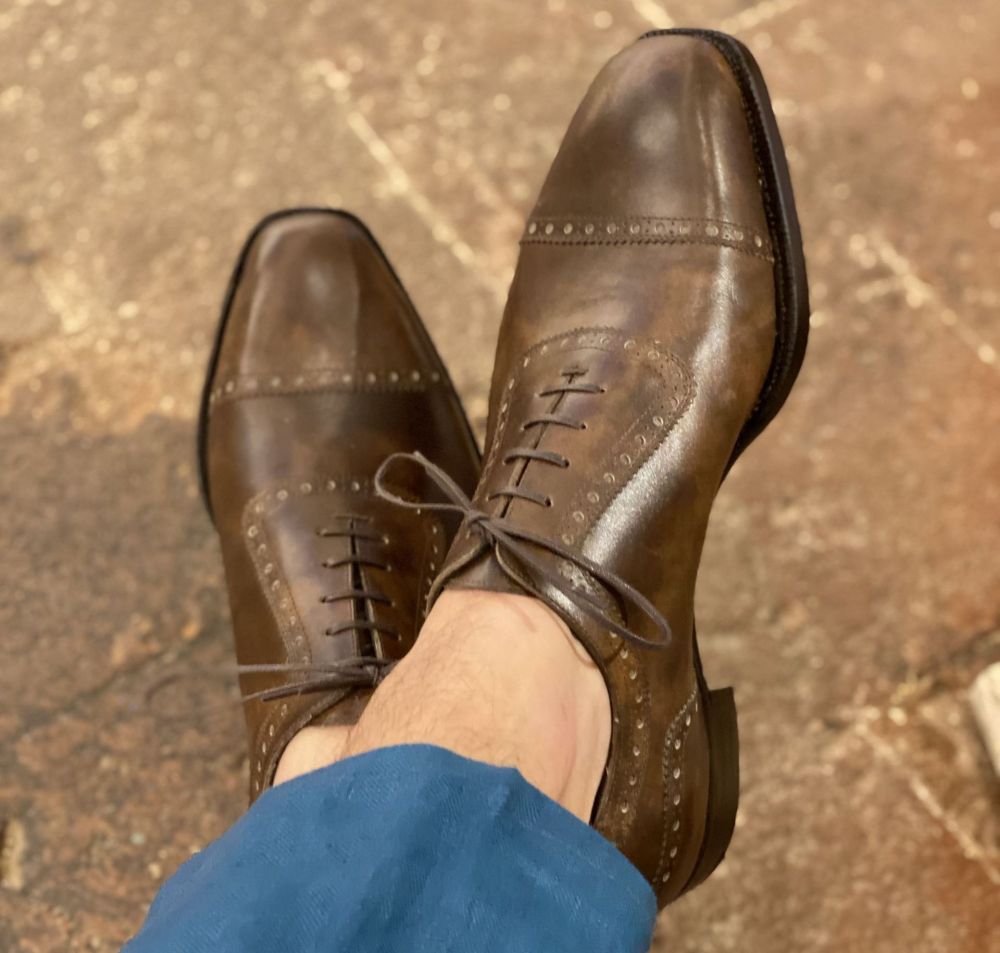
I quickly tried them on even though I was wearing no-show socks and took a few steps to assess the fit.
Instep was great, width was sufficient and so was the toe box space.
Of course, I need to shine them properly and enjoy them but this experience also gave me a lot to think about.
Reflections For The Future
When assessing the fit I also looked for things I could do better.
For example, on one of the shoes the lasting could be tighter next time especially at the heel part.
Or that I could add more paste at the side reinforcements to make the shoes stiffer there if I want.
What’s Next?
Now that school is officially finished, I have a lot of plans.
For starters, I will continue making shoes and practicing.
I am also looking for a space in Florence where I can set up my workshop and hopefully meet all of you.
This is a project that I hope to finalize in the next few months.
In the meantime I will travel to other workshops around the world and try to pick up techniques.
I might accept a few commissions of remote bespoke/mtm/mto as long as you are aware that the end product will not yet be astonishing.
The cost will be lower at the 1000-1200$ range since it does take 2 weeks for me to make a pair plus the materials.
Expect big things from me and rapid improvement though.
Final Words
This is the end of the “Becoming a Bespoke Shoemaker” Series at least for now.
It was more of a diary of some sorts but hopefully showed you not only how much effort handmade shoes take, but also teaching you a bit.
My excitement for the future is at an all time high and I cannot wait to see where I will go.
In time, “Mandilaris Bespoke” will be a thing.
Thank you everyone for reading through this journey and following me.
I will see you next week with a Review of Acme Shoemaker.
Thank you for reading,
Kostas Mandilaris,
Misiu Academy


Great job, Kostas!
Thank you!
Hi Kostas!
I’m impressed with your first attempt at a bespoke shoe! Bravo 🙂
Regards
Anthony (Tony)
Hi Tony, thank you! Here’s to more in the future!