The (Real) Journey Begins
Welcome to Part 1 of my new “Becoming a Shoemaker” Series.
In this series I will be documenting my journey at the Stefano Bemer School where I will learn how to be a Bespoke Shoemaker.
You should expect a mix of tips, thoughts, frustration and excitement!
And hopefully some inspiration for those of you wanting to learn the craft.
The Premise
When Covid and visa issues for other students pushed back my shoemaking course for 2 months I was slightly disappointed.
However, I managed to fill that time with the Leatherworking & Bag Making Course.
I was not only excited to learn bespoke shoemaking, but also to make friends with similar interests.
Turns out, due to similar issues I was the only student in this intake!
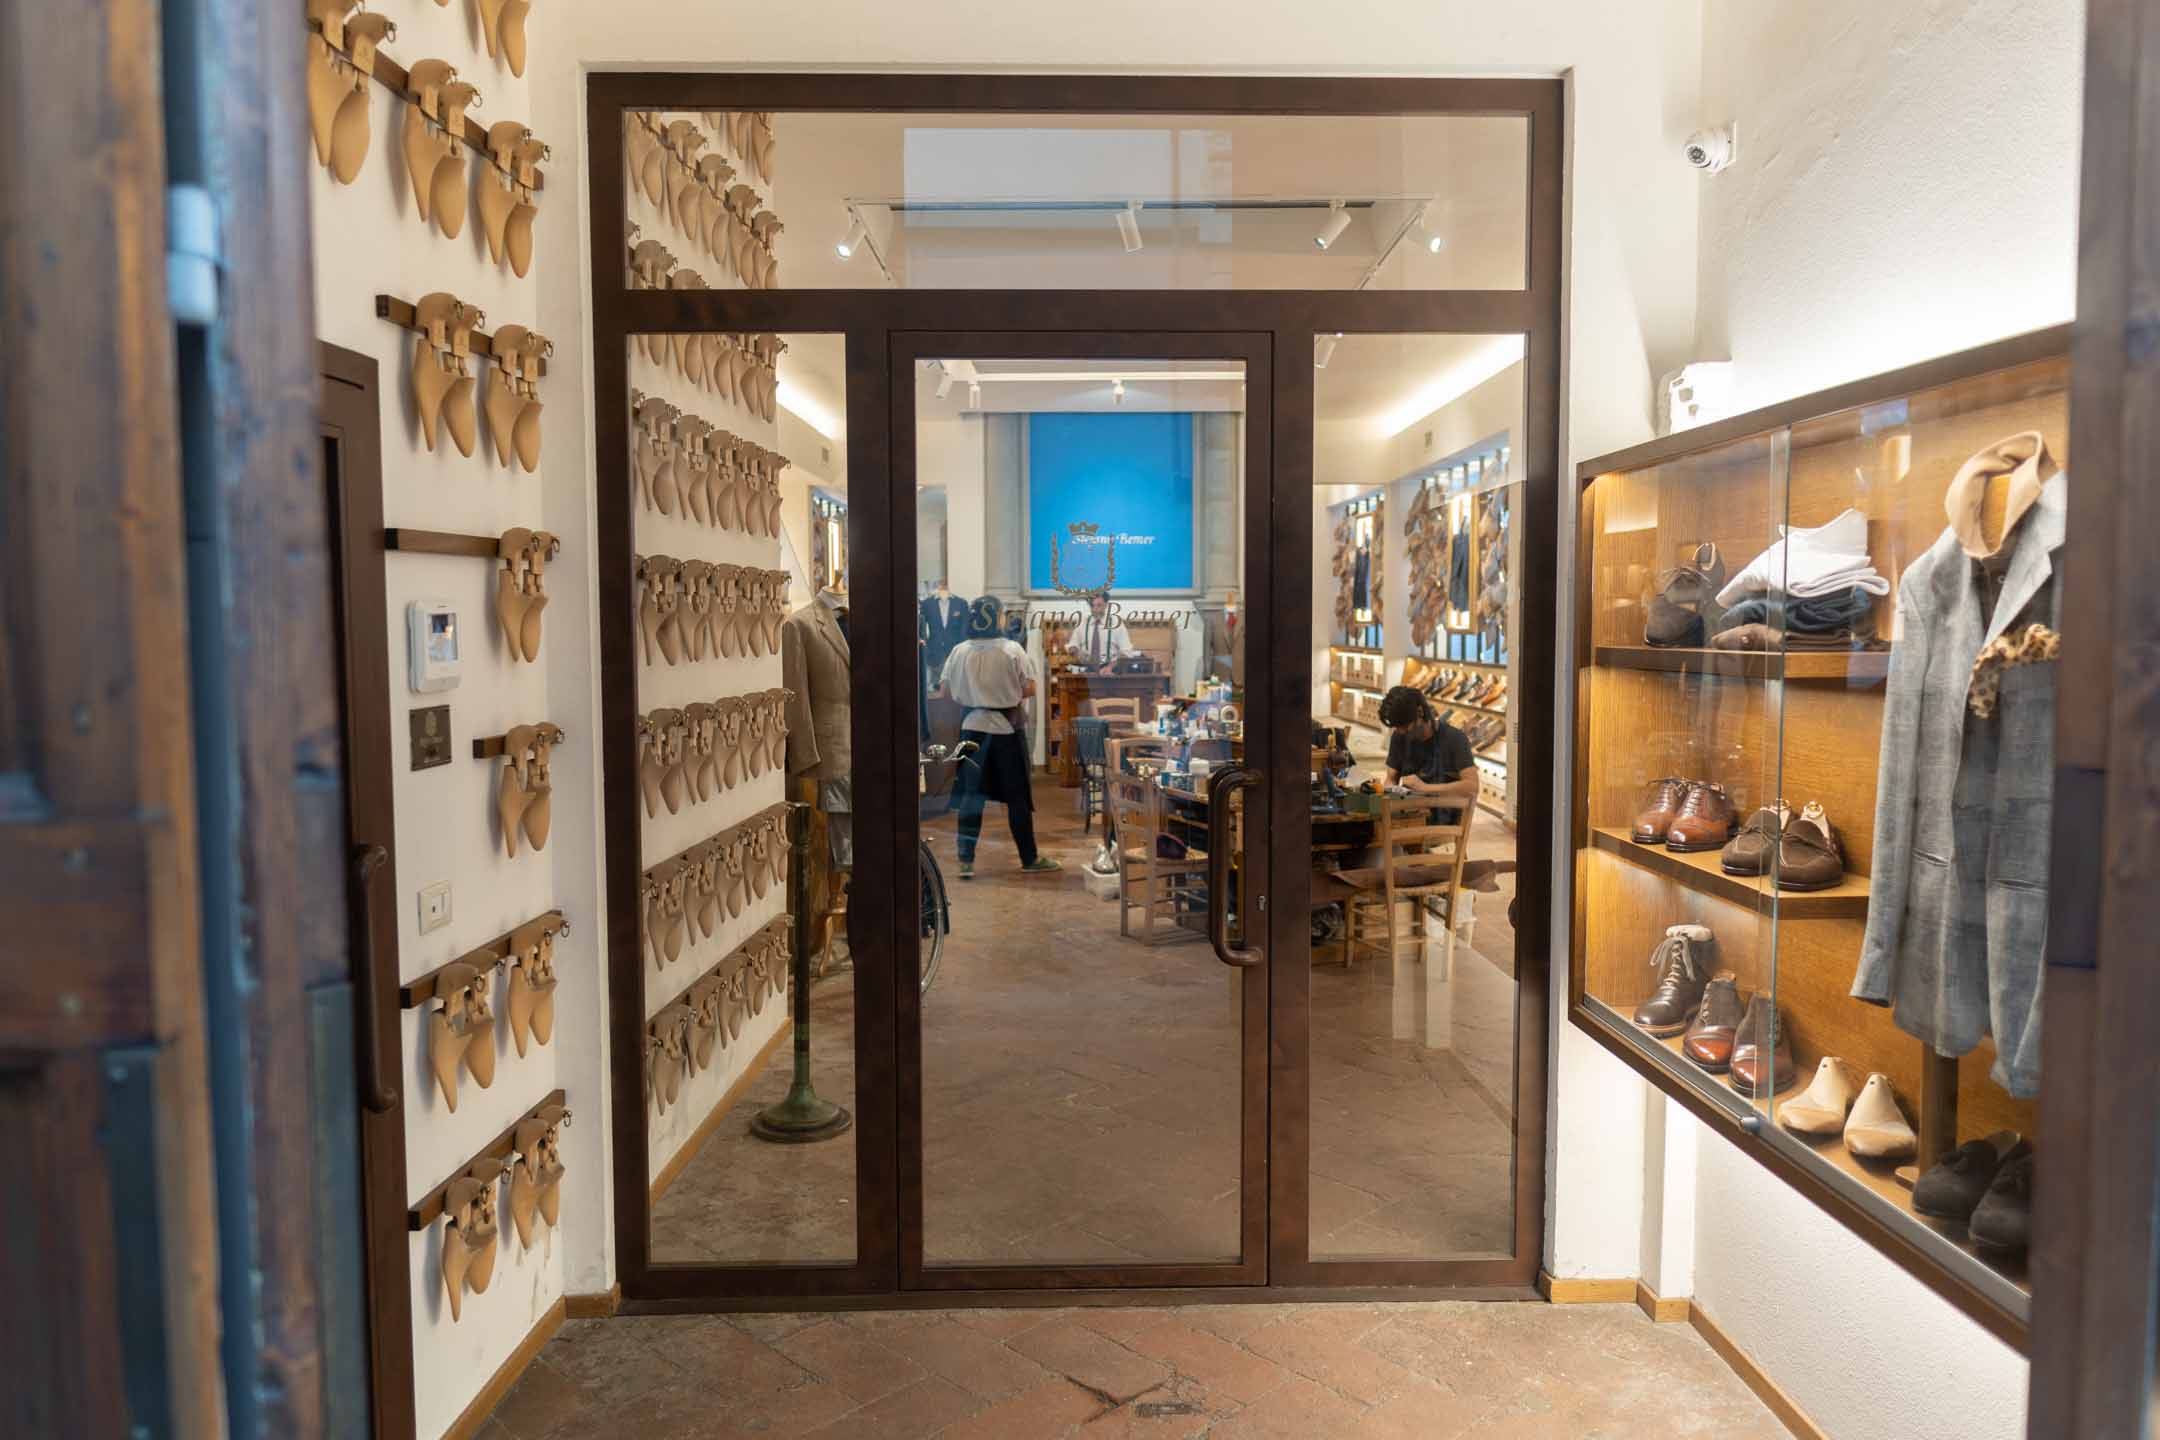
This meant that instead of studying at the academy, I get to learn in the real Stefano Bemer Store in Florence.
I have my own workbench and I work alongside real maestros and artisans in the store.
Quite exciting, if not a little nerve-racking because I feel I need to perform well.
And as you will see during this series, performing is very difficult.
My Teachers
Technically I have one teacher, Betina.
She is originally from the Philippines and was one of the original students of the rebranded Stefano Bemer brand in 2015.
Now she is an expert shoemaker and actually employed by Stefano Bemer in the store.
She is the one teaching me one on one for the course and teaching me everything she knows.
Usually Masako is the one doing the course and she is really one of the old guard.
Probably over 2 decades of experience and tutelage under the original Stefano Bemer.
If Betina is not available she is always there for me.
There are also a few more people in the store, including 2-3 people practicing and helping.
If you have no prior shoemaking or leather knowledge, expect a lot of repetition and training!
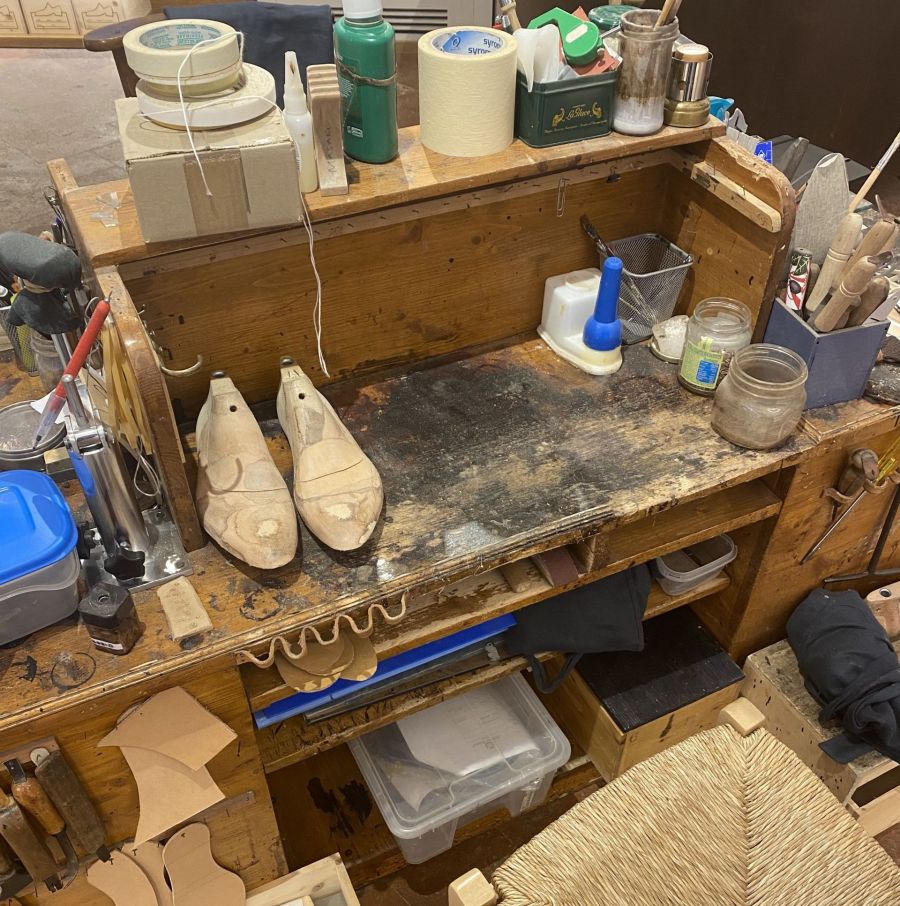
Sharpening Your Knives (A Lot)
A blunt blade is a dangerous blade.
When a knife won’t cut well all it takes is a little extra force and loss of grip to injure yourself or ruin your creation.
Expect to spend most of the first day learning how to sharpen your knives.
There are multiple ways to sharpen but I will briefly just mention a few.
You can use a whetstone, a sander, sandpaper or other types of stones which I don’t know the terms for yet.
The goal is to create a flat surface with a sharp edge with no excess material at the top or bending at the back.
It’s amazing how something relatively simple is so complicated and I am not great at it yet.

What I can tell you is that it is essential to have a sharp knife for shoemaking.
I would say we spent about 4-5 hours sharpening our knives and correcting some tools.
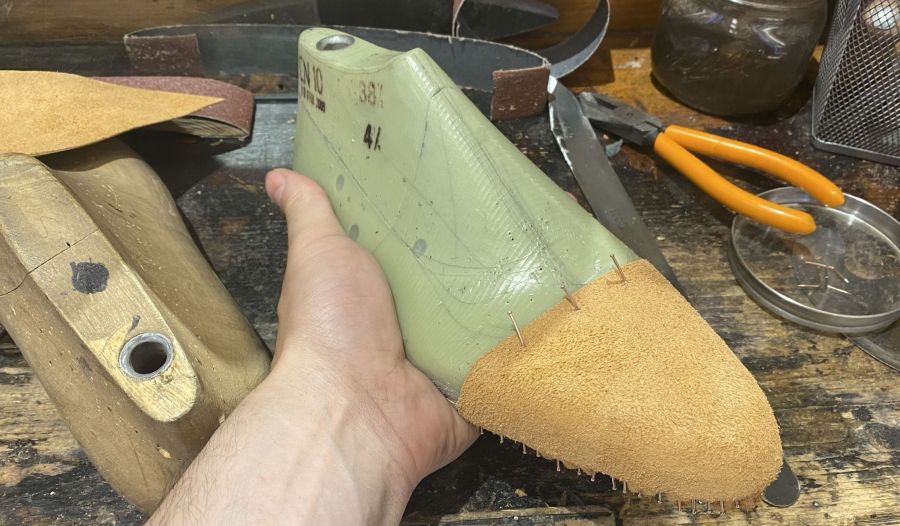
Learning How To Hand-lAst
You cannot just go right into making a full shoe.
The first thing will be cutting insoles from thick leather and learning how to last them on a last.
A last is a 3D rendition of a foot made usually from wood or plastic.
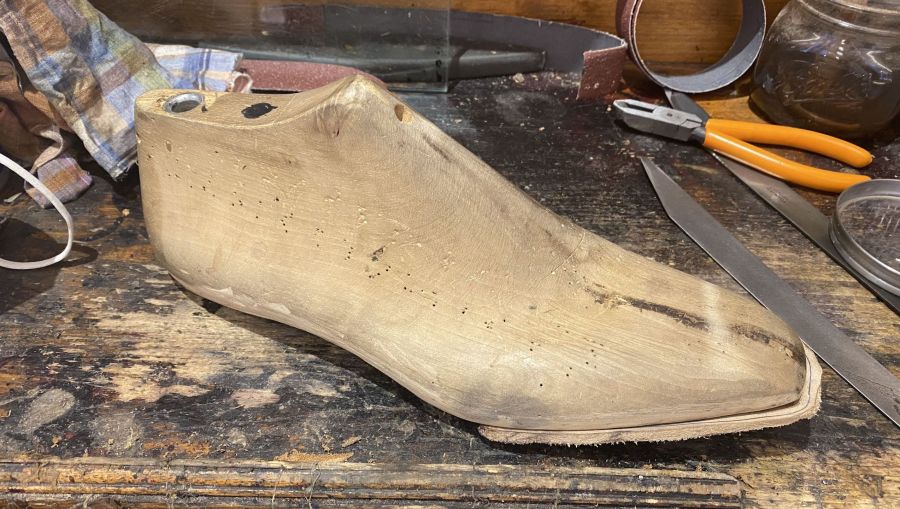
The first step is to trace the exterior shape of the front of the last on the leather.
You proceed to cut that shape leaving some allowance for trimming later.
In order to attach your insole to your last, you will meet your new best friends: nails and the shoemaker’s pliers.
Before that however, it is important to wet your insole with water so it becomes less stiff and more pliable.
You begin by hammering a total of 4 nails, beginning from the top middle part of the insole.

Pulling to stretch the leather, you hammer another 3 nails at the very bottom, covering the middle, left and right.
You have to hammer firmly with your pliers, using more gravity rather than a bouncing motion otherwise the nail will reverb and bend.
After they are inside, you bend them and hammer them down so they lock in position.
You can now trim the insole a bit leaving about 5mm of allowance.
You proceed to finish things up by attaching a further 3 nails on the very top of the toe area.
The Bike’s Air Chamber Rubber Band
If you have ever watched any proper shoemaking videos on YouTube, you will often see them wrapping the shoe with a rubber band.
This is usually from used bicycle air chambers as they are very flexible and stretchy.
When you finish the above steps, you need to mold the insole to the shape of the last.
You do this by wrapping the last and insole very tightly using these rubber bands.
You begin at the top, make a couple of rounds while making sure to stretch as much as possible in every corner.
Once you reach the end you can just make a knot or just fasten them in place.
Don’t forget to hammer them with your shoemaker’s hammer everywhere so the excess air goes away.
Tip: Don’t hammer where the nails are or you will unnecessarily damage the rubber.
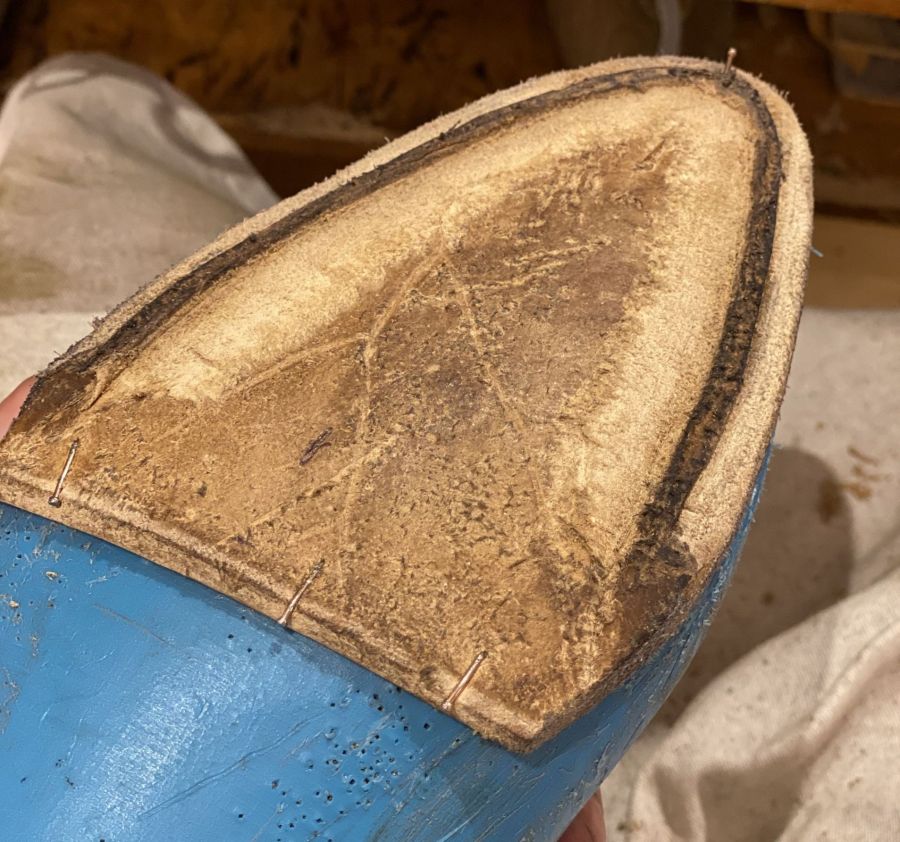
Trimming the insole
After you let the last sit until it’s dry (just leave it overnight)
This is where things begin to become more difficult.
Your insole needs to be flush and level with your last.
To do this you will need two tools which are your trusty knife and a rasp.
We began by trimming as much as possible while at the same time keeping the insole straight.
Before all this, don’t forget to remove the top 3 nails at the top of the insole!
The closer you go, you will see that a “lip” forms on the top between the insole and the last.
You have to use your blade to cut the lip, which is just a vertical tiny incision.
Don’t go haywire trying to remove massive amounts and make sure the blade is sharp.
Trying to do straight long cuts is better than small uneven ones.

Once everything is as level as possible, it is time to use your rasp to “eat” away the excess insole and make micro adjustments.
The trickiest thing is not getting a slanted cut and also the front curve of the toe box.
Just practice and you will eventually get better at it.
Lasting A piece Of Lining
Moving forward, it is finally time to hand-last a piece of lining.
This means that you must have a pattern of a front part of a shoe.
Remember that it not only depends on which shoe you are choosing (left or right) but also what you will be lasting.
For example, the lining goes upside down so you need to flip your pattern.
The concept of lasting a piece of leather on a last is simple but not as easy.
This is because there are a lot of movements and ways to use your hands and pliers that are impossible to explain in writing.
As you decide where you will attach your leather, you hammer 3 nails on the top to keep it steady towards the bottom.
Flip the shoe around and using your pliers, you pull the sides and fasten them in place with a single nail.
Then it is time for the top, where you pull the leather over the toe box firmly and nail it in place.

All this gives you a base to work on.
What you need to do is use your pliers and stretch the leather while hammering nails in such a way that there are no creases and the leather is smooth on the exterior.
In the first few attempts, the bottom of your shoe will look like pinhead from Hellraiser.
Some tips are that you should work your way from the exterior part of the shoe, move to the interior with a few basic nails and then do the top.
The top is usually the place that requires the most nails and you shouldn’t be afraid to readjust them if needed.
In the inside of the shoe there is a special motion that involves first opening (pulling up) and then pulling the leather diagonally.
To help you with pulling, you can make a mark in the bottom middle part of the shoe so every time it can be a reference point for your pliers.
It’s all trial and error.
Removing The Nails
We are almost done!
When all the nails are in place, you can trim the excess leather using your knife with a 5mm allowance.
This doesn’t have to be so accurate but I encourage you to place your nails symmetrically and closer to the edge.
With the leather trimmed, you can proceed to lift the nailed leather up a bit and apply glue underneath.
Let it dry for 5 minutes, because we are going to remove the nails soon.
When it’s finally dry you will use the back of your shoemaker’s hammer to bend the nails inwards.

After you hammer down their base so you don’t damage your hammer but also flatten everything as much as possible.
Hammer a lot around the edges, smoothening out any creases or leather.
Afterwards we remove all the nails holding the leather one by one and smoothen the surface by skiving and trimming the excess leather on the creases.
This is usually just on the toe box area and then hammer once more to ensure evenness.
Lastly, remove the final 4 nails and your lasted insole will come off.

Tip: I forgot to mention that you should also have removed the 3 nails on top of the shoe at this point.
Lasting Both The Lining & Uppers
After the lining, you will also experiment with regular leather and do the exact same thing a few times.
There are few key differences when you last both the lining and uppers however.
The procedure is exactly the same until the insole is trimmed and flush with the last.
This is the time you need to attach the lining to the upper leather with a small amount of glue in between only at the base.
Connect them together and attach them to the last with the same way as before.
However, this is where you pull the upper leather backwards now because you want to individually last the lining first.

Same thing and after this is done there are a few extra steps.
From the front end of the toe, you should mark 7 centimeters in length and then make an perpendicular line from one side to the other.
Think of it as a sideways “T”.
We do this because we will use a material called vegetable paste that is very white and gooey and will remind you of some terrible adult movie.
It has the quality of hardening when it dries (I cannot believe I typed that after my previous sentence) so it makes the toe stiffer and stronger.
You apply it on the top of the lining all the way to the line you made before.

Slowly and gently roll the upper leather over it to avoid creasing and just like before begin to last it.
When you are finished with this one, you can remove all the nails in the same way as before and that’s it.

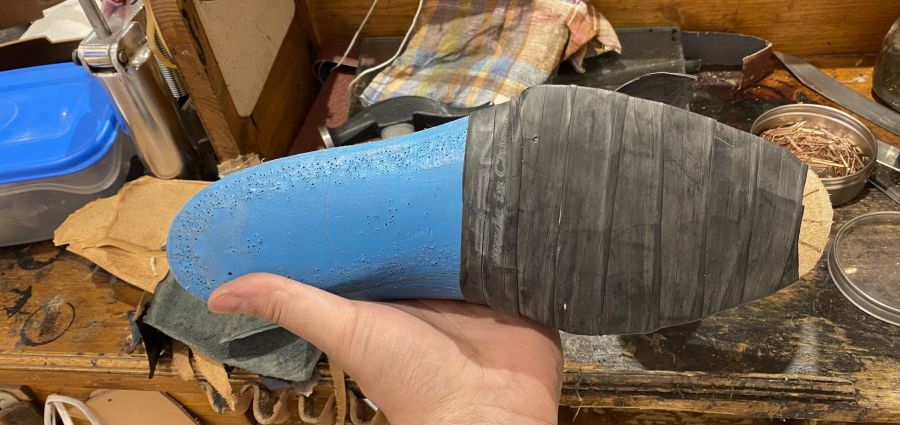
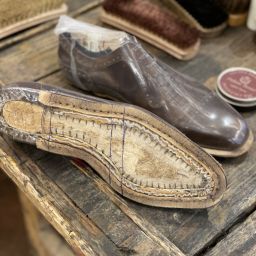
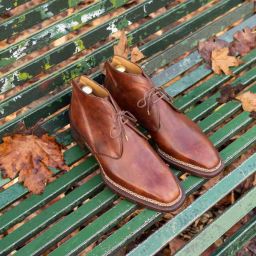
You should end up with something like this.
Notes On Hand-welting
The above exercises want to show you the concept and process of lasting a piece of leather on a last.
As you will see in the next part of the series, shoemaking way more complicated than that.
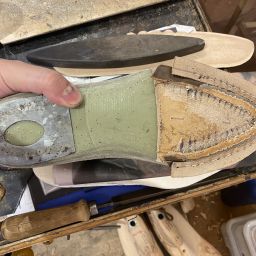
In the next series we will talk about “The Wall” which is a base for hand-welting and requires even more precision and neurosurgeon skills.
If you think about it, you will be recycling the same procedure just taking it a few steps further each time.
 Here’s a snippet of how the wall looks like, even though my first try was rubbish.
Conclusions
This concludes Part 1 of my “Becoming a Bespoke Shoemaker” Series.
I hope you enjoyed it and if you are an aspiring shoemaker, hopefully it was helpful.
Please note that I am merely a novice student and no expert by any means (yet).
However my perspective as a beginner might be helpful without too much jargon for everyday people.
I will see you next week!
Thank you for reading,
Kostas Mandilaris,
Misiu Academy


It’s fascinating to watch your progress. Years from now, I’ll be able to say that I knew Kostas Mandilaris before he was famous.
Thank you Peter. I hope one day to make something for you!
Dear Kostas,
Thank you for this well written ‘how to’ instruction. Its better than a video because the explanation is clear.
I look forward to Part 2.
Srini Naidoo
South Africa
Hello Srini, thank you for reading and I am happy you find it helpful!
Hi there, just want to say these information is so useful, particularlly when trying to guage value for money. Kind regards,
Daniel B