![Welted shoes]()
 Hand-Welting Dress Shoes
Welcome to Part 2 of my “Becoming a Bespoke Shoemaker” Journal Series.
In this article we will go through the process and principals of preparing the toe puff.
Such process is essential to hand-welting leather shoes.
This is the step that bridges lasting the leather and sewing the sole on the shoes.
Let’s begin!
Recap From Last Time
Let’s do a quick recap first of what happened in episode 1.
In the First Article (Read Here) we talked about the basics and starting to last leather and insoles on a last.
The idea was very basic and devoid of too much complication and simply involved lasting pieces of leather on the last.
First we lasted lining, then real leather and then both things together one by one.
In order to take the next step and prepare to welt by hand there are other important steps that you need to prepare.
Most importantly, the “wall” which is a construction that allows you to pass your awl through and welt.
By welt, we refer to a strip of leather that connects the insole and uppers via a stitch.
Later, you sew the welt to the outsole which explains why it is easy to resole a welted shoe.
In this article before we go straight to hand-welting we will discuss the creation of this wall, the purpose and any steps lost from the previous update.
At the end you should have a more advanced understanding of hand-lasting and providing structure with a toe puff.
Creating The “Wall”
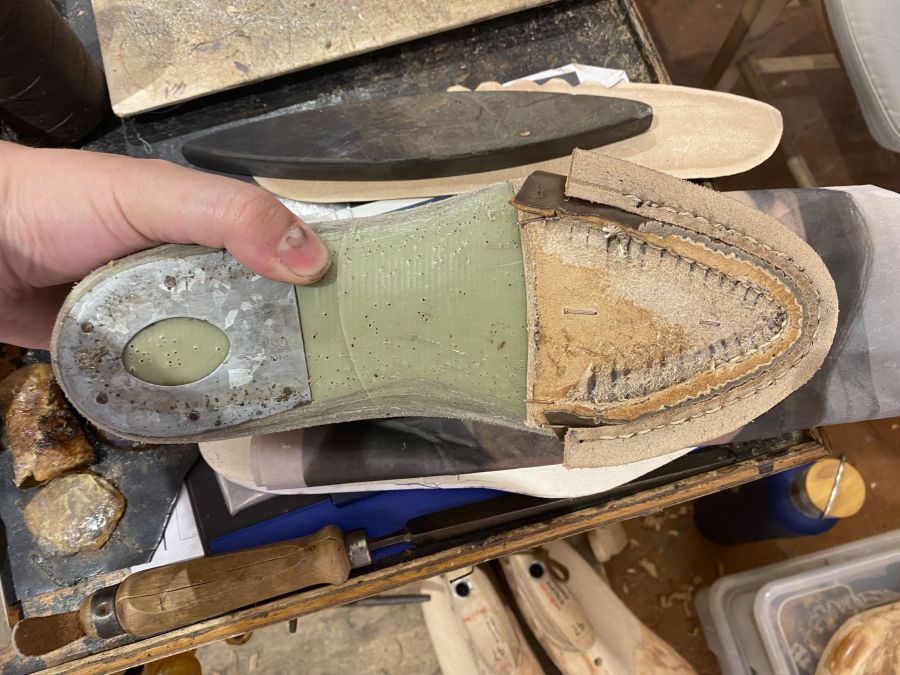
If you remember from the previous article I briefly showed you the “Wall”.
The Wall is essentially a structure that remains after removing material from the exterior part of the insole and then leveling it from the other side.
Very hard explain it with words but the image gives you a better idea.
The purpose of this wall is to allow space for your awl to pass through in a crescent moon shape and come through the uppers and the welt.
You have to mark 0.7 cm evenly from the edge of the insole all around it and draw a line with a pen.
In a harder notion to explain, you now need to remove a bit more than 1/3 and a little less than 1/2 of the insole there.
Accurately draw a line that will serve as a guide using your fingers (it’s all about practice).
Using your finger as a counter and holding the knife flat and vertically, measure that depth you just created on the side.
You then push the knife in at the top of the 0.7 cm line you made before and follow it all the way around.
The reason is to create a cut which is the length of the side line as this indicates the material we will remove.
Sometimes it can take a second pass but make sure to be consistent and try to do it in one go.
Wet the wall and use an all to afterwards open up the cut a bit more.
Proceed to diagonally cut the lip/edge on the exterior so it makes it easier to remove the excess material.
Lastly, using your knife in a flat way or a French skiver (feathering knife) remove this material all the way to the line.
There will always be some leftover so use your rasp to level and then glass to smoothen.
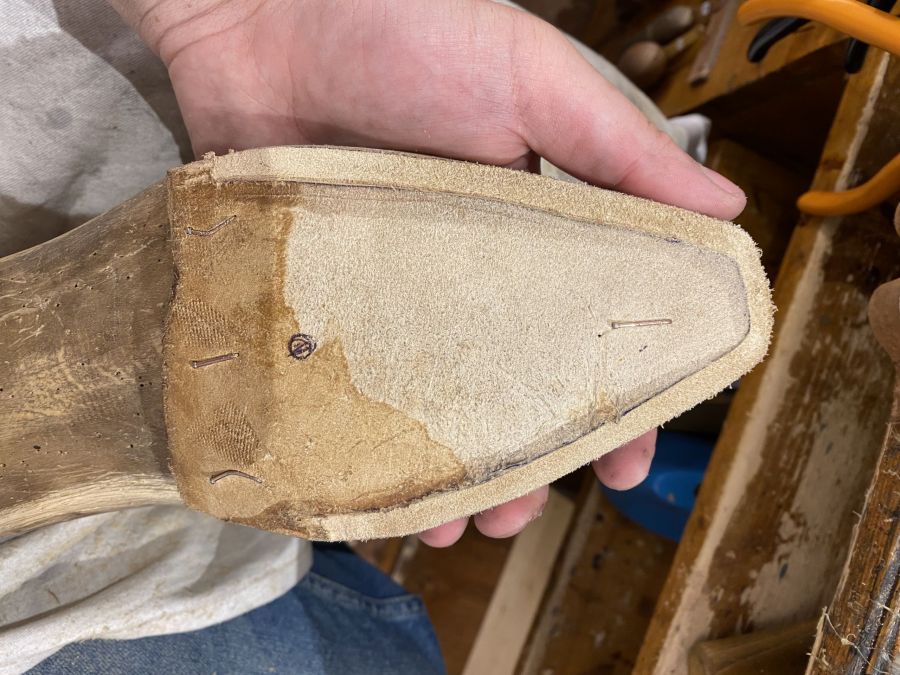
Onto The Inside Part
Once you are happy with the exterior part of the wall it is time to work on the inside.
The idea is generally the same as you want to remove the same material as the outside.
You want your wall to be structurally strong and give it some space though.
This is why will give an allowance and width of 0.6 cm (6 mm) but even if it’s a tiny bit wider it is fine.
The wider it is the harder it will be for your awl to pass through.
In the same way as before, you use your knife vertically to cut a depth equal to the exterior part of the channel.
Then shave it all the way around using the feathering knife, rasp and glass.
Most importantly you want the depth to be sufficient, uniform and the surface to be flat and even.
Preparing THe Welting Holes
Oh boy, if there is one thing that is the most important here it’s this.
You need to make markings that will indicate where you need to pass your awl and welt evenly.
You begin at the top middle point.
Use your dividers and set them at 0.5 cm and make 3 holes on each side, putting the base of the divider at the last hole you made each time.
Then set it to 0.7 and go all the way to the bottom.
The difference is because of the curve of the last and to space them evenly.
Use your awl on those divider holes to create a tiny cut and make references for later.

As a last step make sure to use a pen and make extended lines that showcase where the holes will be/are.
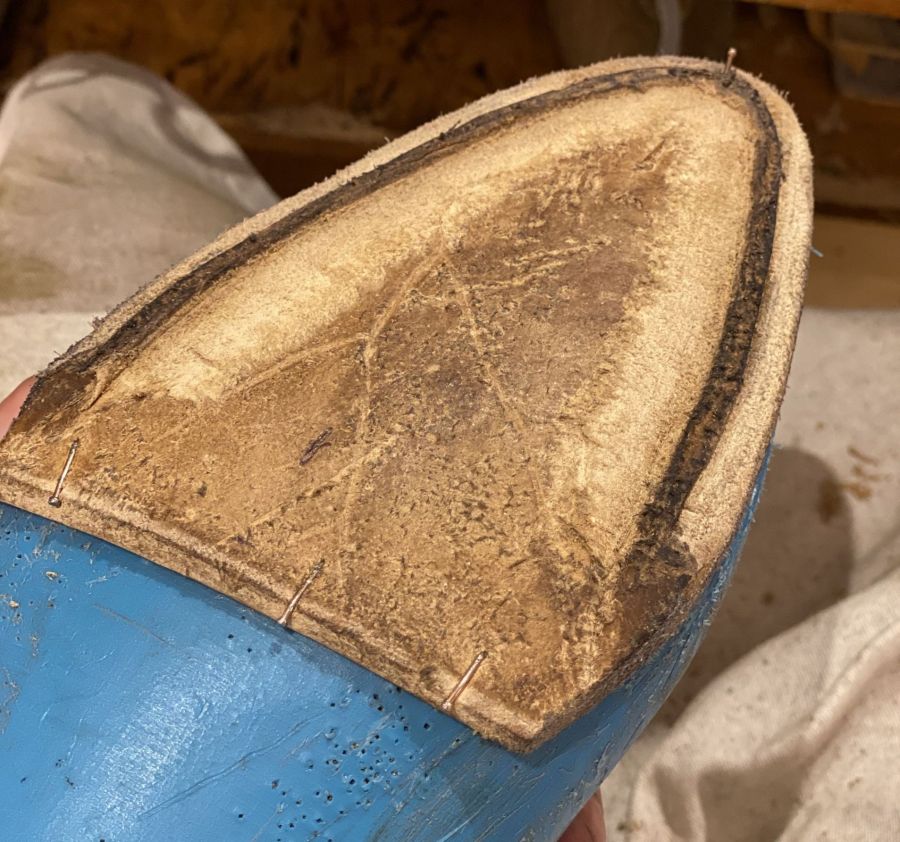
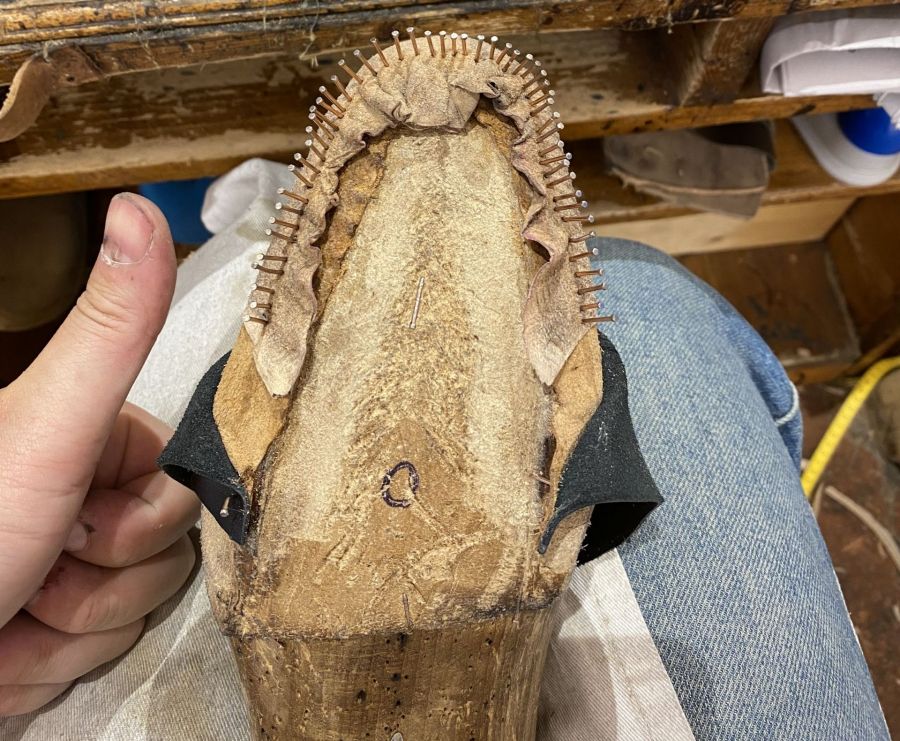
Hand-lasting & Preparing The Toe puff
After building the wall you are ready to hand-last the uppers.
This time, there will be an extra step in between however as we need to reinforce the toe area.
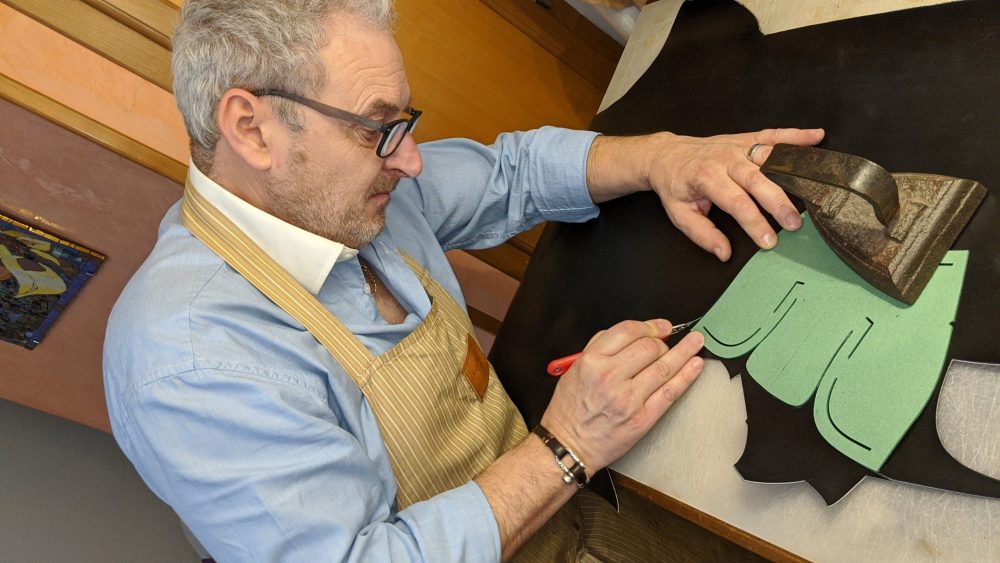
To do this we are going to use a stiffer piece of leather called a toe puff.
It has a few steps to prepare, but most importantly you need it to soak in water so it becomes softer and more pliable.
I would say 15 minutes is enough but it’s ok if you keep it for a longer period of time.
Before we begin lasting the toe puff, we first need to last the inner lining just like we did before.

And after that you need to make that 7 cm marking from the front of the toe and then parallel to the last.

This shows you where the toe puff will sit but also where you will use the special glue paste to harden it.
As soon as you do that, you need to actually prepare the toe puff.
Begin by drying the excess water with a newspaper which is your new best friend.
Then use glass on the smoother side to gently scratch it and help the glue stick easier.
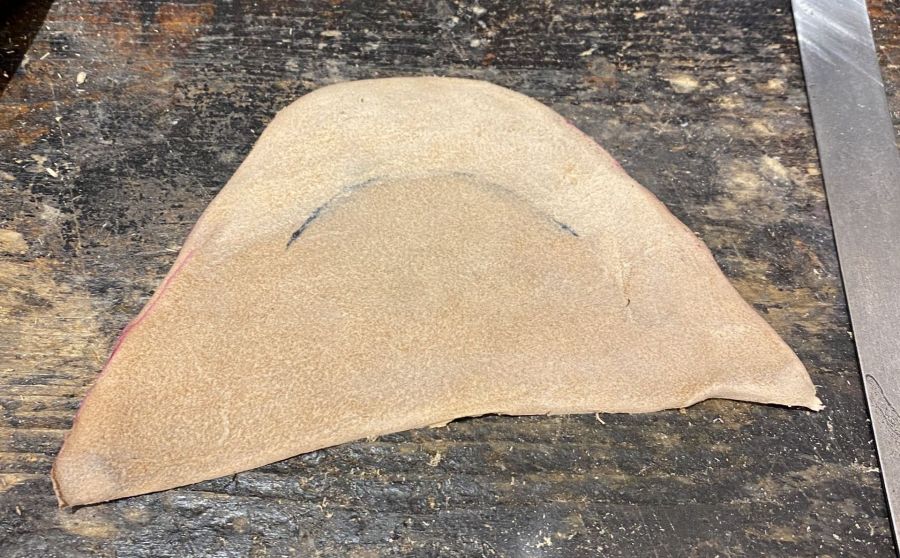
On the other side, the idea is to skive the base around 1 cm in and around the front since it needs to be thinner.
It’s quite hard to explain this in words but it should give a quick idea.
Lasting The Toe Puff
Now we are finally ready to last the toe puff after the preparation.
Apply the “Pasta Vegetable” inside the markings you made on the lining.

Make sure to leave about 3 mm of space but also apply it on the bottom under the last.
This paste hardens when it dries and gives more structure to the toe.
You then proceed to last the toe puff as usual with a couple of slight deviations.
Don’t pull too hard because the leather might rip and as my teacher says you must “feel the leather”.
Also, put the nails much closer to the edge and use more of them to ensure no creases.
At the end you do NOT remove the nails after hammering them since the paste has to dry and harden.
Hammering the Toe Puff
While you wait for that to happen, you need to finish the toe puff above.
The idea is that you need to hammer it flat and smoothen it for 5-10 minutes.
Try to follow the shape of the last and avoid jagged corners.
At the end of that you can use the wooden base of the hammer to smoothen it even further.
When the toe puff is solid and quite shiny you know you are there!
In certain cases where your skiving isn’t enough, you might have to rasp certain areas.
Do it lightly as you don’t want to damage the toe puff too much.
Repeat until it feels appropriate.
This is a step that takes experience and practice.
Rasping & Following The Last
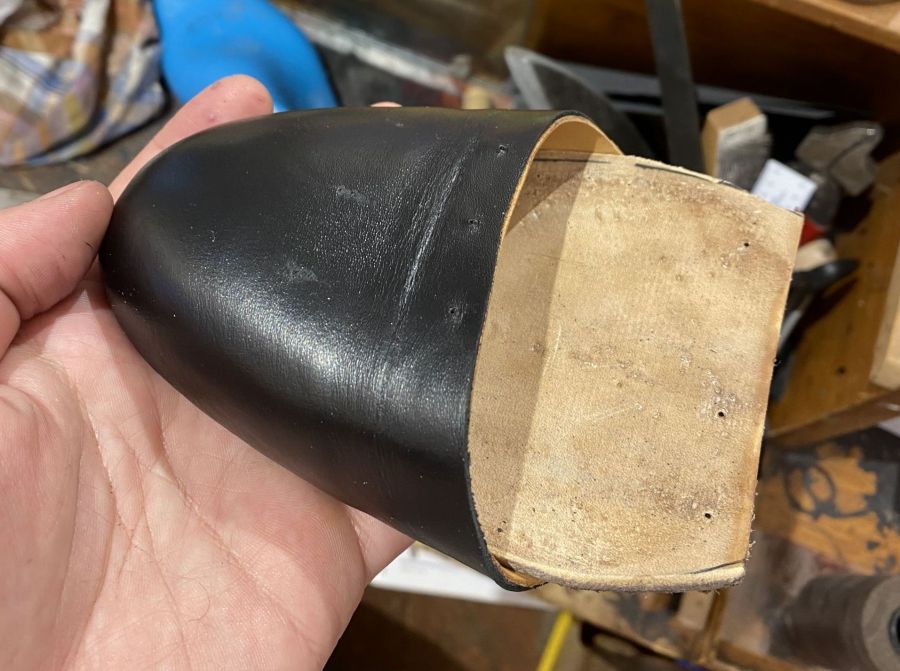
The last step for the toe puff is to remove the nails after the paste dries.
Skive the excess leather on the bottom and hammer hard to flatten.
Now you need to use your rasp and trim the excess leather from the edge so it follows the last.
This is impossible to explain with words, but you can draw a line following your last.
It will show you how much you need to rasp and shave, creating a bit of a corner in the process.
Be careful not removing too much of the toe puff as the lining will show under it.
Once you finish this, it is time for the final step.
Lasting The Uppers
The final step is quite straight forward.
You simply last the uppers whose base you attached to the lining normally.
You put pasta vegetable on the toe puff, stretch, nail and last.
At the end you once more hammer a lot and skive the excess leather.
Marking The Welting Holes
At this point you are ready to hand-welt.
Before that I actually had to practice on just stitching by hand in similar motions.
It was also great practice preparing the thread as this is an art of it’s own.
We will discuss it in more detail in the next episode about hand-welting.
The idea is that here you will punch about 7 holes with your awl from the inside.
Three on the left, three on the right and one on the middle top.
If you made your wall correctly and you are consistent then the awl will come at the same angle and distance every time.
Having 7 reference points means you can draw an outline with a pen all around.
This outline is where we will welt later.

Here’s a snippet of my first try (without a welt) that was hideous and extremely difficult.
And this should conclude today’s lecture.
Conclusions
This brings us to the end of Part 2 of Becoming a Bespoke Shoemaker!
A very difficult, rewarding and actually therapeutic week for me!
Every day we make progress and learn something new.
I hope you enjoy this mini-series and in the meantime check out The Noble Shoe for awesome shoes and to support the blog.
I will see you next week!
Thank you for reading,
Kostas Mandilaris,
Misiu Academy


Dear Kostas Mandilaris
Very nice how you show all this with practical work and model how a shoe is made professionally. There is a lot of effort involved, it seems to me. Also, technical knowledge and especially practical training must have years to be able to work so accurately.
For a few years now I have only worn shoes with Vibram flex rubber soles produced by Rockport, they give me a soft step and you don’t feel as tired in the evening as with shoes that have such hard leather soles.
I appreciate your work very much and it is always a great pleasure to follow your updates most of all I admire that you are still doing this craft as Shoemakers did x hundred years ago
greetings to you very kindly
Peter
Hi Peter,
thank you for following the journey. It is very difficult but very rewarding so far. I hope you are enjoying it and maybe learning a thing or two along the way.
I cannot comment about Rockport shoes but they are not the highest quality. As long as you are happy with them and feel ok, that’s fine.
Stay tuned for more exciting updates in the following weeks as I am slowly going towards making full shoes now.
Best,
Kostas