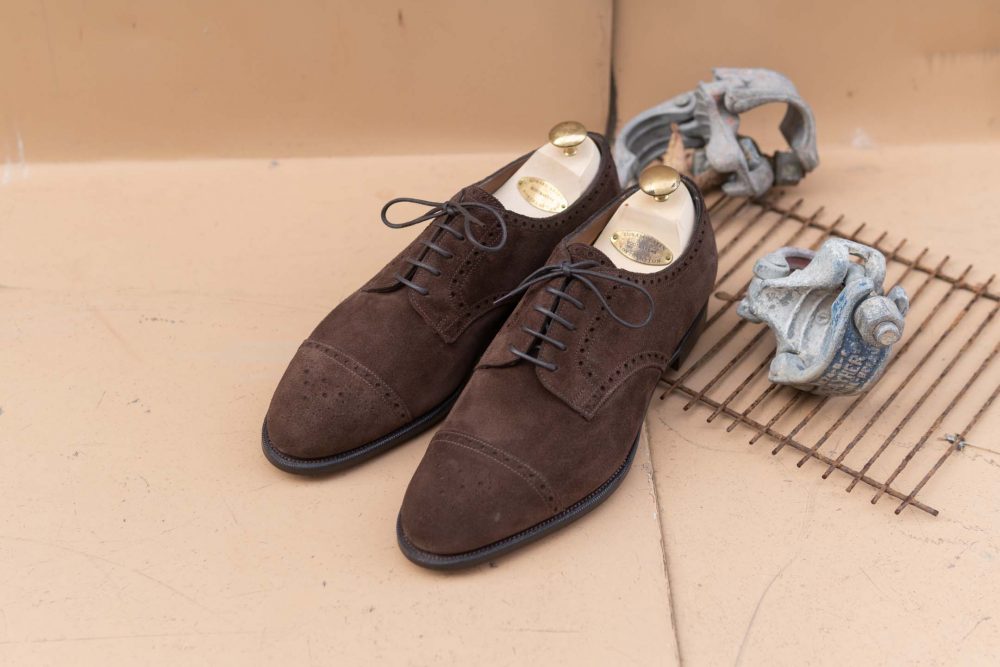
![Bespoke Shoes]()
 Things Are Getting Real!
Welcome to Part 7 of my “Becoming a Bespoke Shoemaker” Series.
This article is special for many reasons, but most importantly because this is my first pair of real Bespoke Shoes.
We will discuss challenges, tips, improvements and show you all the way to the welting.
Let’s go!
Previous Weeks Recap
If you want to follow the journey from the beginning here are the other articles:
- Learning How To Last (Part 1)
- Preparing & Lasting The Toe Puff (Part 2)
- Learning To Hand-Welt (Part 3)
- Cork Filling & Hand-Sewing A Leather Sole (Part 4)
- Edge Coloring Leather Soles (Part 5)
- Making A Blind Waist (Part 6)
And today we begin the real journey and start creating the first Bespoke Pair of Shoes!
Preface
Before I begin, I want to thank of you all for following this journey and contribute to the amazing growth of the blog.
This week was difficult for me as I woke up and my expensive GPU and Monitor fried, leaving me unable to access most of my photos.
It also mean that I couldn’t continue from the last Part seamlessly and had to skip ahead to today.
The stress of producing the content last minute and keeping the quality standards is tough!
So instead I decided that I will talk about my final project at the Stefano Bemer School of Shoemaking.
If you enroll into the second part of the program (Called Artigiano, 20 Weeks) you have to make a final project.
Until now, we only made one shoe in various simple designs.
For the final project you have to choose what you want, take measurements, produce the last, cut the leather and of course make the shoe!
It’s too much content to cover in a measly article but I will do my best and explain along the way.
Did I improve?
As you will see in many of the pictures, my improvement is staggering.
If you think about it I have produced only 2.5 shoes so far and I am on my fourth and final pair.
The consistency and understanding is getting much better, but also the practice and being able to be better on things you did bad the previous time.
For example, I wanted to make a better holdfast with a cleaner look.
My road to that started by learning how to sharpen my knives better and keeping them sharp.
The next step was to accurately draw free-hand or find alternatives (using dividers) to make the holdfast more consistent.
Then, to cut both sides of the channel perfectly and evenly, pre-last correctly and do a tight lovely welting.
I am very happy to report that so far I am extremely happy with all these!
Let me guide you through everything.
Measurements
Every Bespoke Shoe starts with a discussion and a vision.
But it is when the shoemaker measures the various parts of your foot that begins the actual process.
One cannot take their own measurements, because you need to do it both sitting and standing.
You see, our feet behave and shape differently depending on if we stand or sit.
So someone else must do it for you, if you are making your own shoes at least.
There are multiple drawings and outlines as well as measurements of length, instep, arch and ball.

And of course the projection of the actual last shape later on the drawing.
My feet fit perfectly fine in the S Last of Stefano Bemer so I didn’t need many modifications.
Then the measurements go to the last maker, who creates a 3D wooden rendition of your foot.
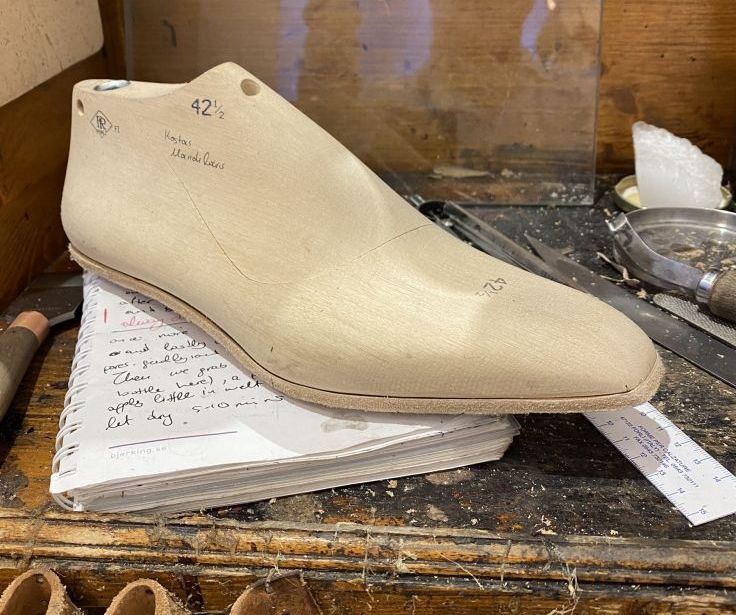
Making your own lasts from a block of wood requires years of experience.
Nonetheless, it feels amazing to have my own last!
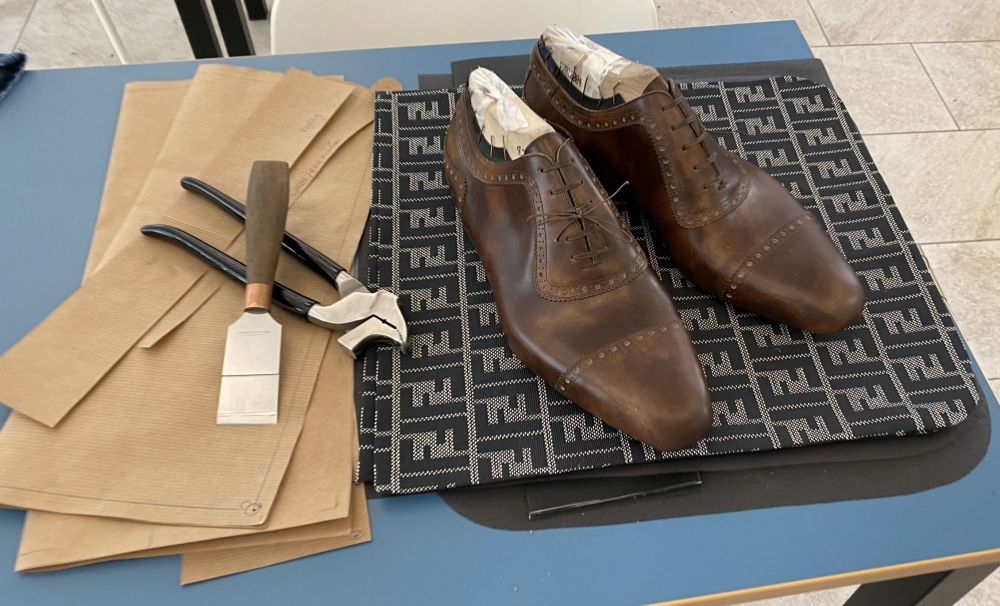
Cutting The Leather Pattern
In Bespoke Shoemaking, you design something from scratch and adapt it to the last.
Since my school is ending in just a couple of weeks, there was no time for me to learn that so quickly.
Instead, I used an Adelaide Oxford pattern from the high end Stefano Bemer Collection.
I eventually went to their other workshop that does the clicking, cutting and assembly but also finishing.
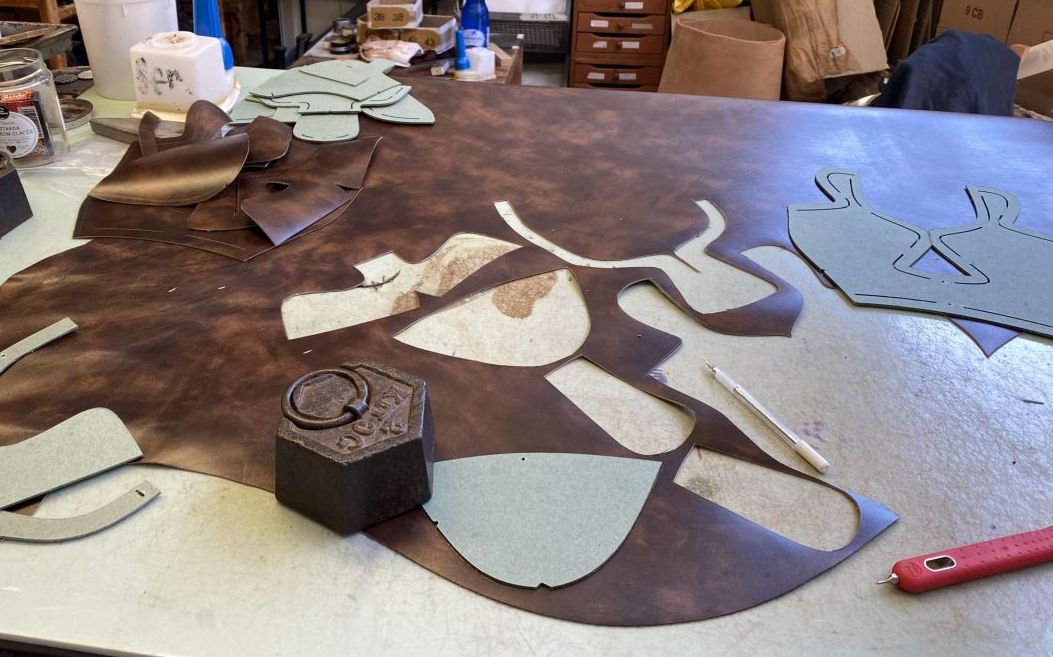
After picking the leather and lining, I received the patterns for both and went to work.
I cut all the pieces by hand and it reminded me how laborious it is, how precise you have to be and how much more there is to learn.
For my leather I chose a lovely mid-brown museum calf and a navy lining.

I think it turned out quite nice!
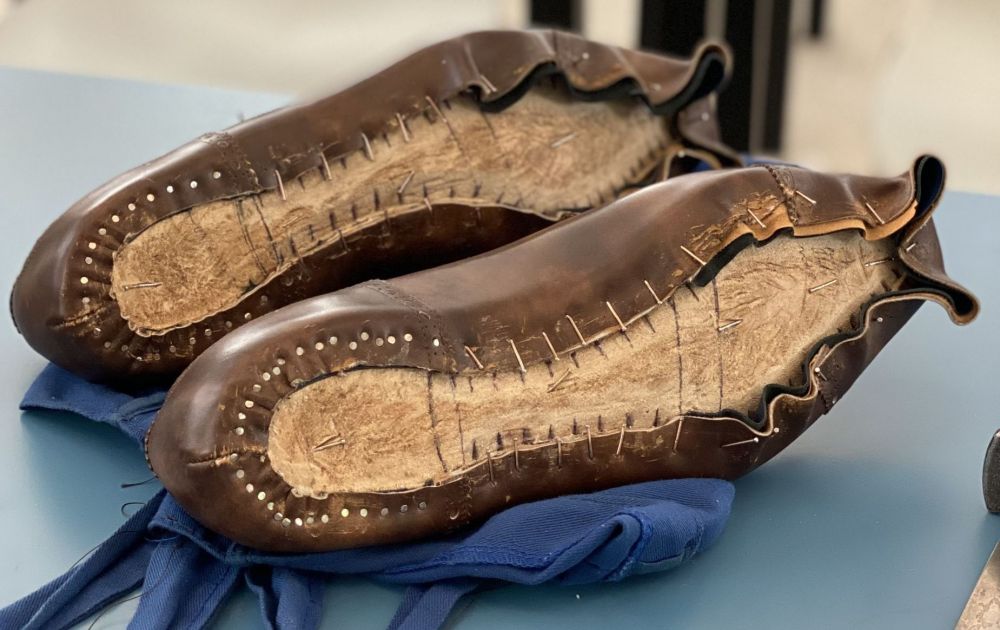
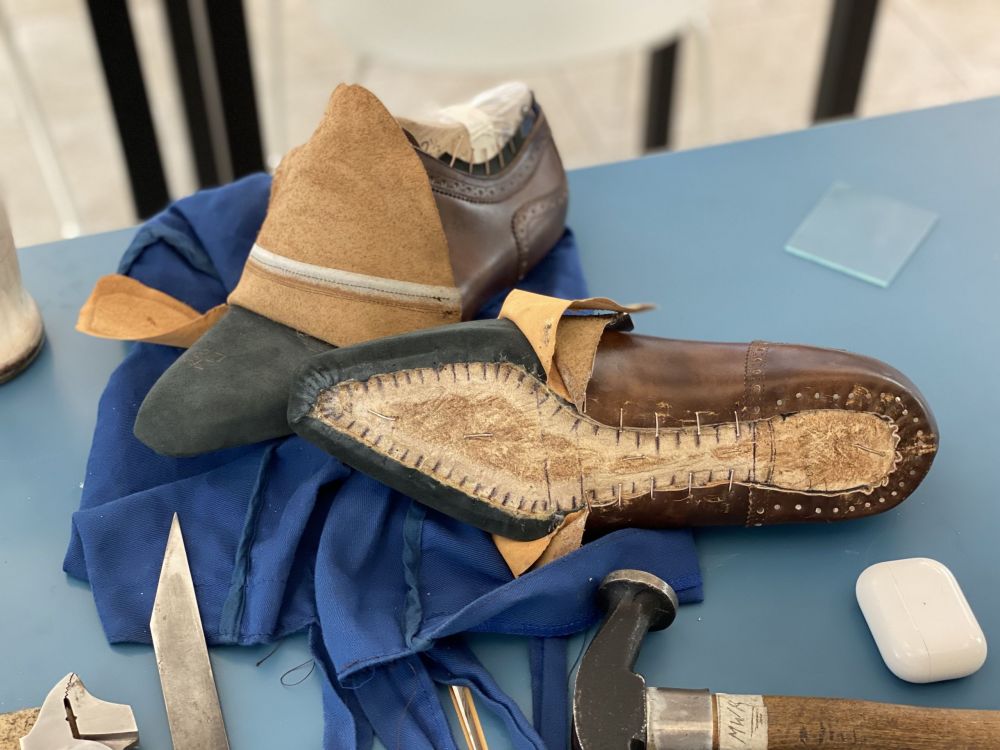
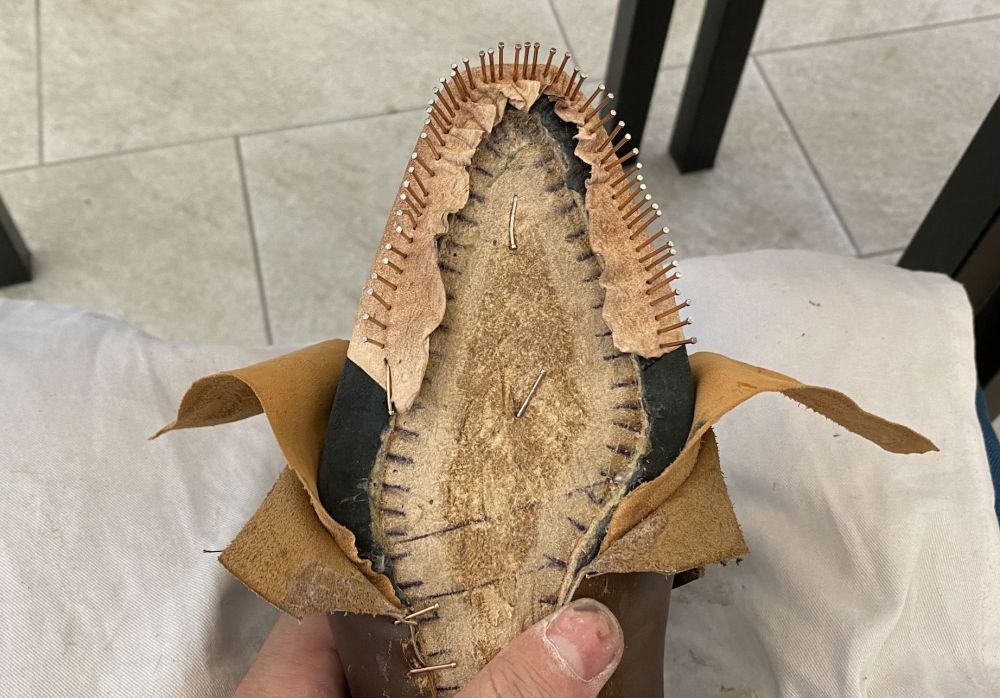
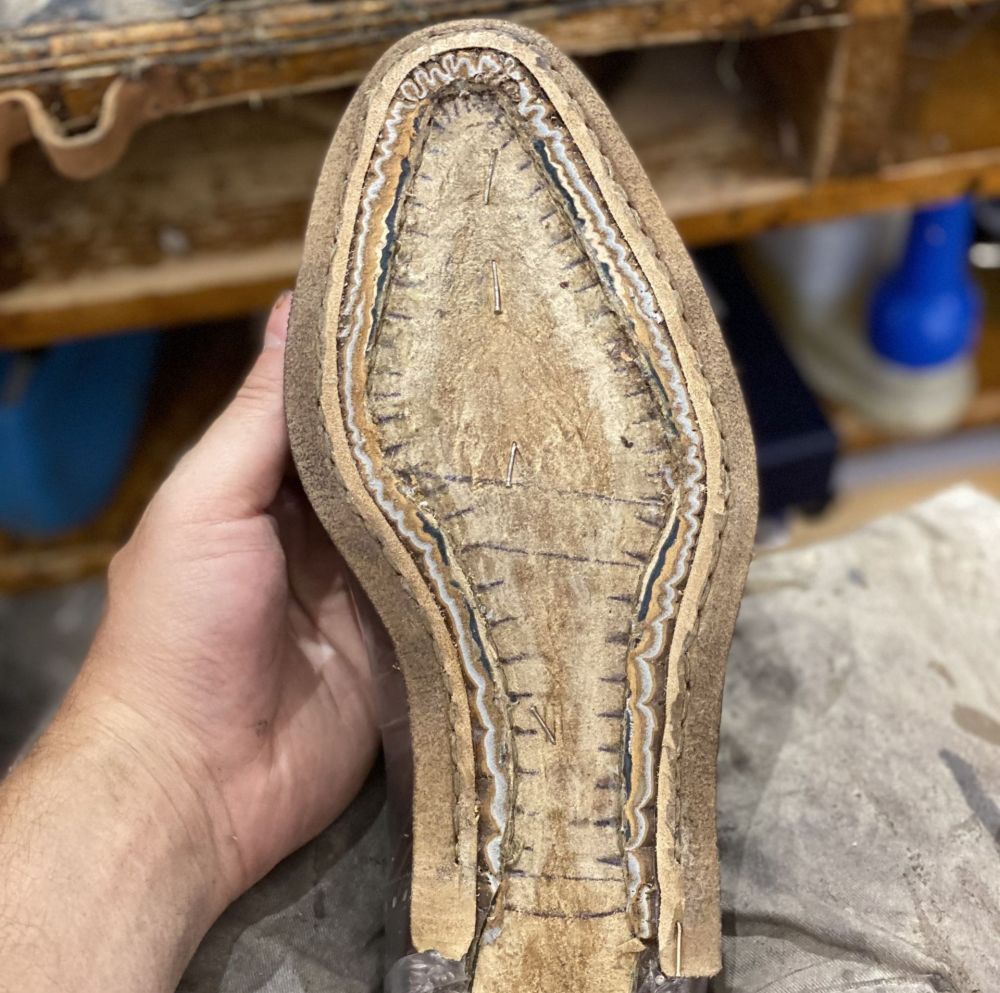
Insole Preparation
If you remember, the first thing we do is to prepare the insole.
Our goal is to create the Holdfast, a wall that serves as the building block of our welt stitching.
During my previous attempts it was clear I was getting better but could also improve much more.
For example, it was important to improve the consistency of my channels and make them cleaner.
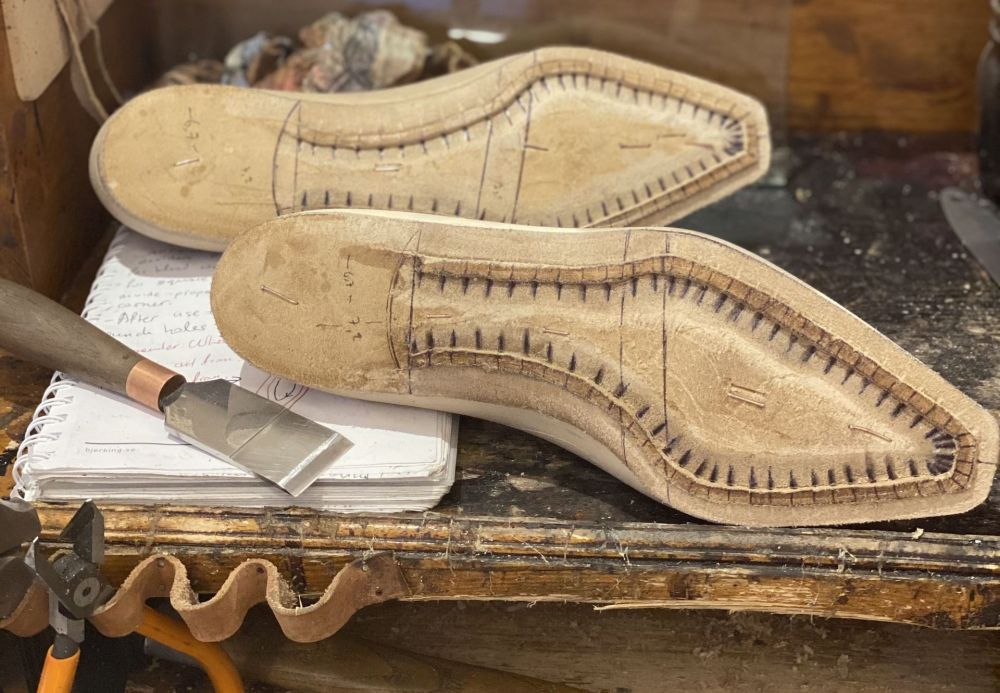
Or to give the holdfast a much better shape following the curves of the last.
In this occasion, it turned out really nice and I even included the previous attempt to show the difference.
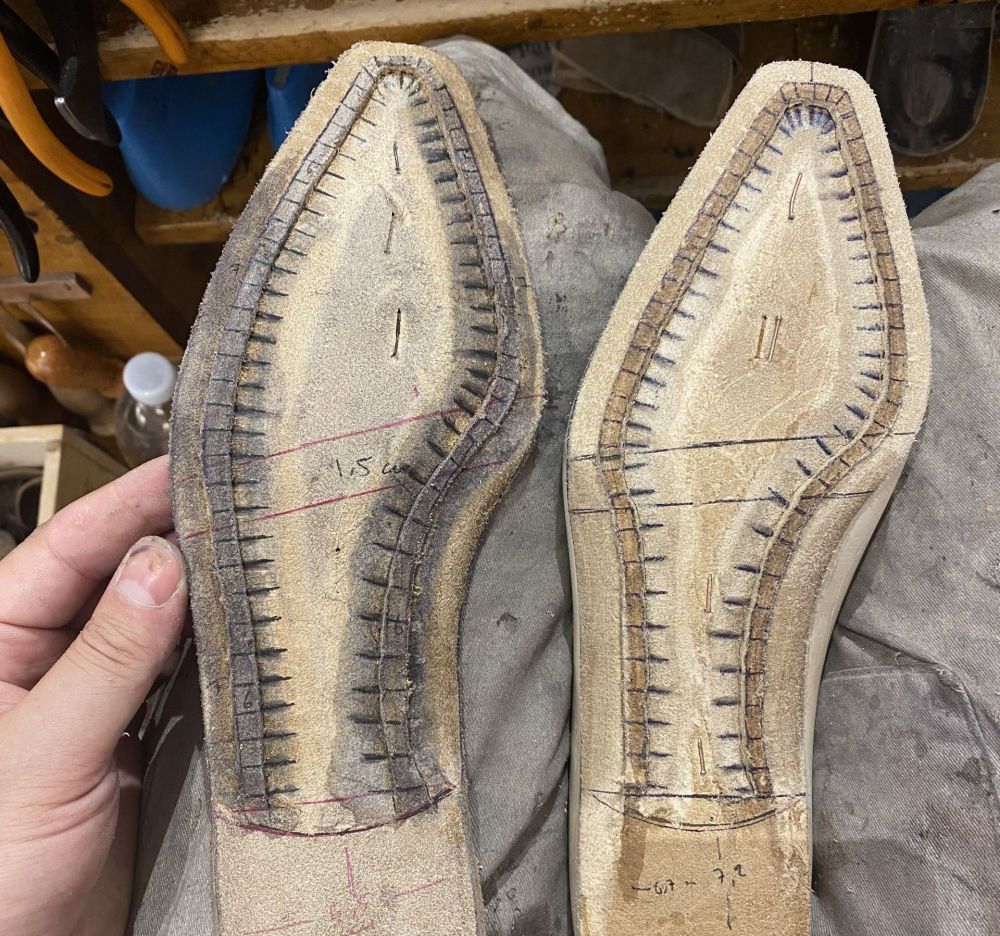
Honestly, the difference is staggering from one shoe to another.
Pre-Lasting The Uppers
Before you actually last the uppers, you need to Pre-Last them.
You essentially give the shape of the final lasting product to the leather and lining.
A good Pre-Lasting will make lasting so much easier as the form will already be there.
You begin at the front, align the shoe properly and then work your way to the back and the waist.
At the end, you stretch everything properly at the front in order to remove air bubbles and any creases.

Air bubbles usually mean that you either didn’t pull hard (or proper) enough or not at the right spot.
Once you finish with the Pre-Lasting, you let it remember that shape for at least 15 minutes and then remove it off the last.
Adding The Stiffeners
I forgot to mention that during pre-lasting you should add the heel stiffener.
You don’t have to glue it or anything, just add it properly to give shape.
It is important to prepare the heel and side stiffeners and skive them as a preparation.

For the heel stiffener and toe puff you need to keep them wet and pliable.
However after the pre-lasting you will add them normally with some “pasta vegetale” that will harden them and give structure.
Lasting The Heel & Waist
Just like Greek Stuffed Vegetables (Famous Dish), after removing the pre-lasted uppers it’s time to actually last them.
But first you need to last and secure the heel and waist.
These two form the basis of your lasting before you move on to the top.
Lasting the heel can be intimidating at first but after some practice you can get a nice clean shape.
You actually don’t even have to last the lining with nails and can only use glue.
If your last has a metal plate on the heel, you need to use tacks which remain in the insole.

Otherwise you use regular nails but there’s also another process involving a longer holdfast.
My last has a metal heel plate so I used tacks which need to be evenly spread out and level so the leather tension is equal.
I need to work on this but all things considered it was ok.
As for the waist, you really need to pull hard and remove air bubbles so work with the lining as before and then the uppers.
We put nails around 1 cm apart until the lower ball line.
After all this it’s time to do the final parts of lasting.
Lasting The Lining & Toe-Puff
The last hurdle before the welting is our classic lasting of all 3 layers.
If the pre-lasting went well this should be easy for you.
The steps are all the same essentially and we begin with the lining.
Since the lining is so pliable and stretchy (be careful though it rips easily) it’s also easy to last.
After the lining it’s time for the toe-puff, one of the defining moments of the shoe.
Because lasting it is not that hard (depending on how you skived) but then you have to shape it.
There’s a ton of hammering, rasping, sanding and more hammering to make it flat, smooth and give it the shape of the last.
I cannot stress enough its importance, because let’s say you have a square last but you don’t bother shaping it.
You will actually end up with a bulbous round unappealing shape.
Oh and at the end you should also use the handle of your hammer to make it shiny.

It’s time for the last missing piece now before lasting the uppers.
Which is gluing the side stiffeners and also shaping them to blend seamlessly with the rest.
You do that by gluing them on the lining, but adding a bit of pasta vegetale at the corner.
Then you once more have to rasp, sand and hammer in order to get them flat and following the shape of the shoe.
If there’s a bumpy spot here or an irregularity it will be visible or you will feel it on the uppers.
Unfortunately I forgot to take a picture so this will have to do for now.
Lasting The Uppers
Our last piece of the jigsaw is lasting the uppers.
There’s absolutely nothing different here and is a regular procedure.
At the end, it will be visible if you did everything correctly.
There should be no air bubbles and the skin should be tight, stretched and appealing.
Of course, if you did good in the previous steps the shape of the top, sides and front will be correct.
If you didn’t, try to learn and improve next time.
Preparing For Hand-Welting
We reached the magic word that makes every Styleforumer wet.
But before we hand-welt there are a few things to take care of.
First of all, the nails need to come off at the bottom except from the tacks.
Secondly, unless it’s a Norwegian Construction you will wrap the shoe in plastic and glue it without creasing around the shoe.

You want to protect your shoe from hazards, spills and glue right?
Then you need to mark your welting stitching line which we do with a silver pen after making a few holes.
Once you do that, you need to cut the welt, soak it in water for at least 10-15 minutes and prepare the thread.
This time I used the polyester pre-waxed one but what you use makes no structural difference.
And voila, you are ready!
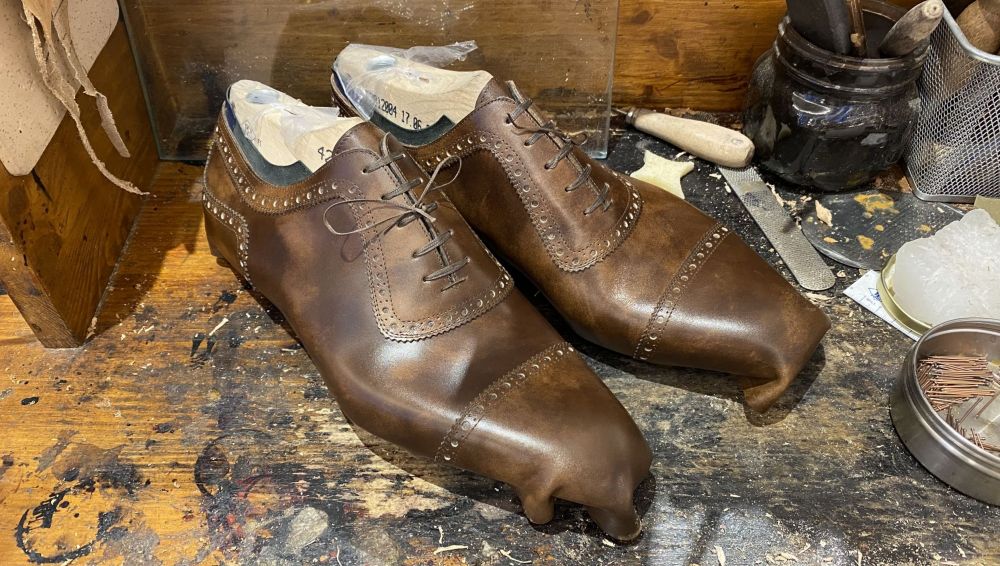
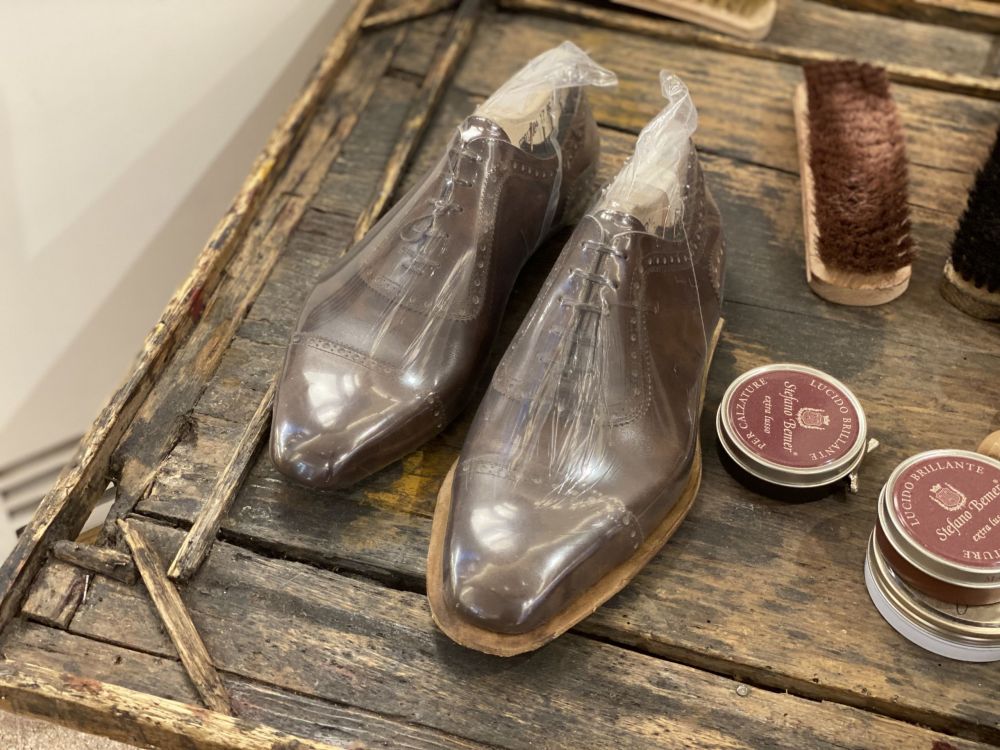
Hand-Welting My Bespoke Shoes
We are at the final section of today which is the actual welting.
In fact, just today I finished the first shoe and I have one more left for tomorrow.
But the process is the same and enough for me to show you what I did.
Welting is the same as before, but this time I was much better at keeping the stitch in the grooves.
I also was smarter and used water to my advantage helping me to shape the welt better.
At the end of the stitching which took me 1 hour and 45 minutes I skived the inside part flat.
After a lot of hammering and slight trimming of the curved front it was ready to rest.

Turned out pretty good didn’t it?!
Tomorrow then I will finish the other shoe, put the shank and cork and give them shape for the outsole.
 Enjoy one last picture before I wrap things up for today!
Conclusions
This brings me to the end of Part 7 of my “Becoming a Bespoke Shoemaker” Series.
What a leap in quality, content and confidence it was!
The program is nearing its end but stay tuned for a lot of exciting videos and reviews.
Of course that includes more amazing make ups from The Noble Shoe.
Let me know what you think of my progress in the comments!
I will see you all next week.
Thank you for reading,
Kostas Mandilaris,
Misiu Academy


This is very nice…
i hope some day i will finally find myself making footwear too
Thank you David, it is best if you find a school specializing in this!
I learnt a lot from this content… Thanks for sharing
You are welcome sir