![Becoming A Bespoke Shoemaker Part 10: Shoe Uppers]()
 Grab YouR Sewing Machine
Welcome to Part 10 of my “Becoming a Bespoke Shoemaker” Series.
In this article I begin my next project after a short hiatus and learn new valuable skills.
Specifically, cutting patterns, giving allowance and assembling, reinforcing and stitching the uppers of a shoe.
Let’s go!
Previous Weeks Recap
If you want to follow the journey from the beginning here are the other articles:
- Learning How To Last (Part 1)
- Preparing & Lasting The Toe Puff (Part 2)
- Learning To Hand-Welt (Part 3)
- Cork Filling & Hand-Sewing A Leather Sole (Part 4)
- Edge Coloring Leather Soles (Part 5)
- Making A Blind Waist (Part 6)
- Starting My First Bespoke Pair (Part 7)
- Cork, Fiddleback & Sole (Part 8)
- Bespoke Adelaide Oxfords (Part 9)
Today we are picking up from Part 10 and talking about cutting, clicking, patterns and upper making!
The Part Everyone FOrgets
Shoes don’t magically appear out of thin air.
Someone has to design the pattern, cut the leather and assemble it all together.
While my studies in Schola Academy of Stefano Bemer were overall excellent, I did not learn a few key skills.
This was pattern making, last making and assembling the uppers.
All of these are arts and skills on their on right and require years and years of experience.
Due to a lack of time, summer vacations and staff shortages I didn’t have time to focus on any of these.
Last adjustments and modifications are very important in Bespoke Shoemaking and something I will learn in the future.
As for Pattern Making it is impossible to be an expert without attending a proper design school.
Which is why next year I will try to attend a course in Arsutoria of Milan.
Luckily, they owed me 2 weeks of practice in their premises so I got my chance to learn a bit about upper making.
MAking The Uppers
An upper is simply the entire visible part of the shoe leather, stitched together to form the “upper” part.
It includes reinforcement, stitching, leather and lining and is a laborious meticulous task.
The process to get there is not so simple and I will try to showcase it to you via images and text today.
Model Choice
Everything begins with this choice.
What do you want to make?
There’s a ton of available styles out there (Read my lengthy guide) and this choice dictates the pattern.
Since I don’t yet do pattern design I will skip that step and assume you know or have access to predefined patterns.

For example, I got to use patterns from the Stefano Bemer Archives.
I chose my next 3 projects which are a Classic Derby, Double Monk Strap and Chukka Boots.
Each model has different pieces, assembly and requirements.
Leather Choice
Your second most important choice will be your leather.
Calf and Museum Calf are a classic nice option that has a decent amount of stretch.
Hatchgrain can be stiffer, while other grains might be smoother.

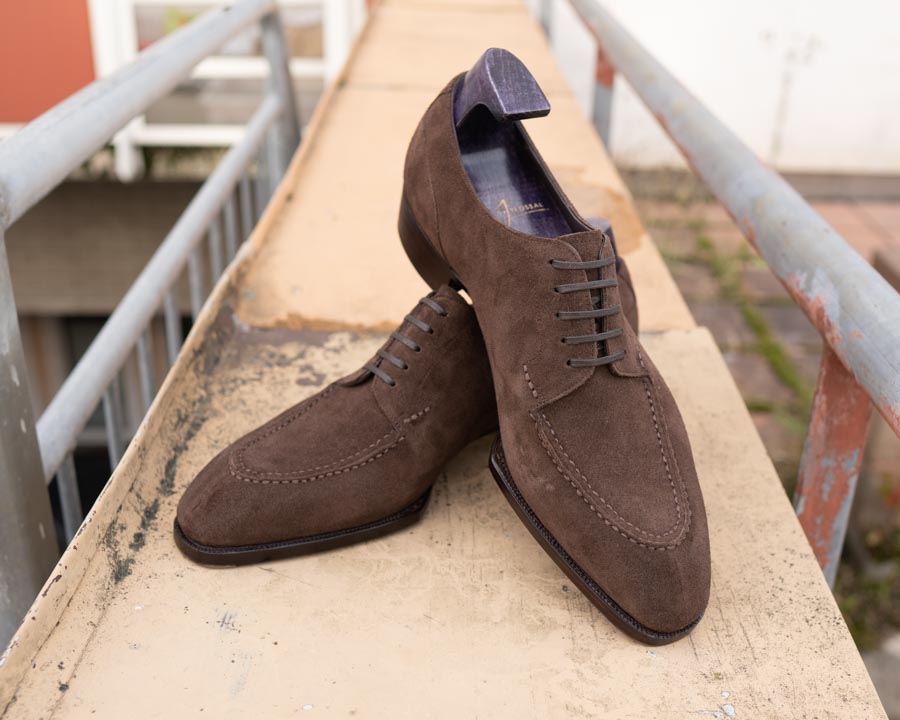
The easiest and most stretch by far is suede and I picked two pairs of them.
A nice dark brown and a snuff suede that I will use on the monks and chukkas respectively.
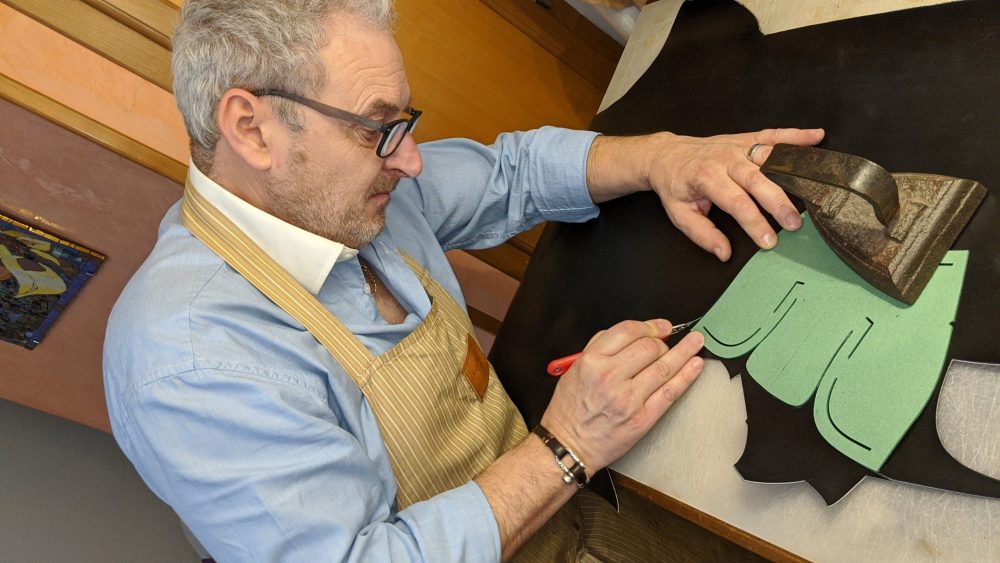
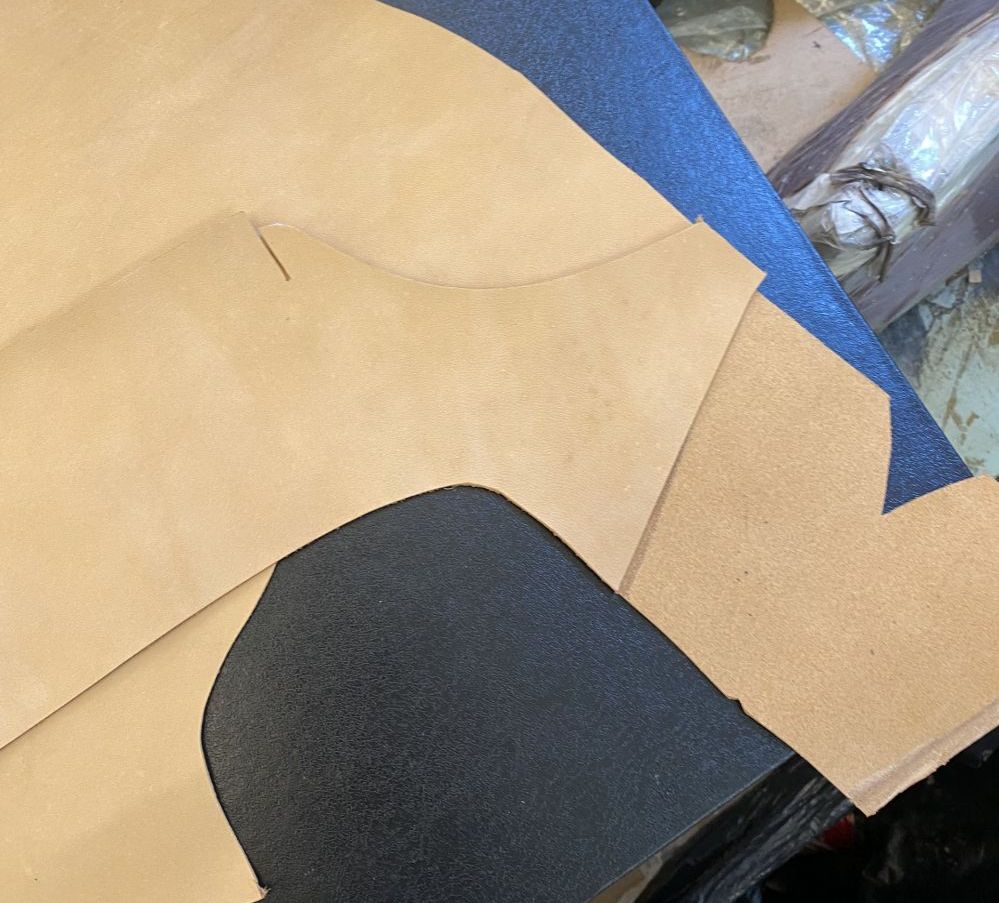
Cutting THe Leather
To cut the leather you need a nice flat surface with a cut resistant mat and a sharp knife.
You identify a few things, such as where you need to add extra allowance and how much or how many pieces you need.
Not only that but you should remember that some pieces need to be flipped for the right and left shoe.

Lastly, the lining has its own patterns and requires other types of stretchy, thin leather.
Allowance can be tricky in the beginning but you generally want it in areas that will fold or go under the shoe.
Essentially it gives you room to pull and stretch during lasting.
There are also a few markings that you make with a silver pen which act as guides for piece assembly later.
In the picture above you can see the derby pattern I used with separate pieces for the vamp, cap-toe, quarters and eyelets.
Skiving Certain Pieces
This was a very scary, nervous experience for the first time.
I recommend you keep some extra material that you practice skiving on just in case.
Skiving thins the edge of the leather to make it look seamless when you put it over another piece.
So you assess your pattern and see what goes over something else in order to skive.
The top piece usually is thinned to half thickness while the bottom “skived to zero”.
The tongue, lining and certain areas have their own skiving areas.
Reinforcement
More fragile areas or those that need certain stitching or holes require a bit of reinforcement.
This one exists between the lining and the uppers in the form of tape.

Over those pieces we will also apply piping.
Piping
You also need to prepare piping which strengthens some areas but also makes the edges look nicer.
It is a strip of leather that you fold, glue and skive and loosely resembles a pipe (hence the name).
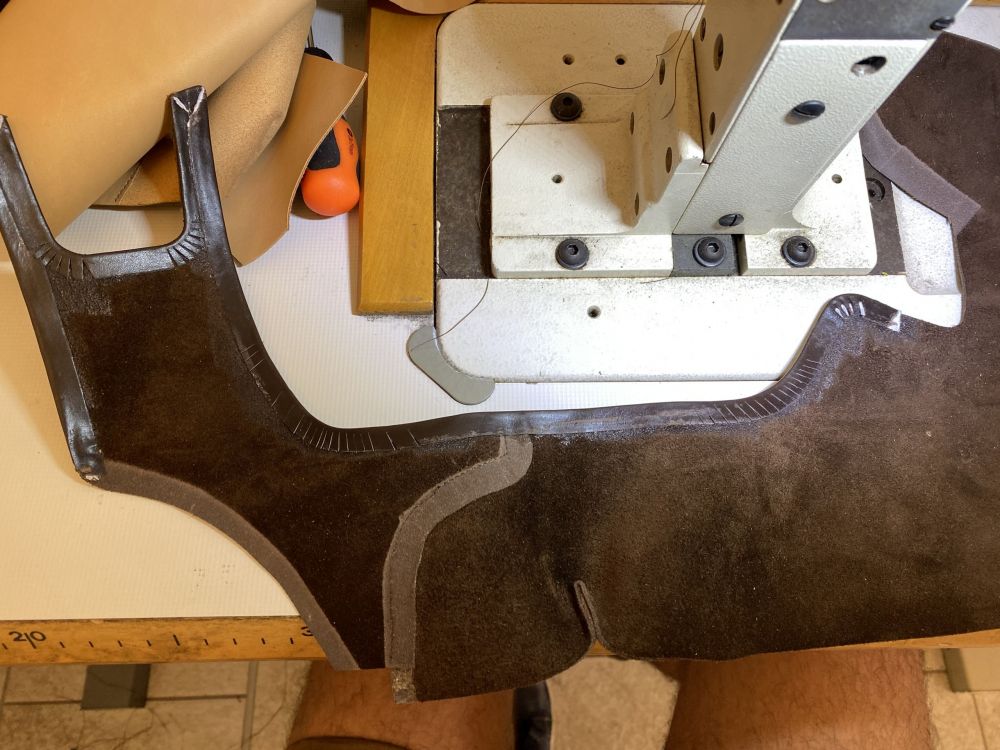
You then apply the piping over certain visible spots such as the straps and top line of the shoe.
For those that might want a reference, I cut my strips to be 86 cm long and it was more than enough.
You can also notice some slits in curved areas and it helps the leather follow them without bunching up.
Assembly & Sewing
It takes experience and practice to understand how and what to sew.
You generally begin by assembling the uppers and the lining up to a certain point first.
It involves glue and following the original markings with the silver pen.
Generally areas that you glue and overlay will require stitching.
In the monk strap, I connected the main piece to the buckle.

The lining required a bit more preparation as you must connect the main piece to the back and then the quarters.
We use mostly Pfaff machines in this school but there are more budget friendly versions from Singer around.
Afterwards it is time to join the top piece of the lining with the uppers by gluing and removing excess pieces of lining.
As you see in certain parts of the top line I preserve the lining as it is important during the lasting process.

It is a good picture for you to also take a look at the piping and finished product between the layers.
You can also observe the top line stitching.
In the end, you wrap everything in a nice circle, in what we call “closing the uppers”.
What you get is the following picture.
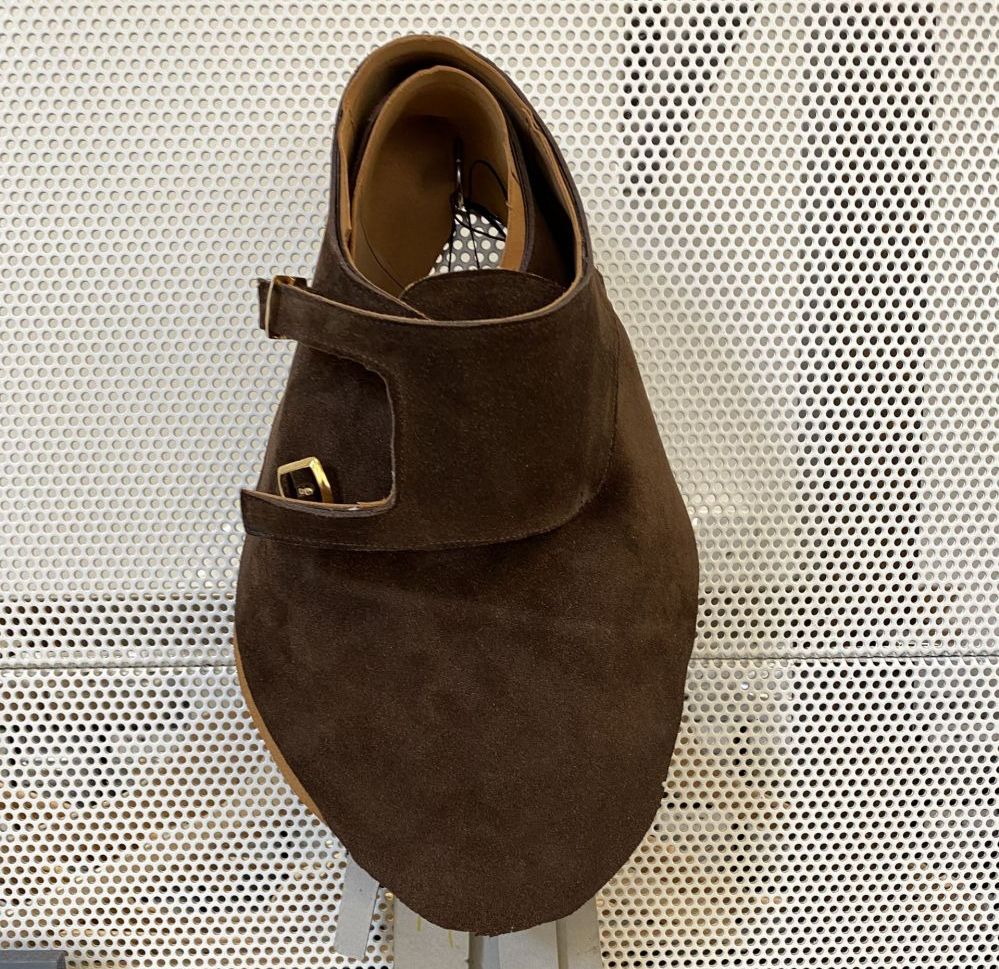
I did not include tiny steps such as preparing the buckle loops or opening holes.
Stitching Notes & Challenges
There are some very big challenges during sewing.
Obviously, stitching the wrong thing can be very bad.
It is less visible on suede however which is a good practice piece.
The level of detail and consistency is also important and requires years of experience.
Many times your thread might get stuck or need readjustment and it takes time and patience.
There are also some very uncomfortable, difficult spots to reach such as closing the uppers.

There are more complicated patterns than monk straps, but also easier ones.
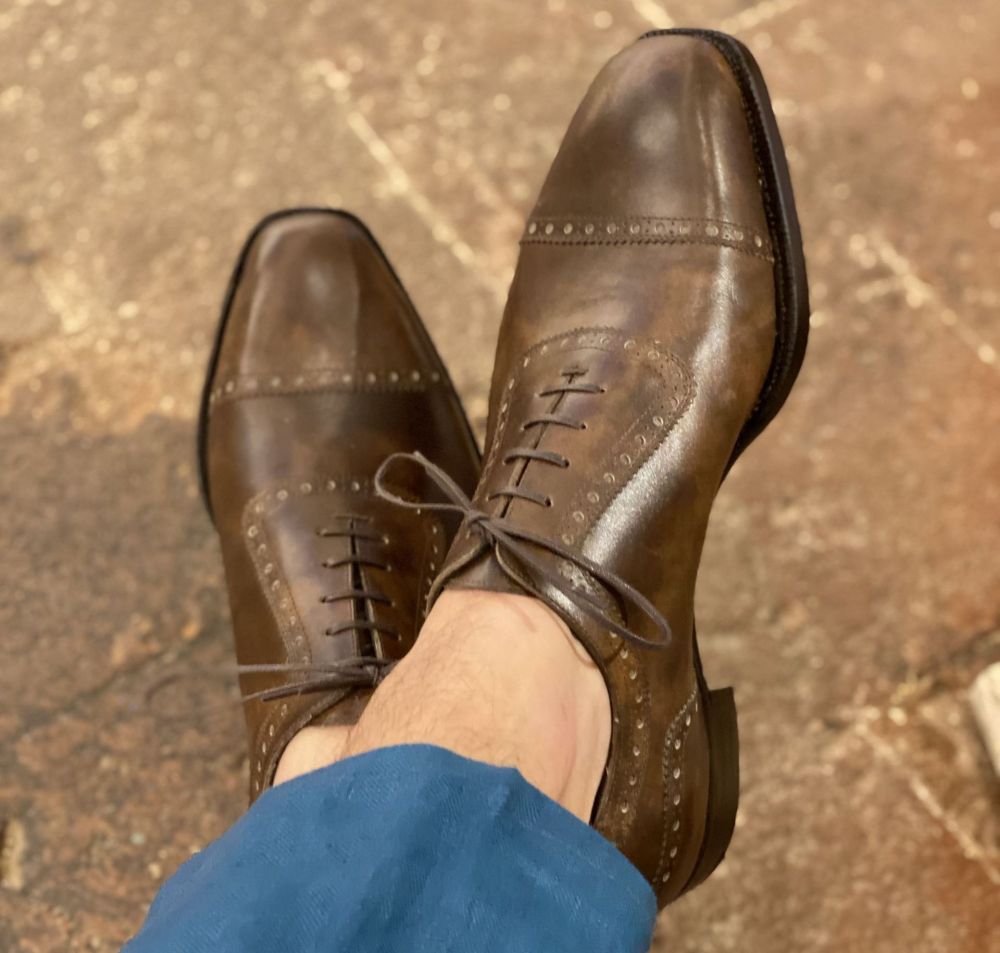
My next challenge after I become familiar with sewing and closing will be broguing details.
Very excited to do this!
What’s Next?
Right now I am on my way to Spain, where I will visit a very popular shoe factory.
I cannot disclose yet what it will be about but it is beyond exciting and I will make sure to show you the details.
However I will say that it’s related to The Noble Shoe!
As for the shoes, I already lasted them and they look great.
Here’s a snippet of how they are looking right now!
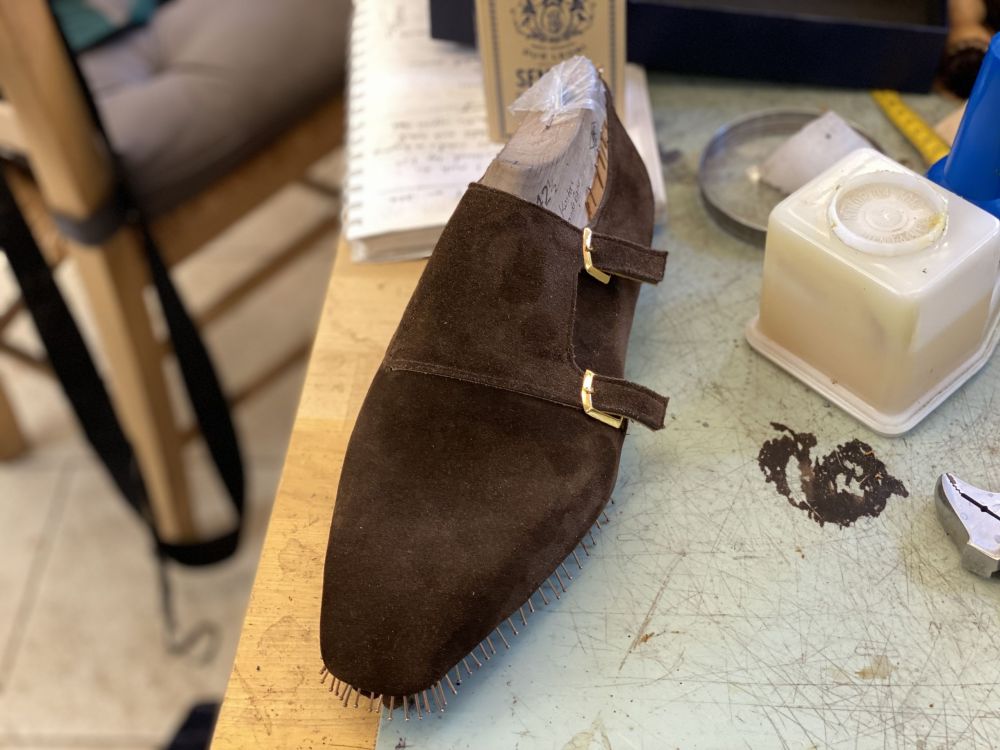
In my next article in the series I will most likely talk about lasting suede, differences and refinements in my technique.
After a hiatus of about 3-4 weeks without shoemaking, I am relieved and happy I still remember how to to everything alone.
Final Remarks
This brings us to the end of Part 10 of my “Becoming a Bespoke Shoemaker” Series.
I would say at this calm pace I need about 7-9 days to finish this pair of monk straps.
Then I will start working on one of the other two pairs.
But you might notice from the sneak peek above that a lot of my work mostly on lasting and the toe area improved massively.
Stay tuned because there’s some amazing things coming up!
Thank you for reading,
Kostas Mandilaris,
Misiu Academy